Using ENBUILD AMI
Creating an AWS EC2 Instance Using the ENBUILD AMI or Marketplace Item
This guide will walk you through the steps to create an Amazon EC2 instance using the AMI named ENBUILD.
The ENBUILD AMI has ENBUILD pre-installed in it, along with the gitlab.
The Gitlab also has Catalog repositories of BigBang and EKS pre-populated with it.
Prerequisites#
- An AWS account with the necessary permissions to create EC2 instances.
- Basic familiarity with the AWS Management Console.
Steps#
1. Log in to the AWS Management Console#
- Go to AWS Management Console.
- Enter your AWS account credentials to log in.
2. Navigate to the EC2 Dashboard#
- In the AWS Management Console, type “EC2” in the search bar and select EC2 from the dropdown list.
- This will take you to the EC2 Dashboard.
3. Launch an Instance#
- On the EC2 Dashboard, click on the Launch Instance button.
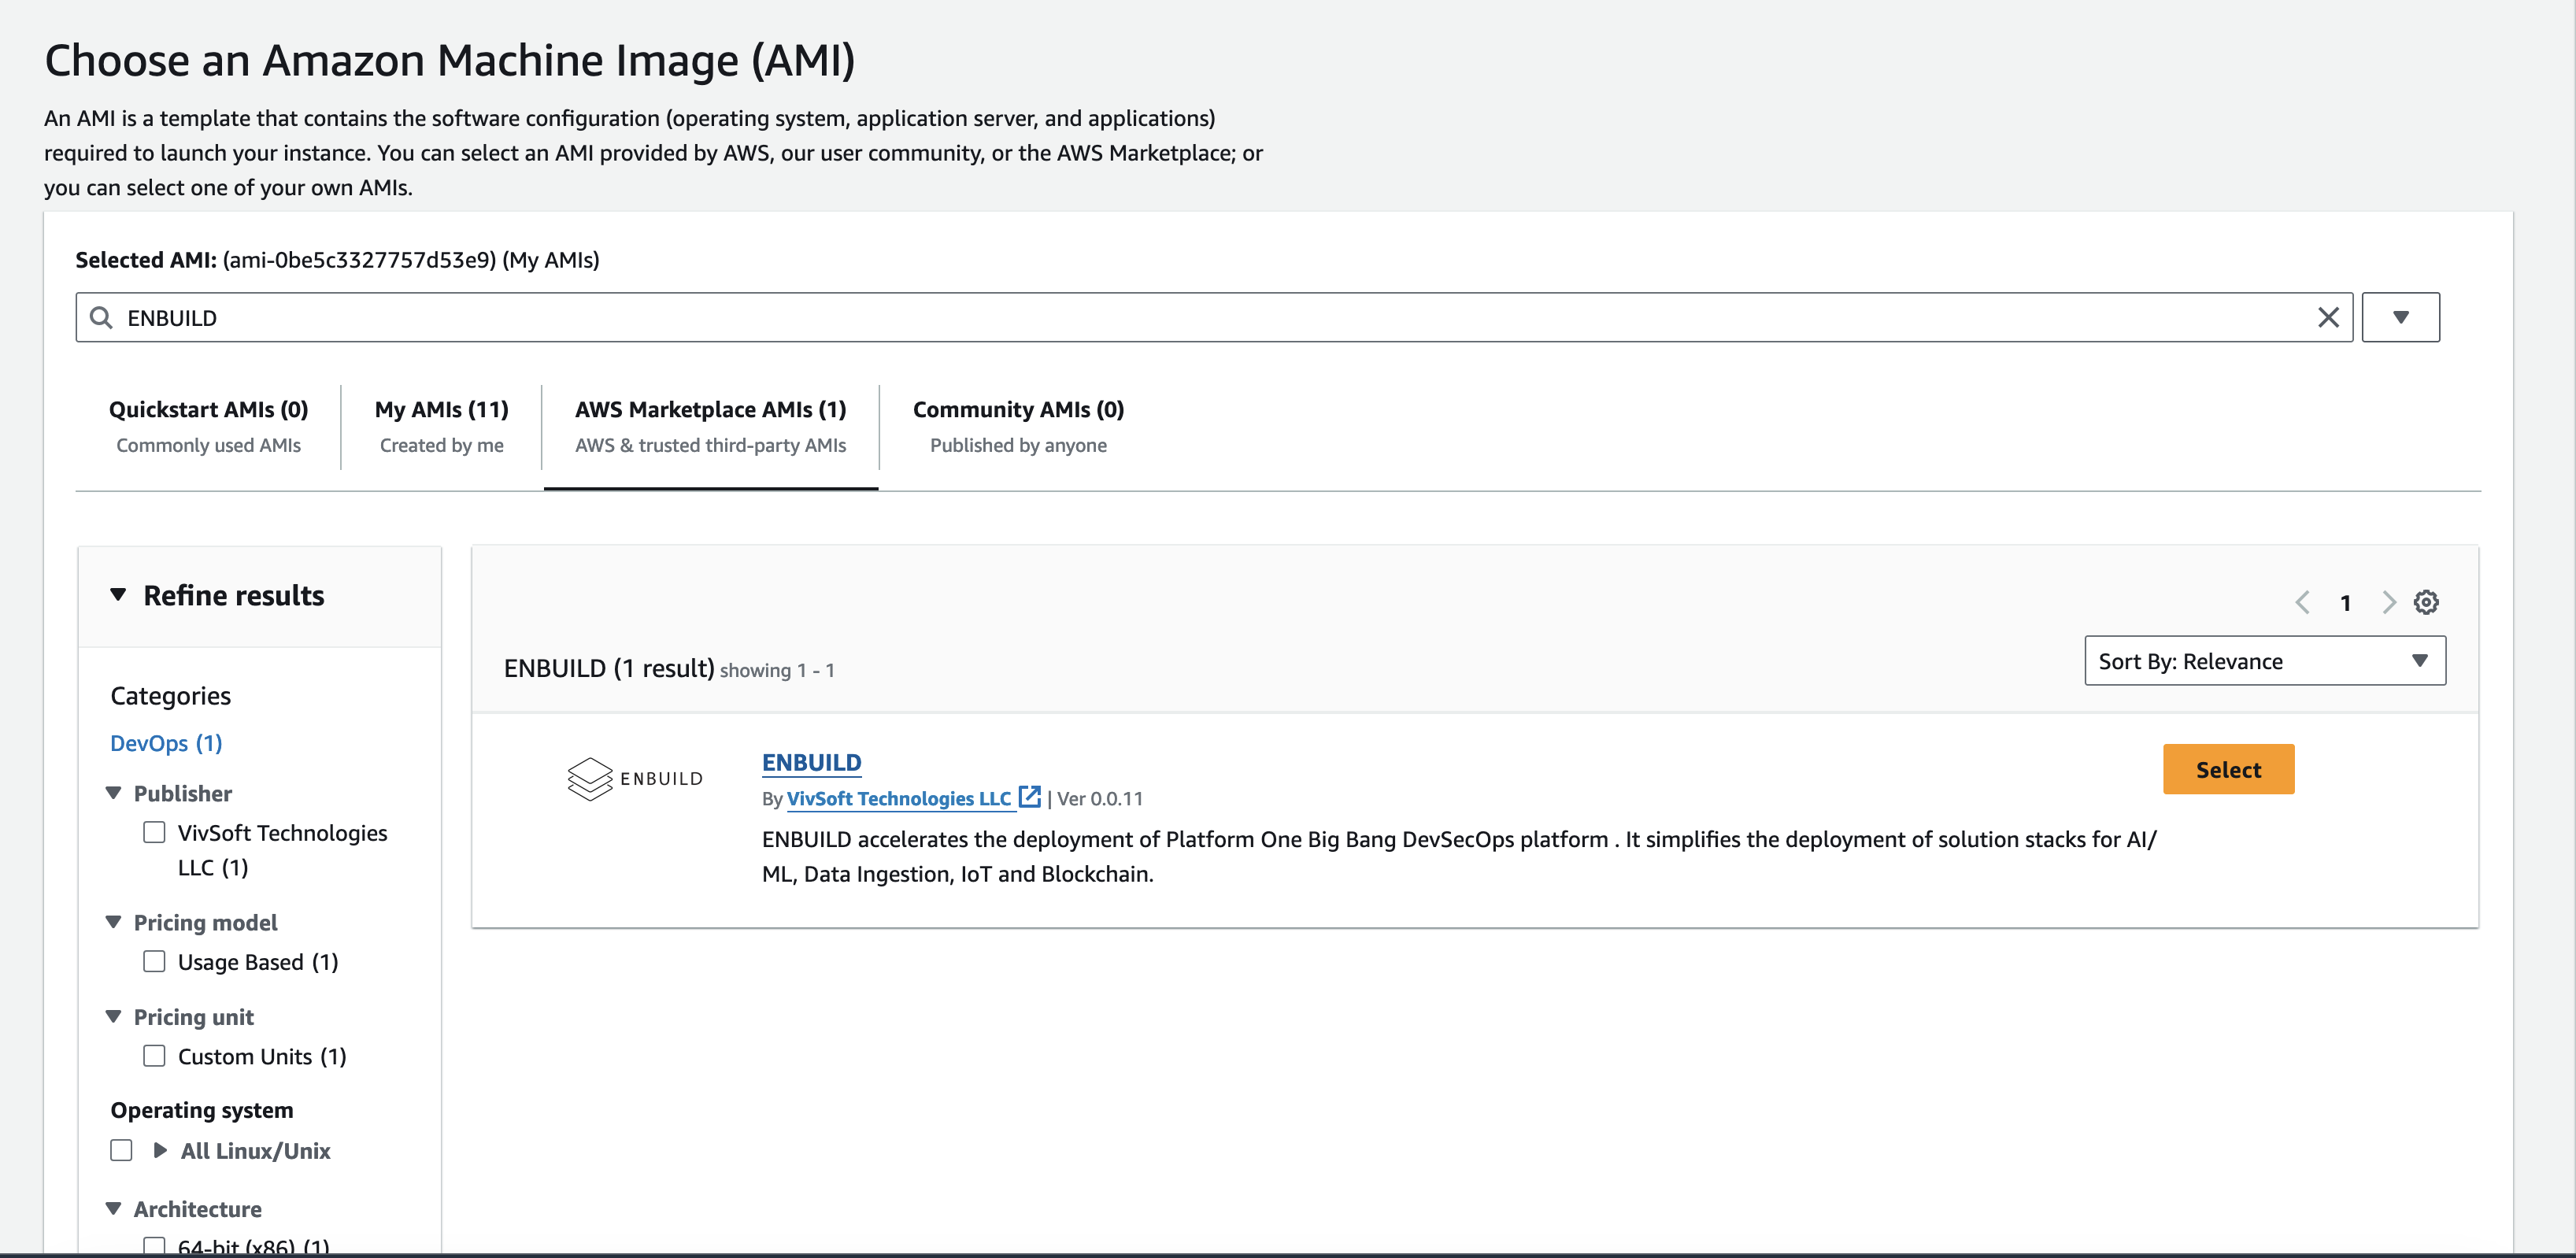
4. Choose an Amazon Machine Image (AMI)#
- In the Choose an Amazon Machine Image (AMI) step, go to the My AMIs tab or AWS Marketplace AMI’s
- Use the search bar to find the AMI named ENBUILD.
- Select the ENBUILD AMI by clicking the Select button next to it.
5. Choose an Instance Type#
- Select an appropriate instance type based on your requirements (e.g.,
t2.micro for free tier eligible users). - Click the Next: Configure Instance Details button.
- Configure the instance details as needed. The default settings are typically sufficient for most users.
- Click the Next: Add Storage button.
7. Add Storage#
- Adjust the storage settings if necessary. The default settings usually suffice.
- Click the Next: Add Tags button.
- (Optional) Add tags to your instance to help organize and manage your resources.
- Click the Next: Configure Security Group button.
- Create a new security group or select an existing one.
- If creating a new security group, add rules to allow necessary inbound traffic (e.g., SSH for Linux instances, RDP for Windows instances).
- Click the Review and Launch button.
10. Review and Launch#
- Review your instance configuration to ensure everything is correct.
- Click the Launch button.
11. Select a Key Pair#
- In the Select an existing key pair or create a new key pair dialog:
- Select an existing key pair, or
- Create a new key pair and download the private key file (
.pem). Make sure to keep this file safe, as you will need it to connect to your instance.
- Check the acknowledgment box and click the Launch Instances button.
12. View Your Instance#
- Click the View Instances button to go to the EC2 Dashboard and view your newly created instance.
- Wait for the instance to enter the
running state.
13. Connect to Your Instance#
- Select your instance in the EC2 Dashboard.
- Click the Connect button and follow the instructions to connect to your instance using SSH (for Linux instances) or RDP (for Windows instances).
Congratulations! You have successfully launched an EC2 instance using the ENBUILD AMI.
Accessing Services of ENBUILD#
The services can be accessed after launching the instance using the AMI at the following URLs with the given public IP (NODE_PUBLIC_IP) of the node:
Default credentials for Gitlab are root/supersecretpassword, and the token for the root user is glpat-RuJrDn4yUuPRJySjJdZh.
Additional Resources#
If you encounter any issues or have questions, refer to the AWS documentation or seek support from AWS.