Title here
Summary here
Before you begin, ensure that you have the following prerequisites in place:
kubectl command.Login to Platform1 registry by using the following command:
helm registry login registry1.dso.mil/bigbang
WARNING: Kubernetes configuration file is group-readable. This is insecure. Location: /root/.kube/config
WARNING: Kubernetes configuration file is world-readable. This is insecure. Location: /root/.kube/config
Username: Juned_Memon
Password:
Login Succeeded
We need to create the keycloak namespace
kubectl create ns keycloak
Next, we need to create the imagePullSecret for pulling the images from Platform1 registry.
First export the REGISTRY1_USER and REGISTRY1_PASSWORD with your P1 credentials.
export REGISTRY1_USER=<YOUR_REGISTRY1_USER>
export REGISTRY1_PASSWORD=<YOUR_REGISTRY1_PASSWORD>
Next, create the imagePullSecret for pulling the images from Platform1 registry.
kubectl create secret -n keycloak docker-registry private-registry --docker-server=registry1.dso.mil --docker-username=$REGISTRY1_USER --docker-password=$REGISTRY1_PASSWORD
Now install keycloak Helm charts using the P1 Helm chart:
Create a keycloak-input-values.yaml
## Overrides the default args for the Keycloak container
args:
  - "start"
  - "--http-port=8080"
  - "--import-realm"

# Additional environment variables for Keycloak
# https://www.keycloak.org/server/all-config
extraEnv: |-
  - name: KC_HTTP_ENABLED
    value: "true"
  - name: KC_PROXY
    value: edge
  - name: KC_HOSTNAME_STRICT
    value: "false"
  - name: KC_HOSTNAME_STRICT_HTTPS
    value: "false"
  - name: KC_HTTP_RELATIVE_PATH
    value: /auth
helm upgrade --install --namespace keycloak keycloak oci://registry1.dso.mil/bigbang/keycloak --version 23.0.7-bb.2 -f keycloak-input-values.yaml
Verify the keycloak pod is up and running:
# kubectl get po -n keycloak
NAME                    READY   STATUS    RESTARTS   AGE
keycloak-0              1/1     Running   0          105s
keycloak-postgresql-0   1/1     Running   0          16m
Access the Keycloak web interface using Port forwarding
❯ kubectl port-forward svc/keycloak-http 9090:80 -n keycloak
Forwarding from 127.0.0.1:9090 -> 8080
Forwarding from [::1]:9090 -> 8080
Handling connection for 9090
Handling connection for 9090
Handling connection for 9090
Use the following command to get the admin credentials for the keycloak instance:
USER=$(kubectl get secret keycloak-env -n keycloak -o jsonpath='{.data.KEYCLOAK_ADMIN_PASSWORD}' | base64 --decode)
PASSWORD=$(kubectl get secret keycloak-env -n keycloak -o jsonpath='{.data.KEYCLOAK_ADMIN}' | base64 --decode)
echo "Keycloak Admin user is $USER and password is $PASSWORD"
keyclaok realm is a logical container for a set of related users, applications, and groups.
Access the http://localhost:9090/auth/admin/#/realms and click on Add realm.
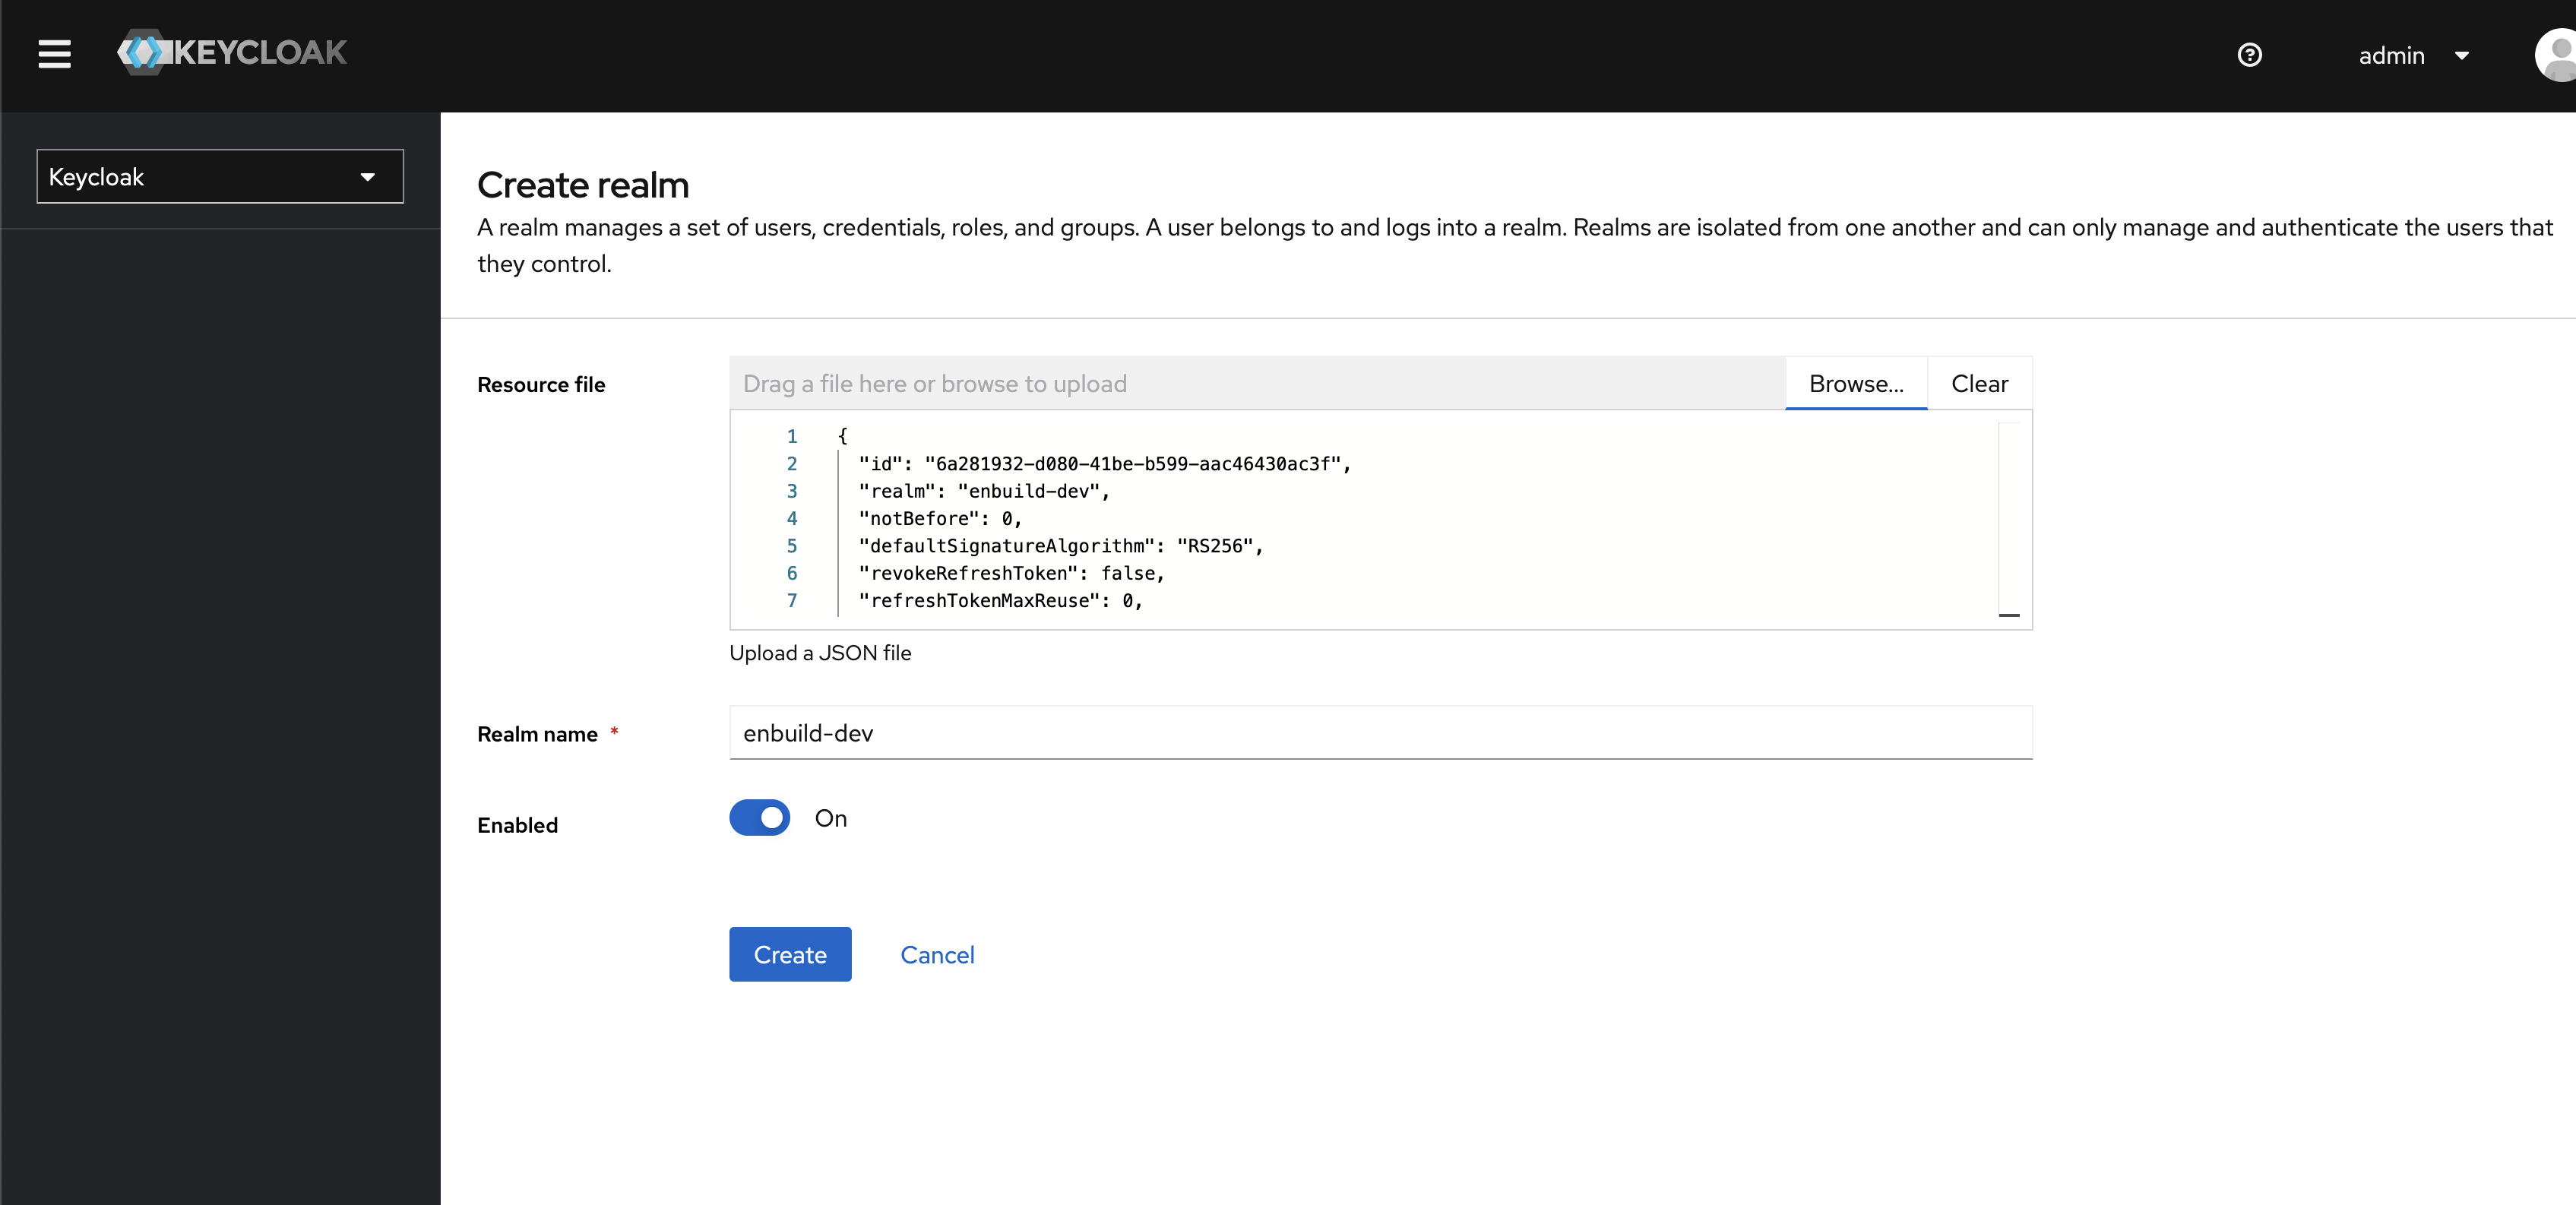
To save we have provided a realm.json file. All you have to do is import it.
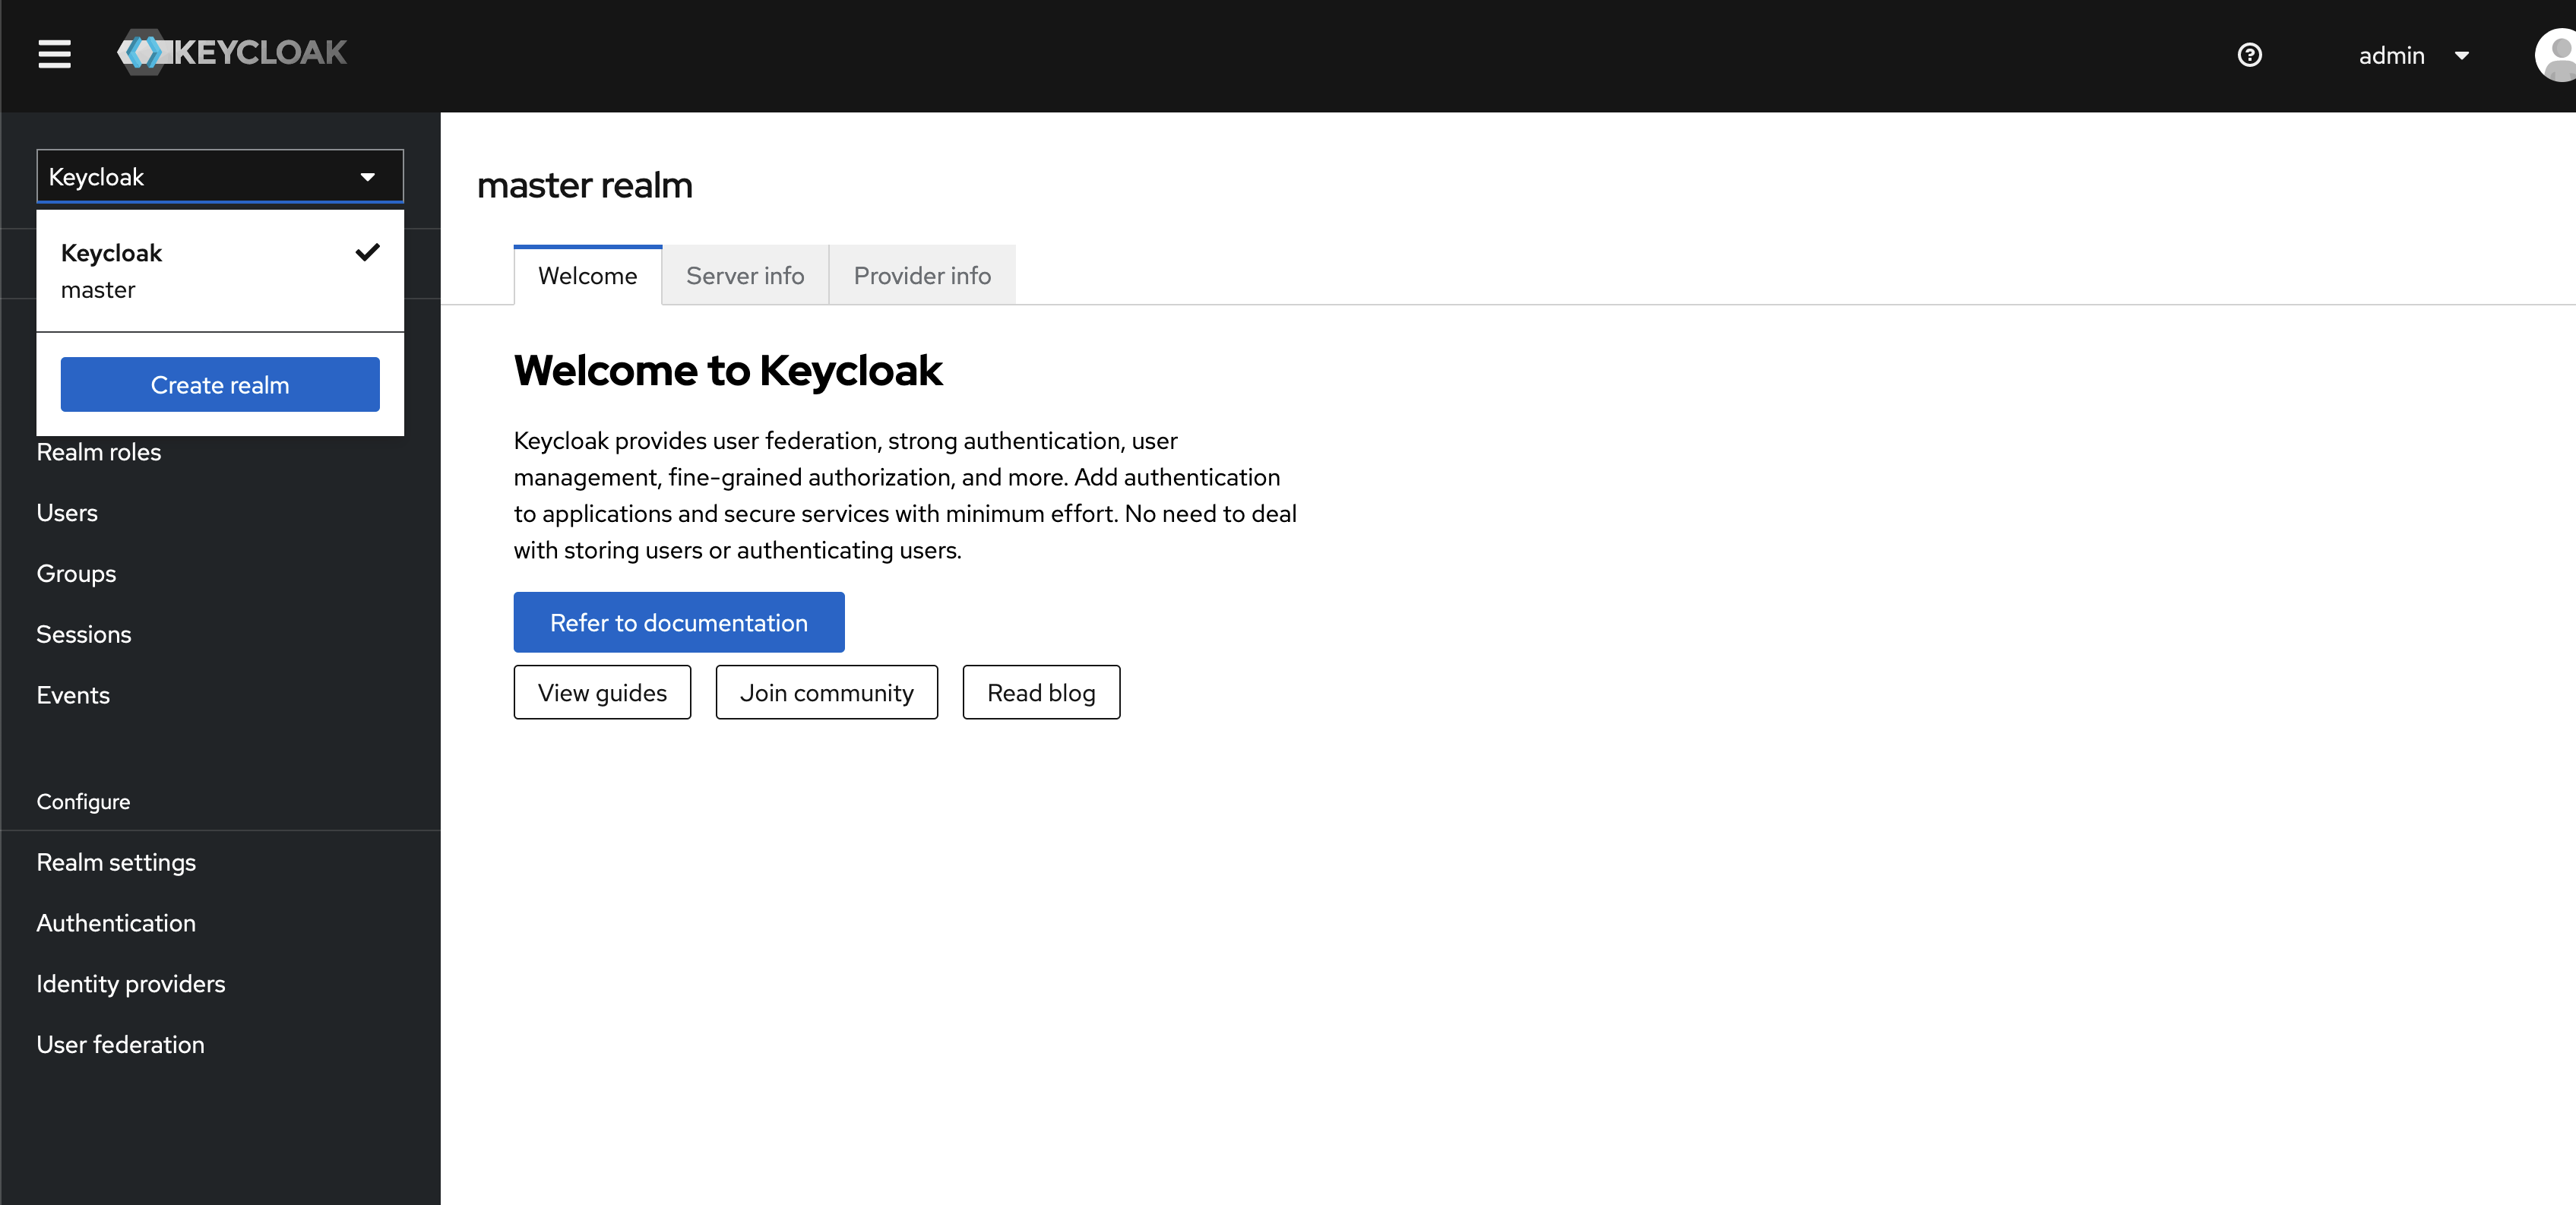
Click on the Browse button and provide the realm.json file.
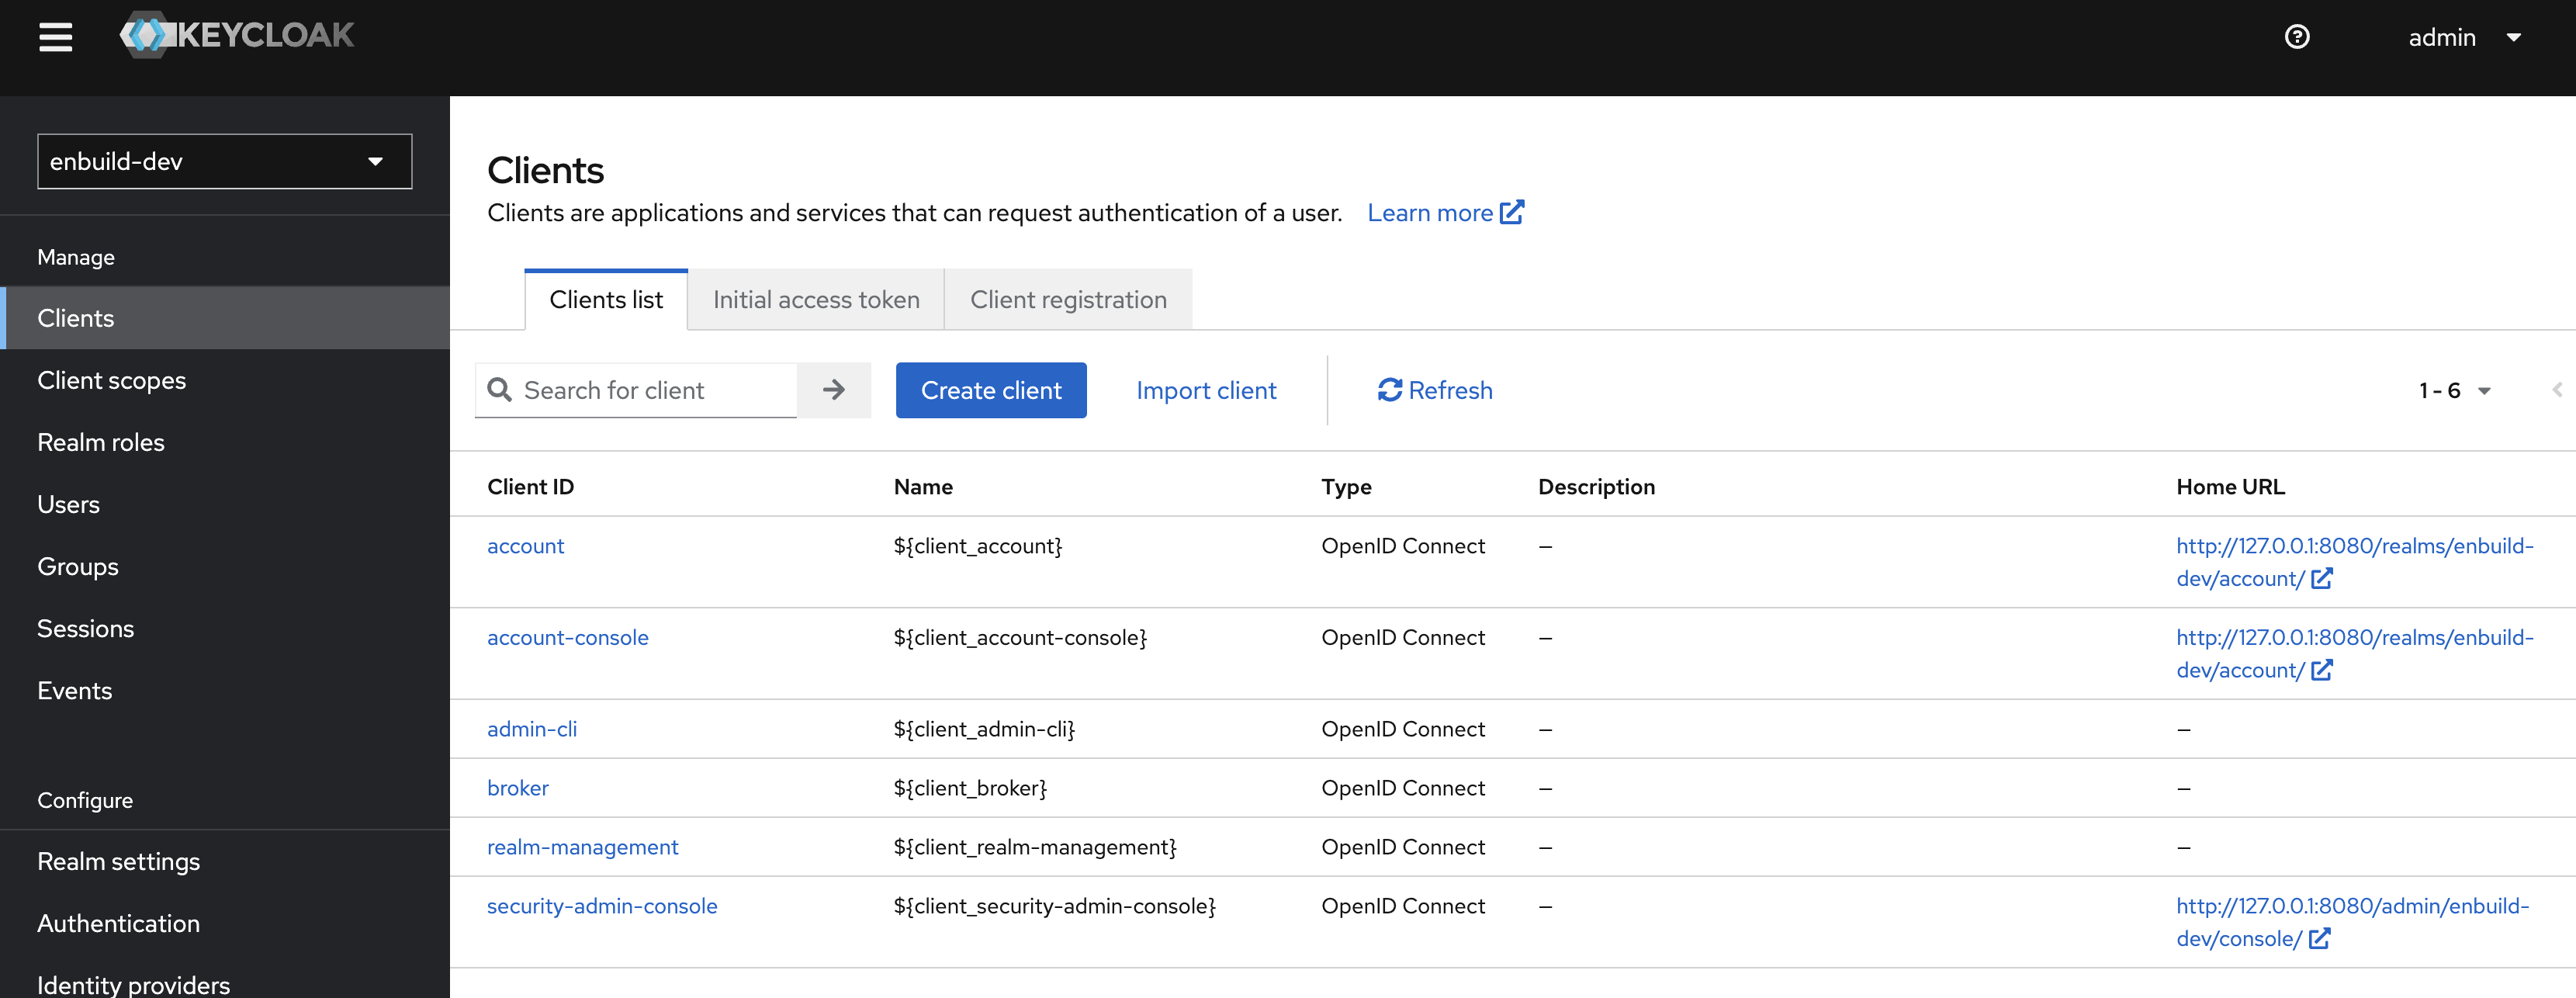
Clients are entities that can request Keycloak to authenticate a user. Most often, clients are applications and services that want to use Keycloak to secure themselves and provide a single sign-on solution.
Clients can also be entities that just want to request identity information or an access token so that they can securely invoke other services on the network that are secured by Keycloak.
Click on the Clients menu from the left pane. All the available clients for the selected Realm will get listed here.
Rather creating Clients manually we will use Import so that the you do not have provide the details manually.
To create a new client, click on Import client.
Click on the Browse button and provide the enbuild-ui.jsonfile.
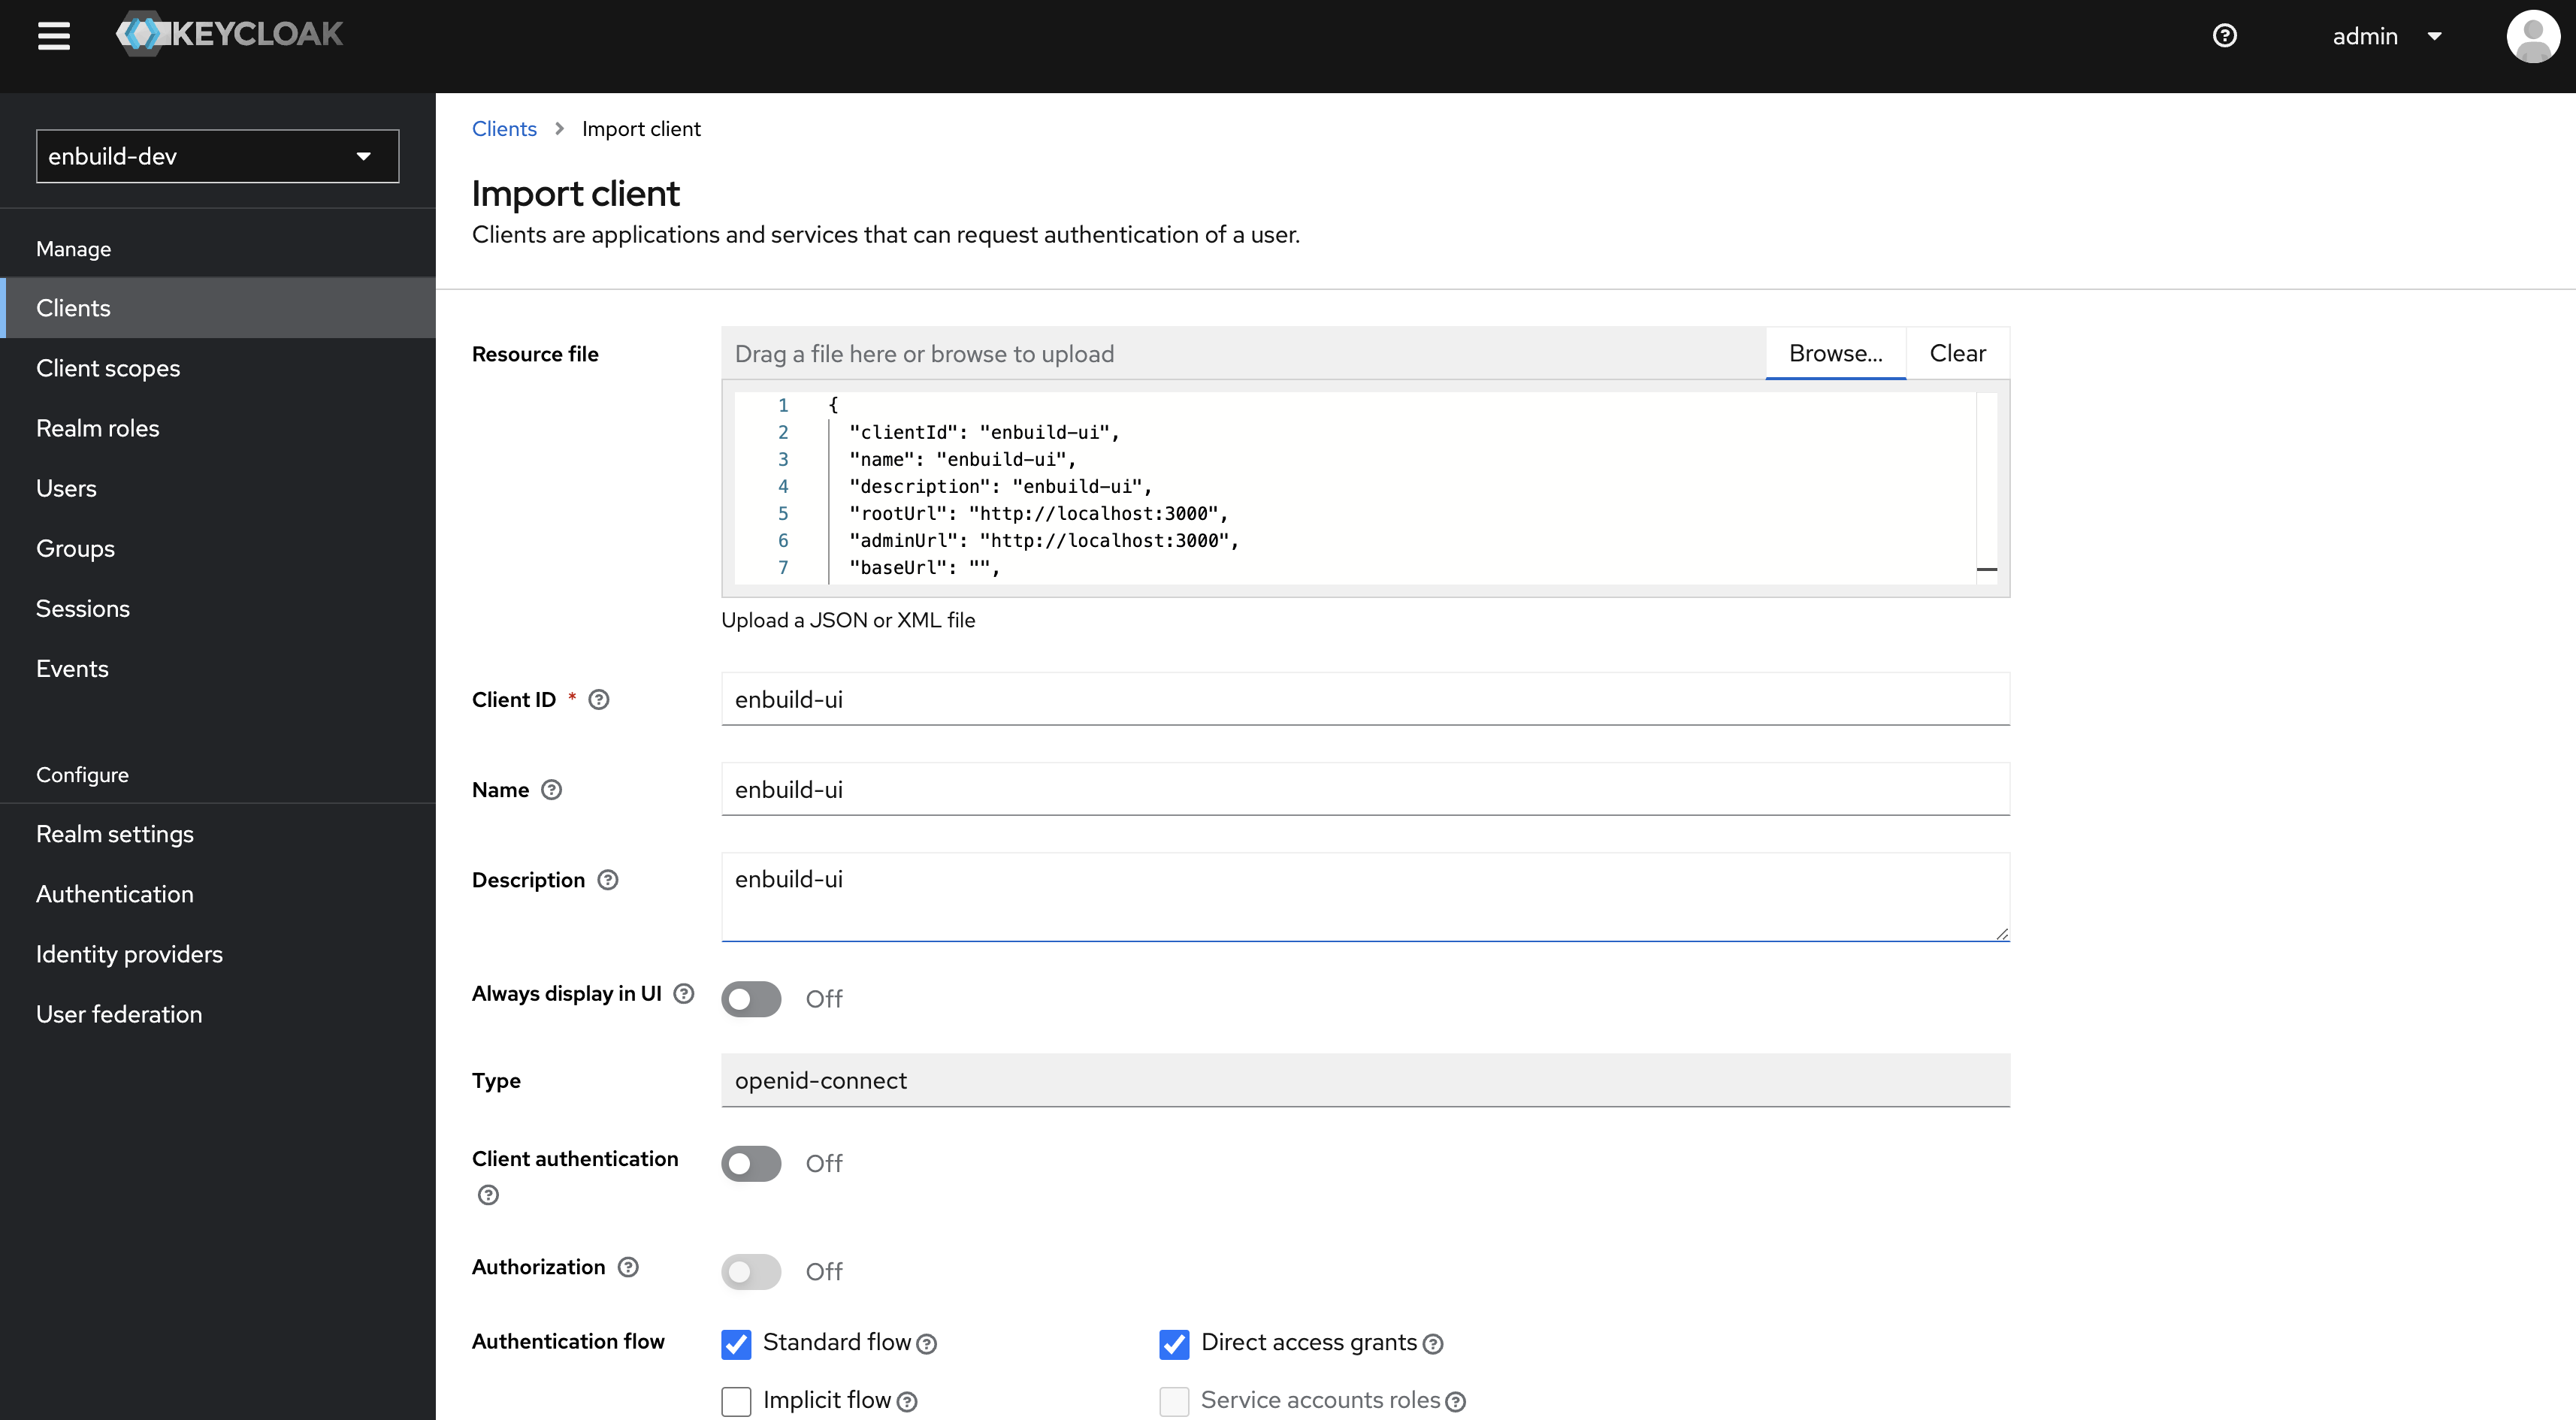
and Save the client.
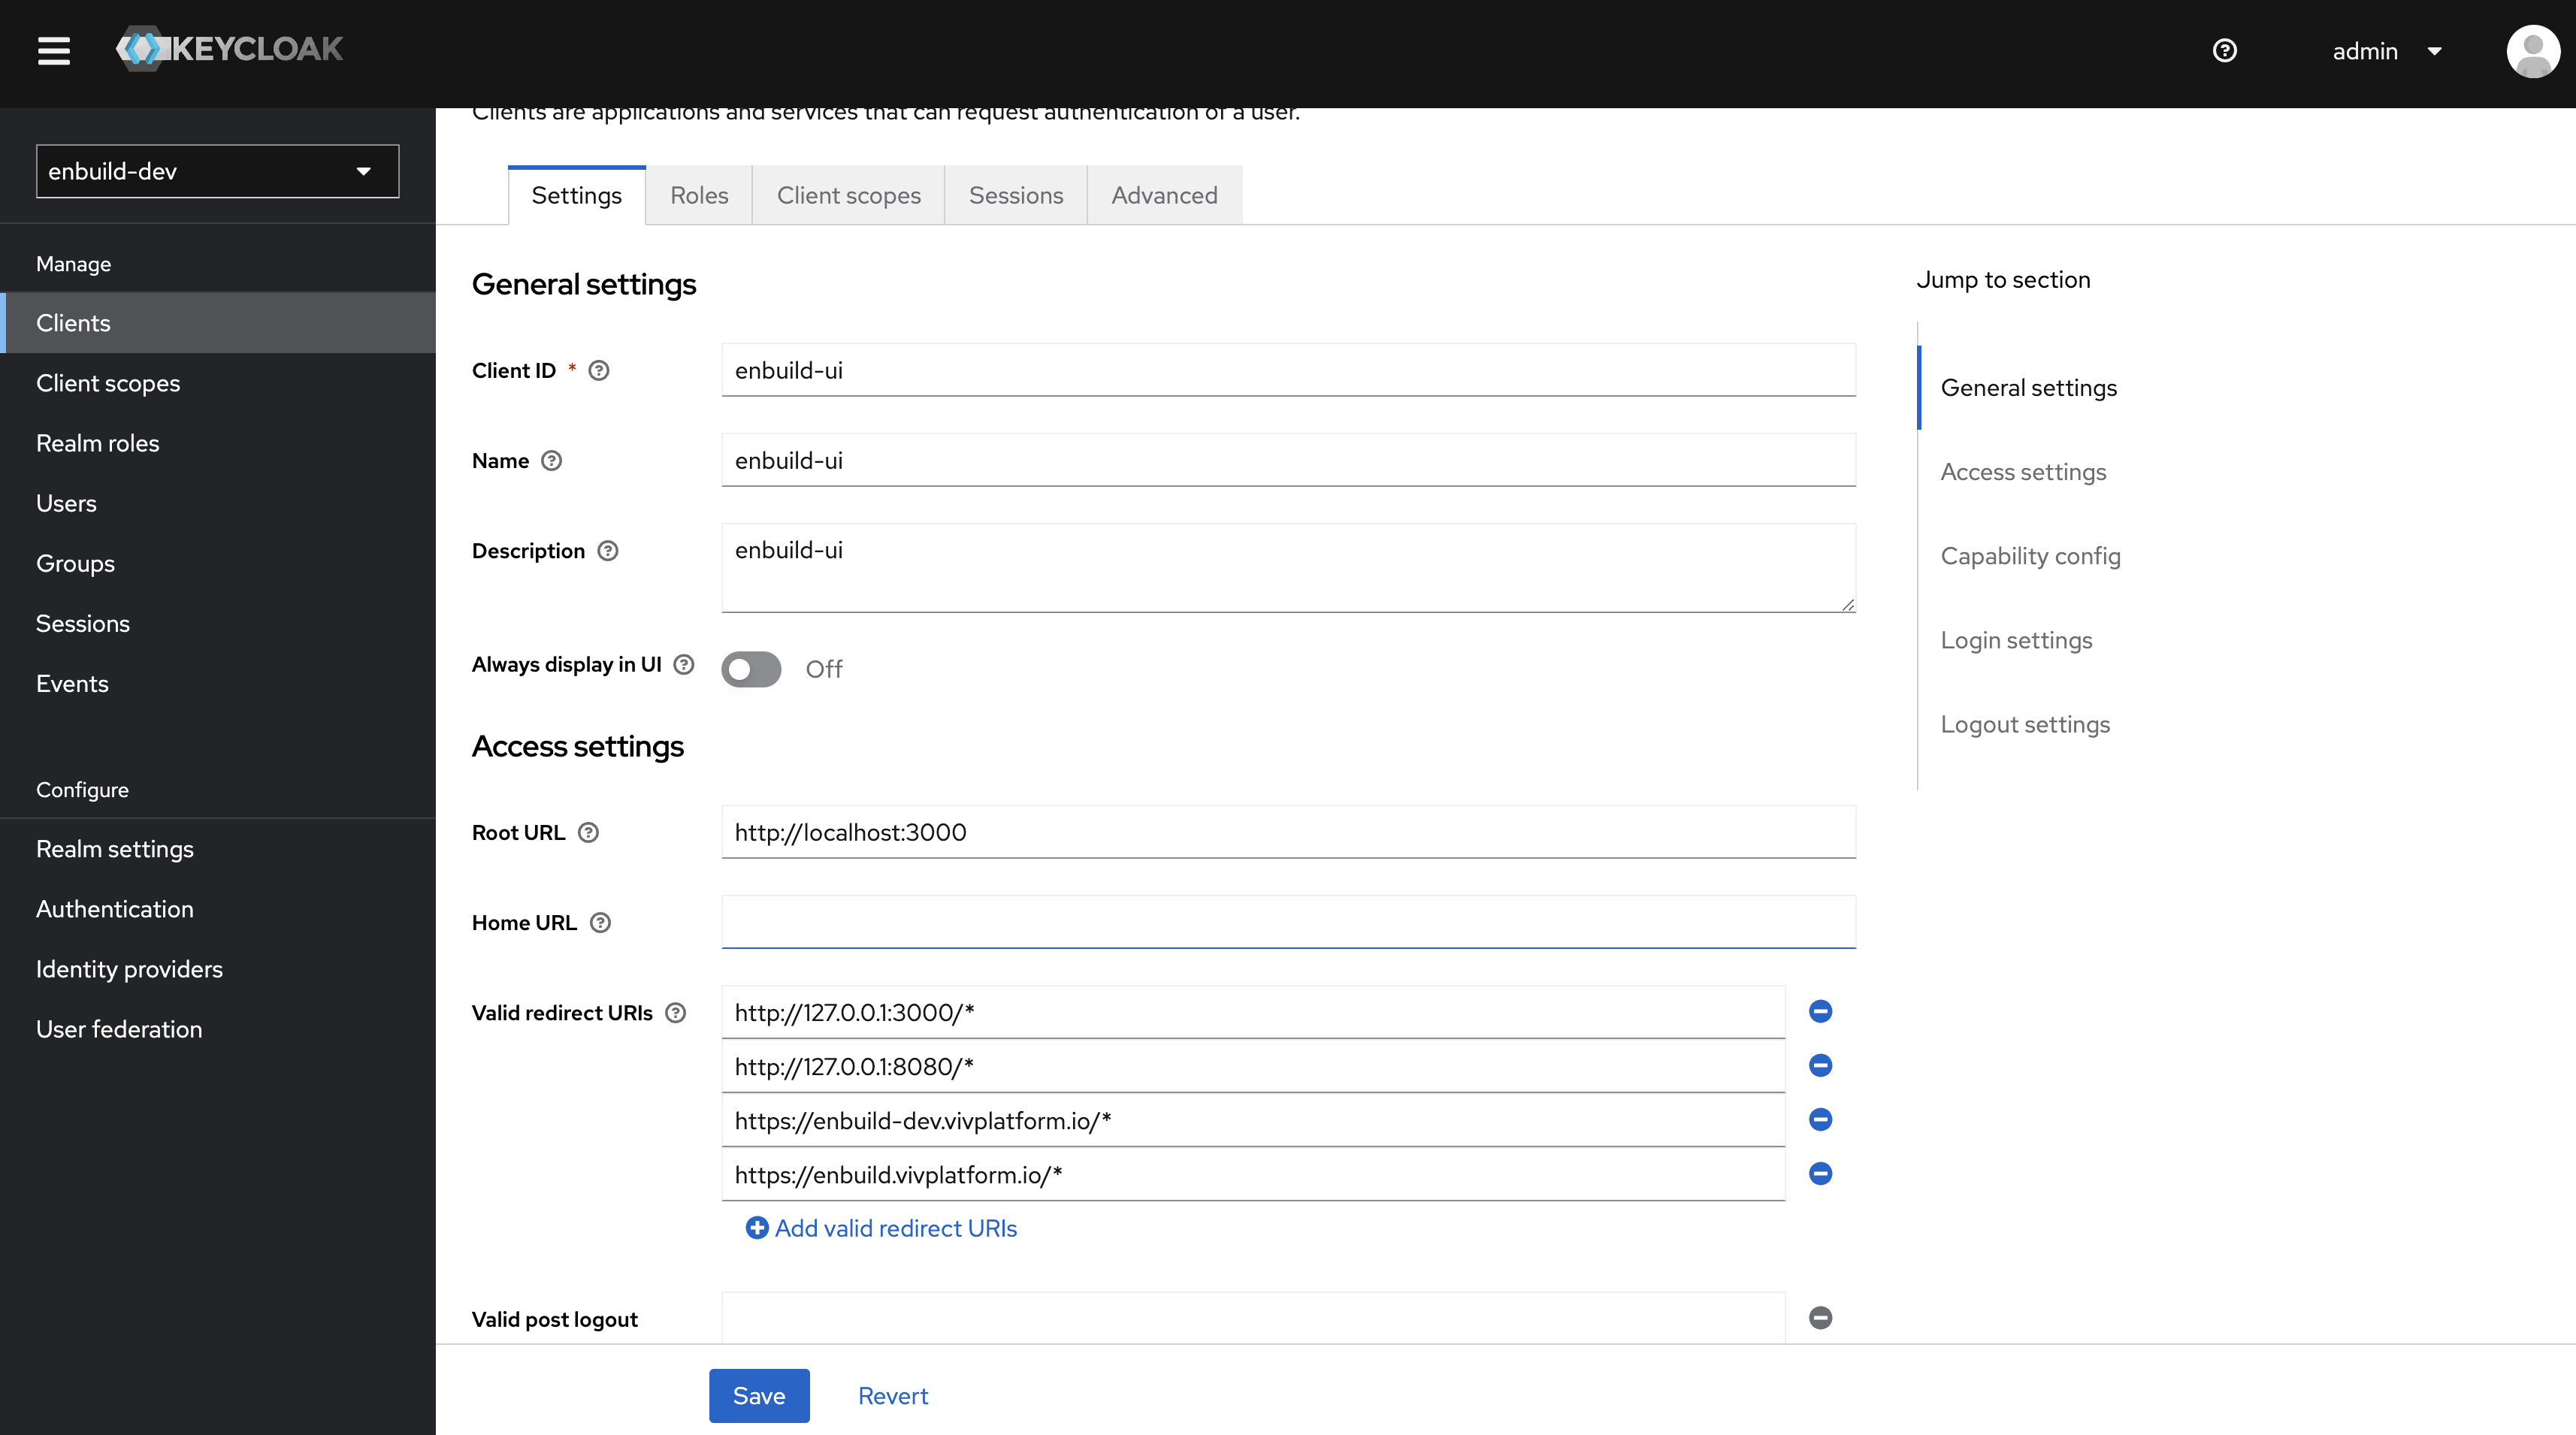
After import make sure you configure the valid redirect URI’s.
You have to provide the URI(FQDN) of ENBUILD that you have configured while installing the ENBUILD Helm chart.
Use the same method to Import the enbuild.json client.
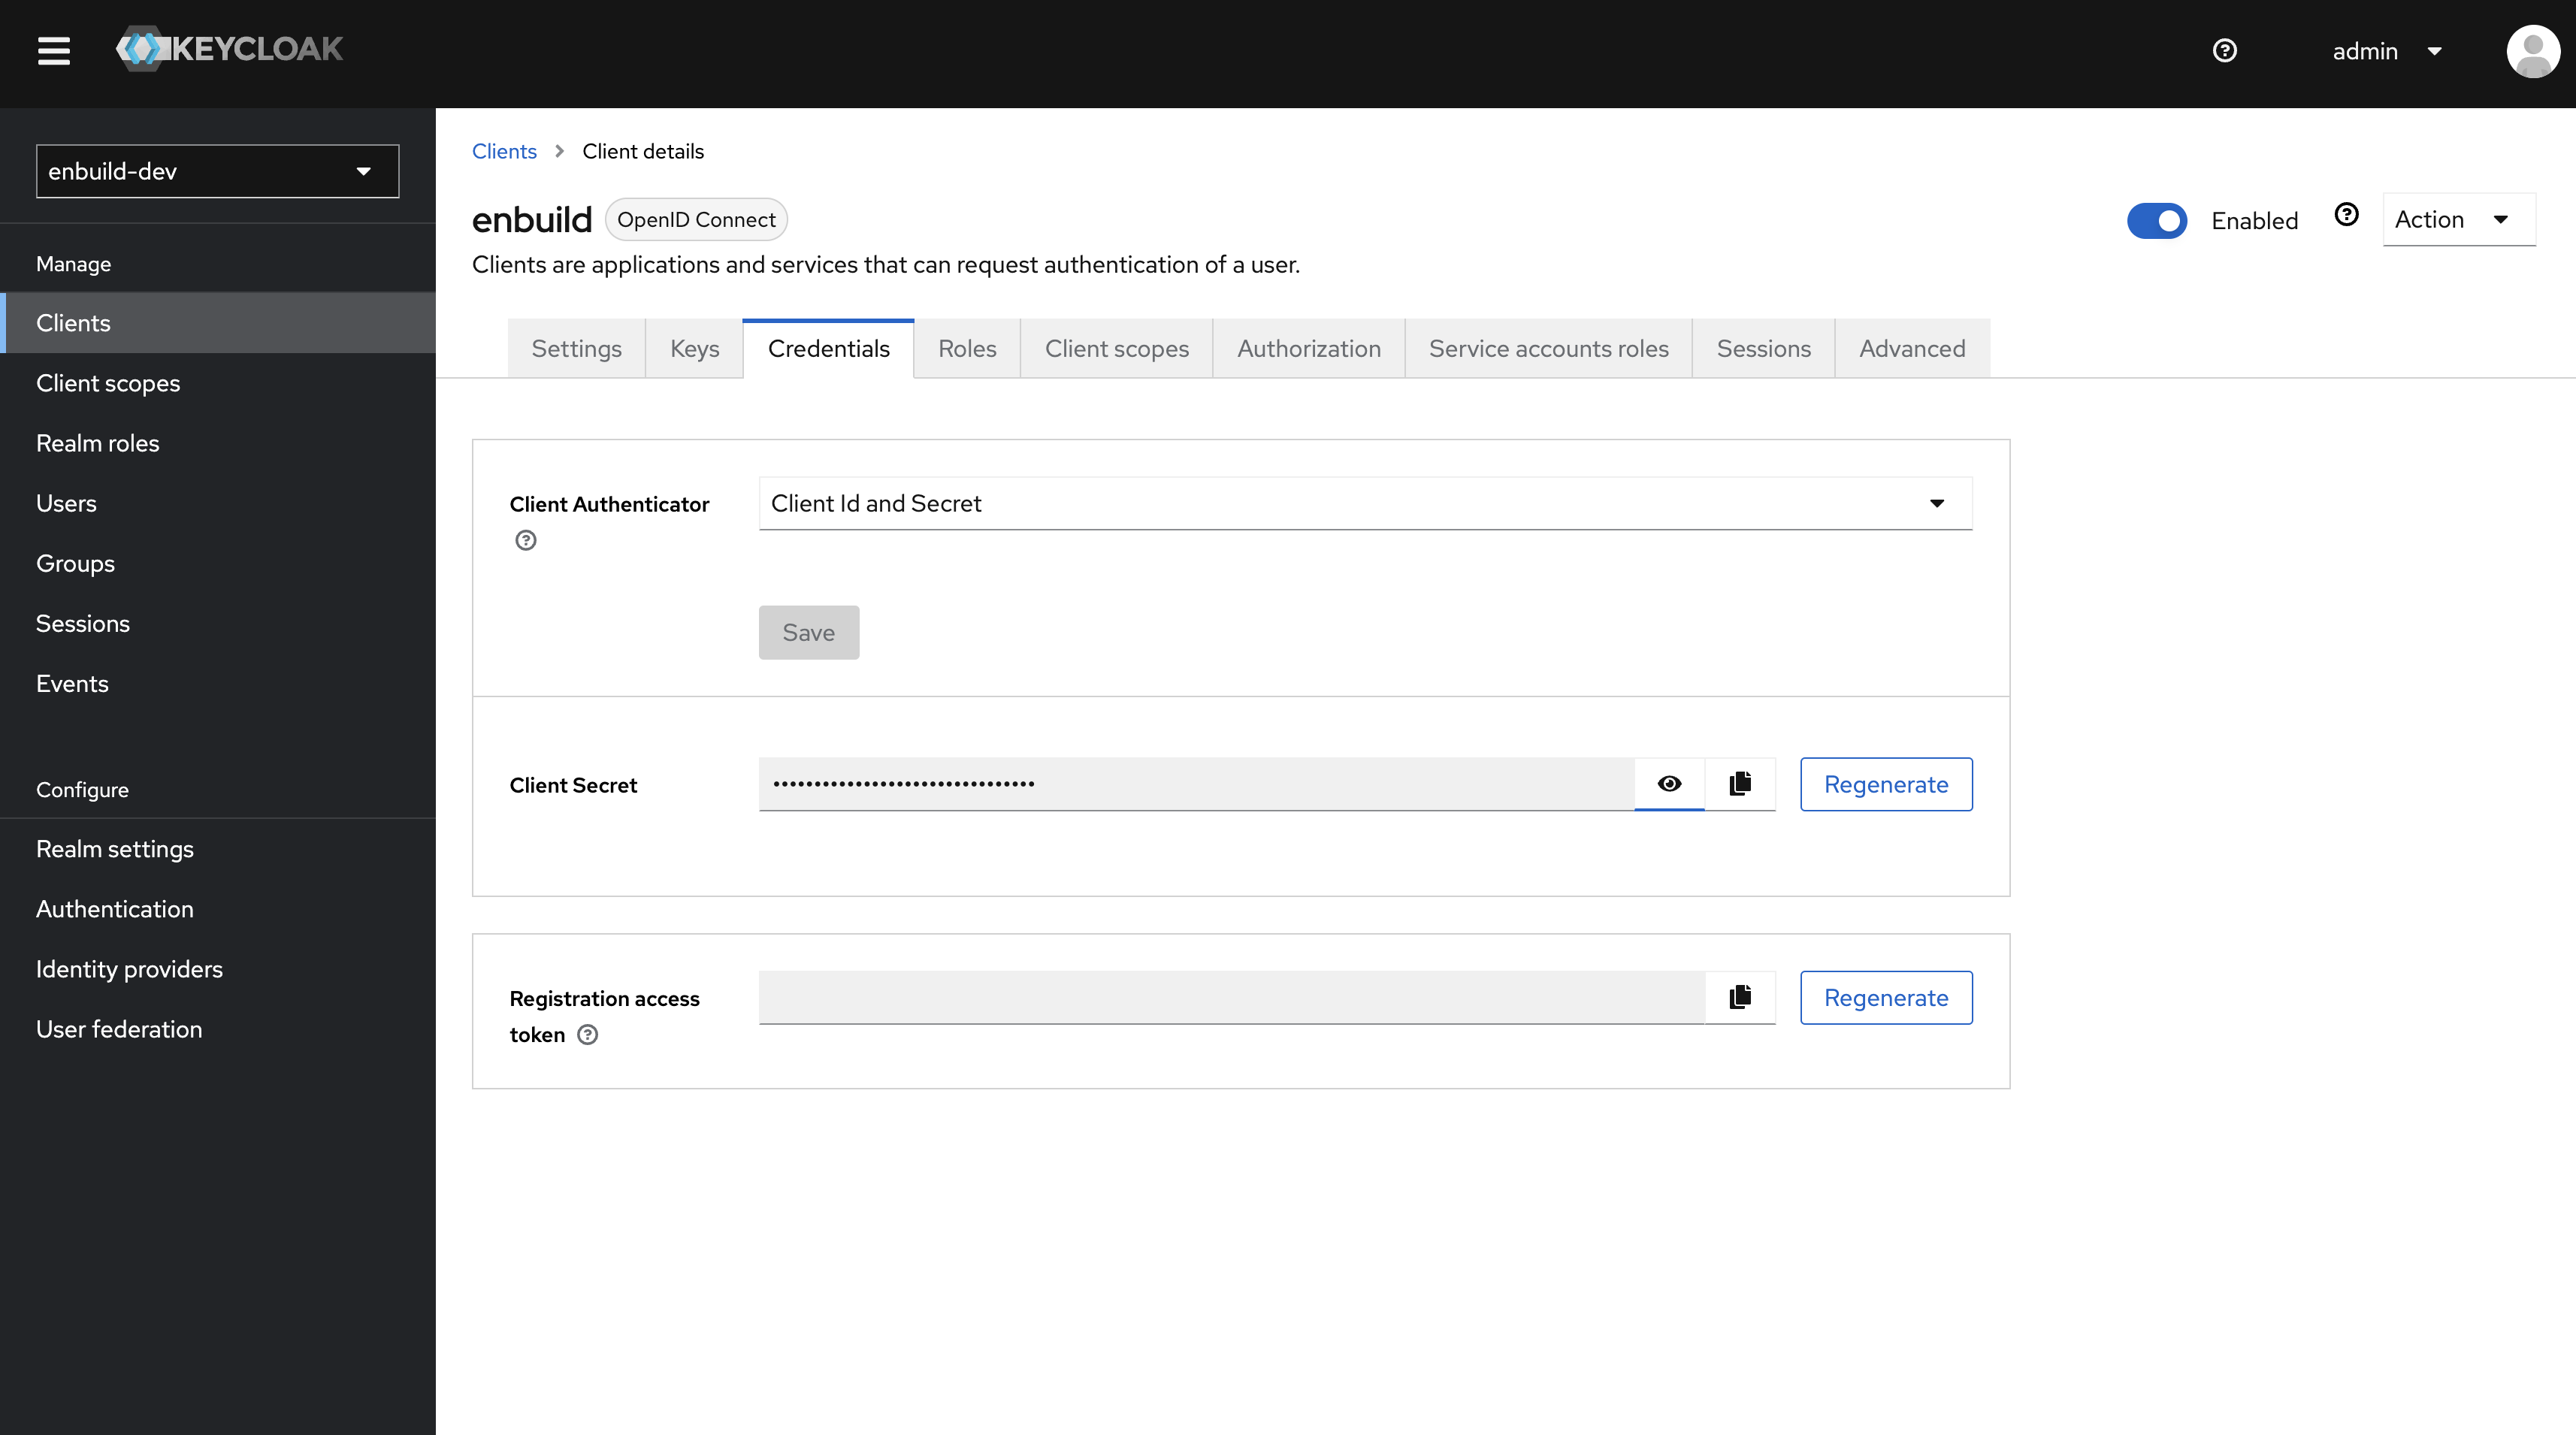
After you save the enbuild client.
Go to the Credentials tab of the enbuild client to get the Client Secret which is required for configuring the (Keycloak in ENBUILD admin setting)[../configuring-enbuild/#configure-keycloak]
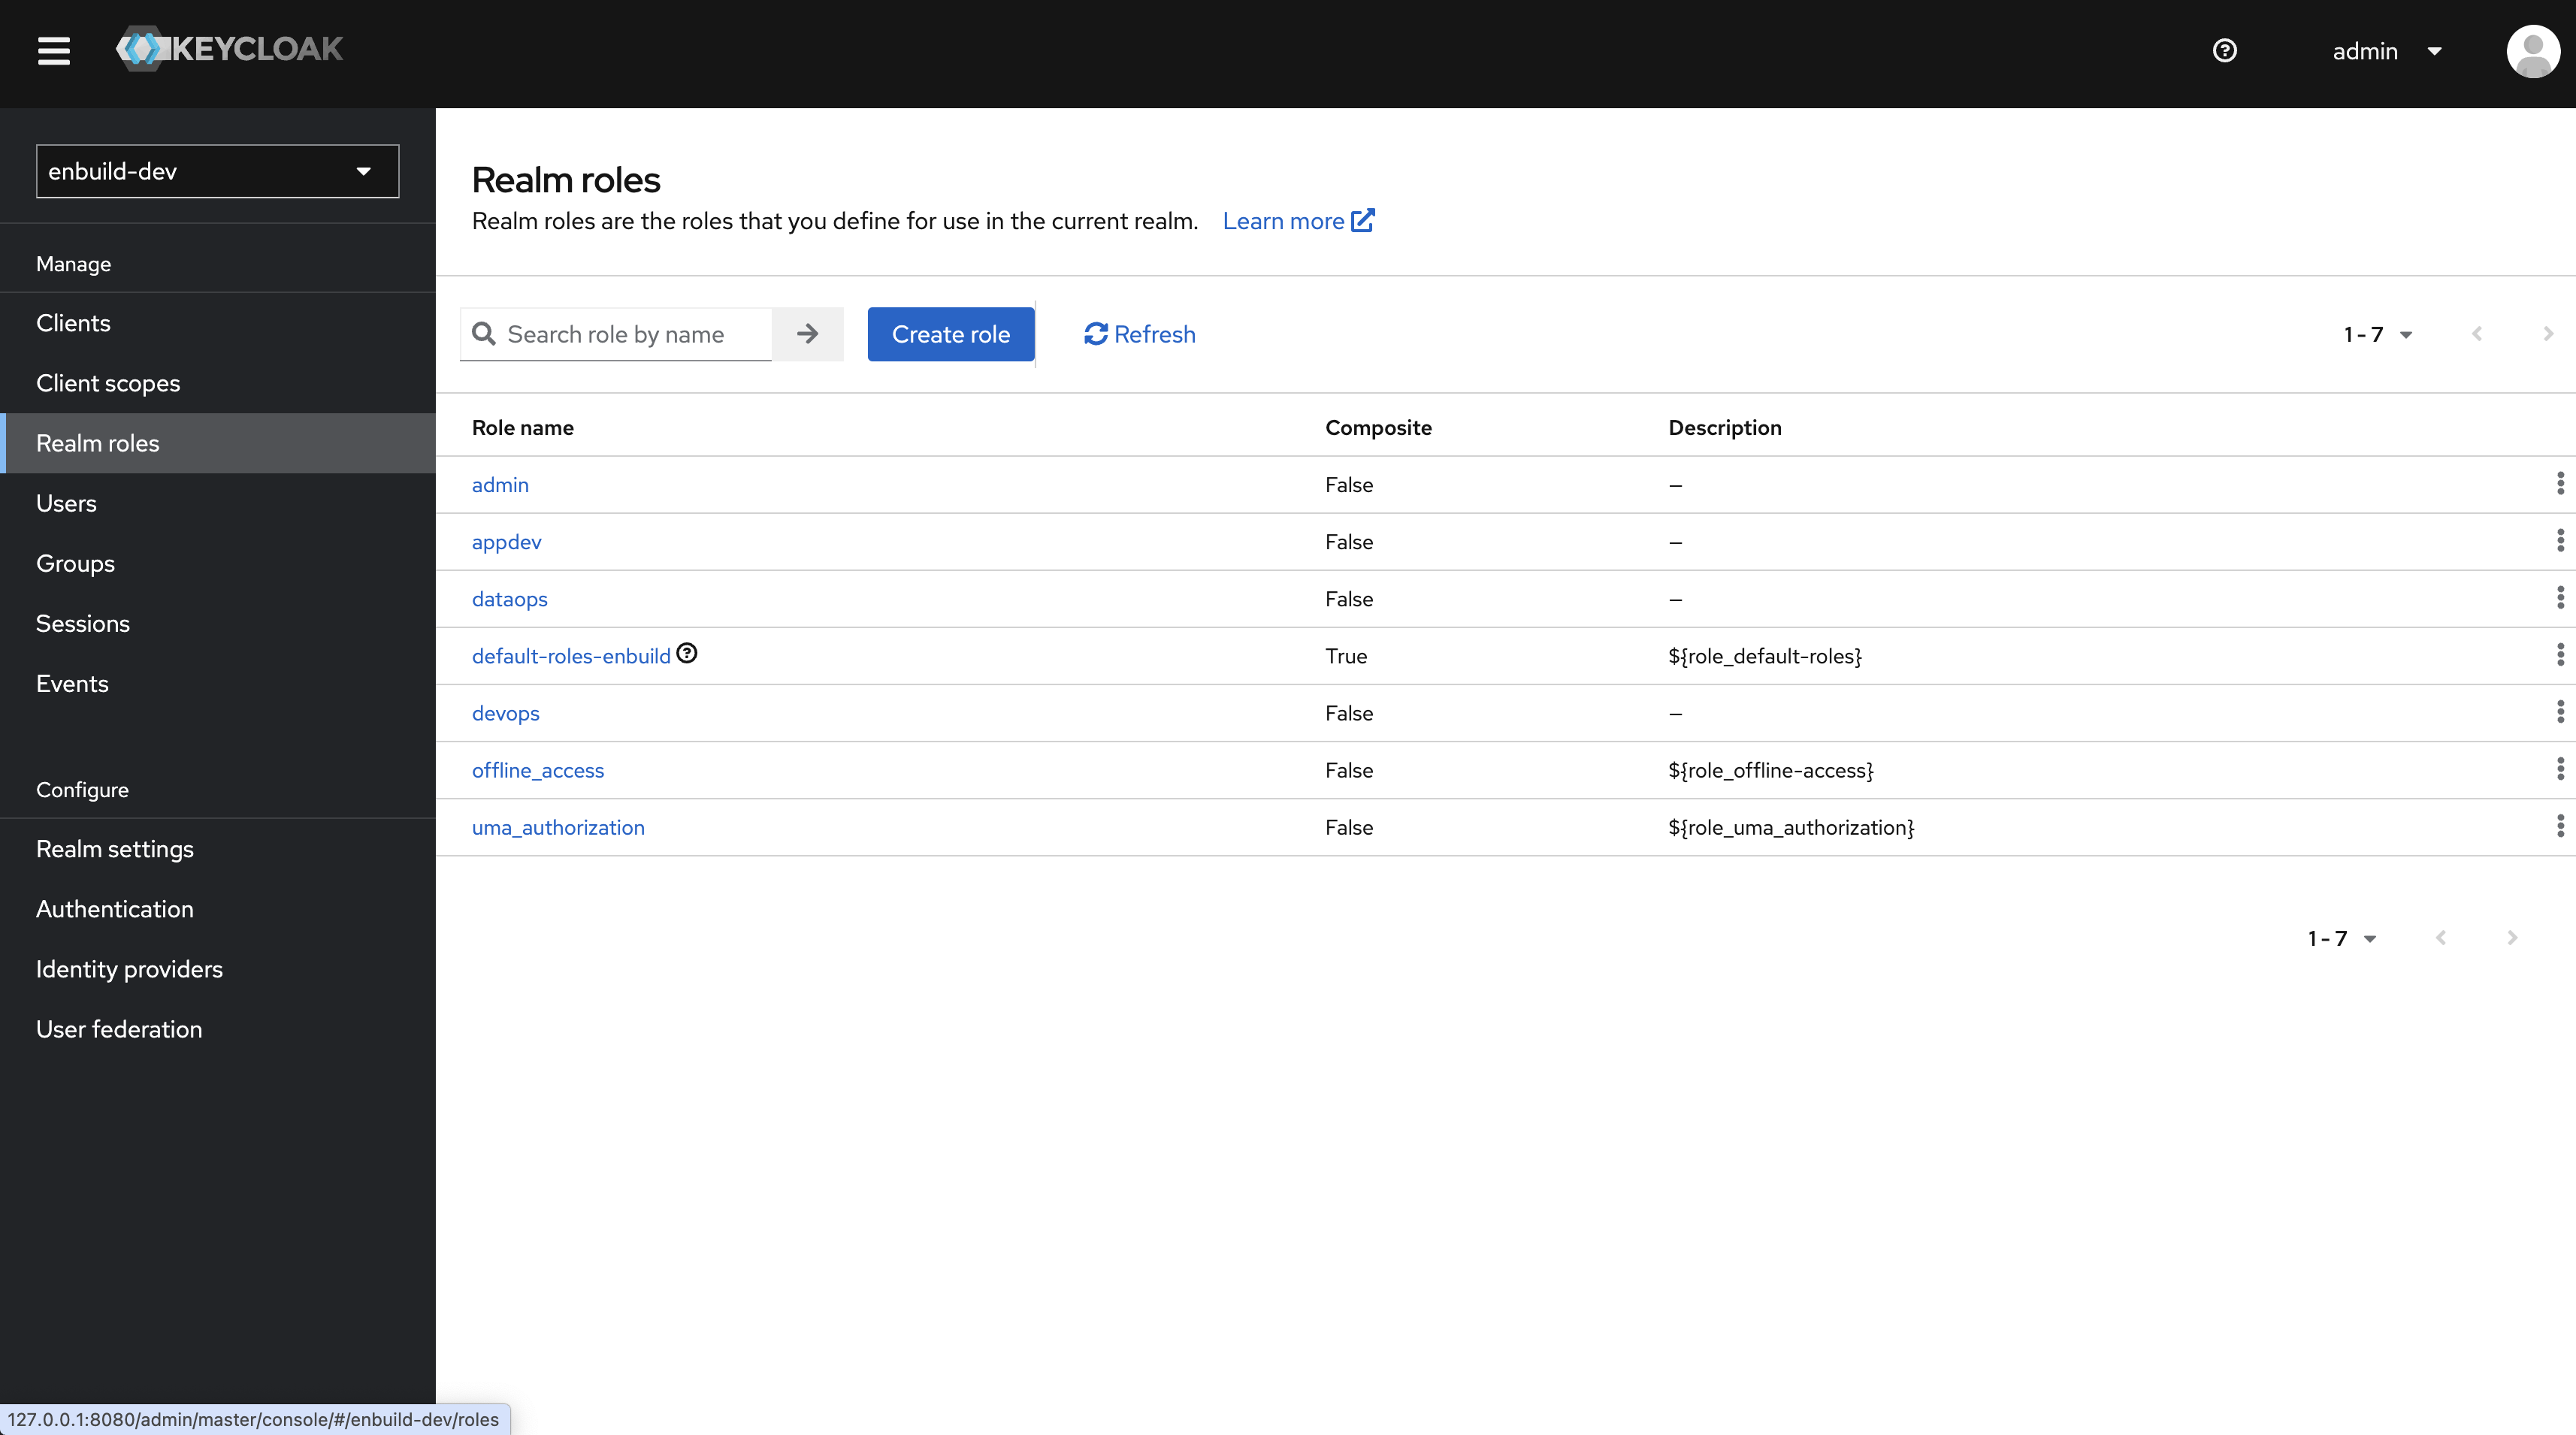
❗ Note: All these roles and groups are already created in the realm, when we imported the realms.
ENBUILD support different roles , and based on these roles, differnt type of catalog can be visible.
By default
these Groups are present in the realm we imported.
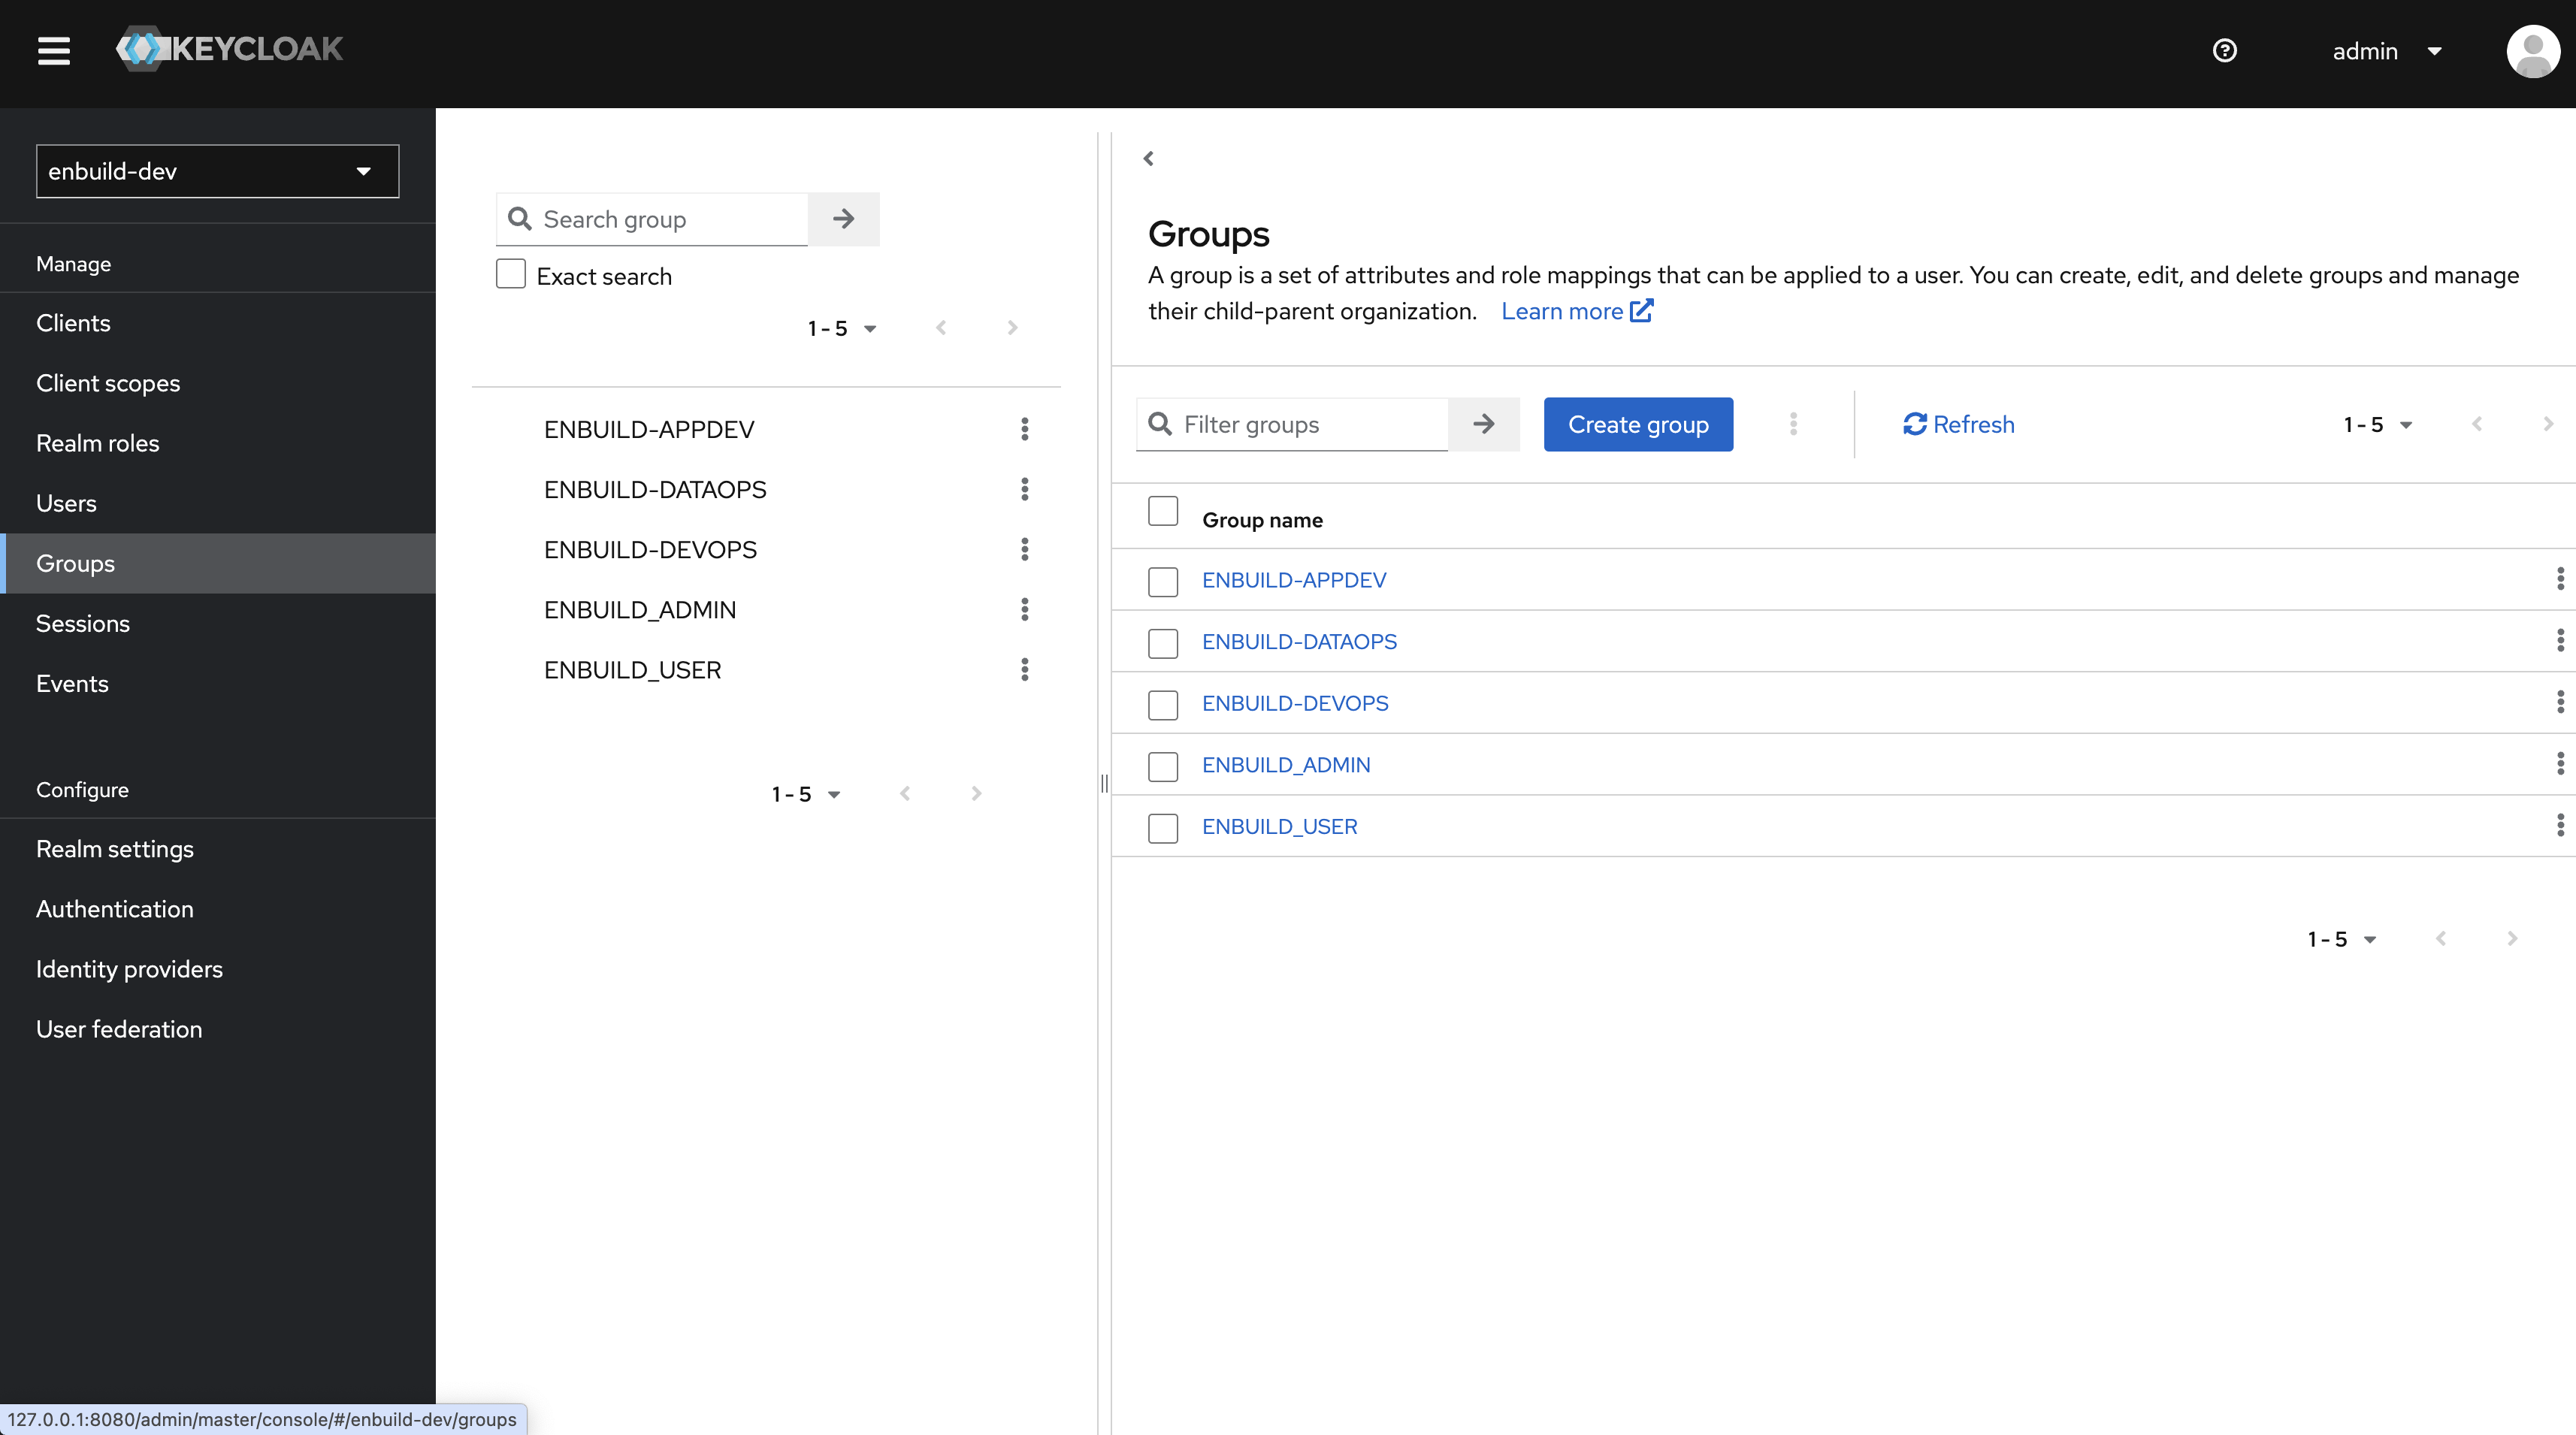
These Groups mapped to the following roles in one to one relationship.
Users are entities that are able to log into your system.
They can have attributes associated with themselves like email, username, address, phone number, and birth day.
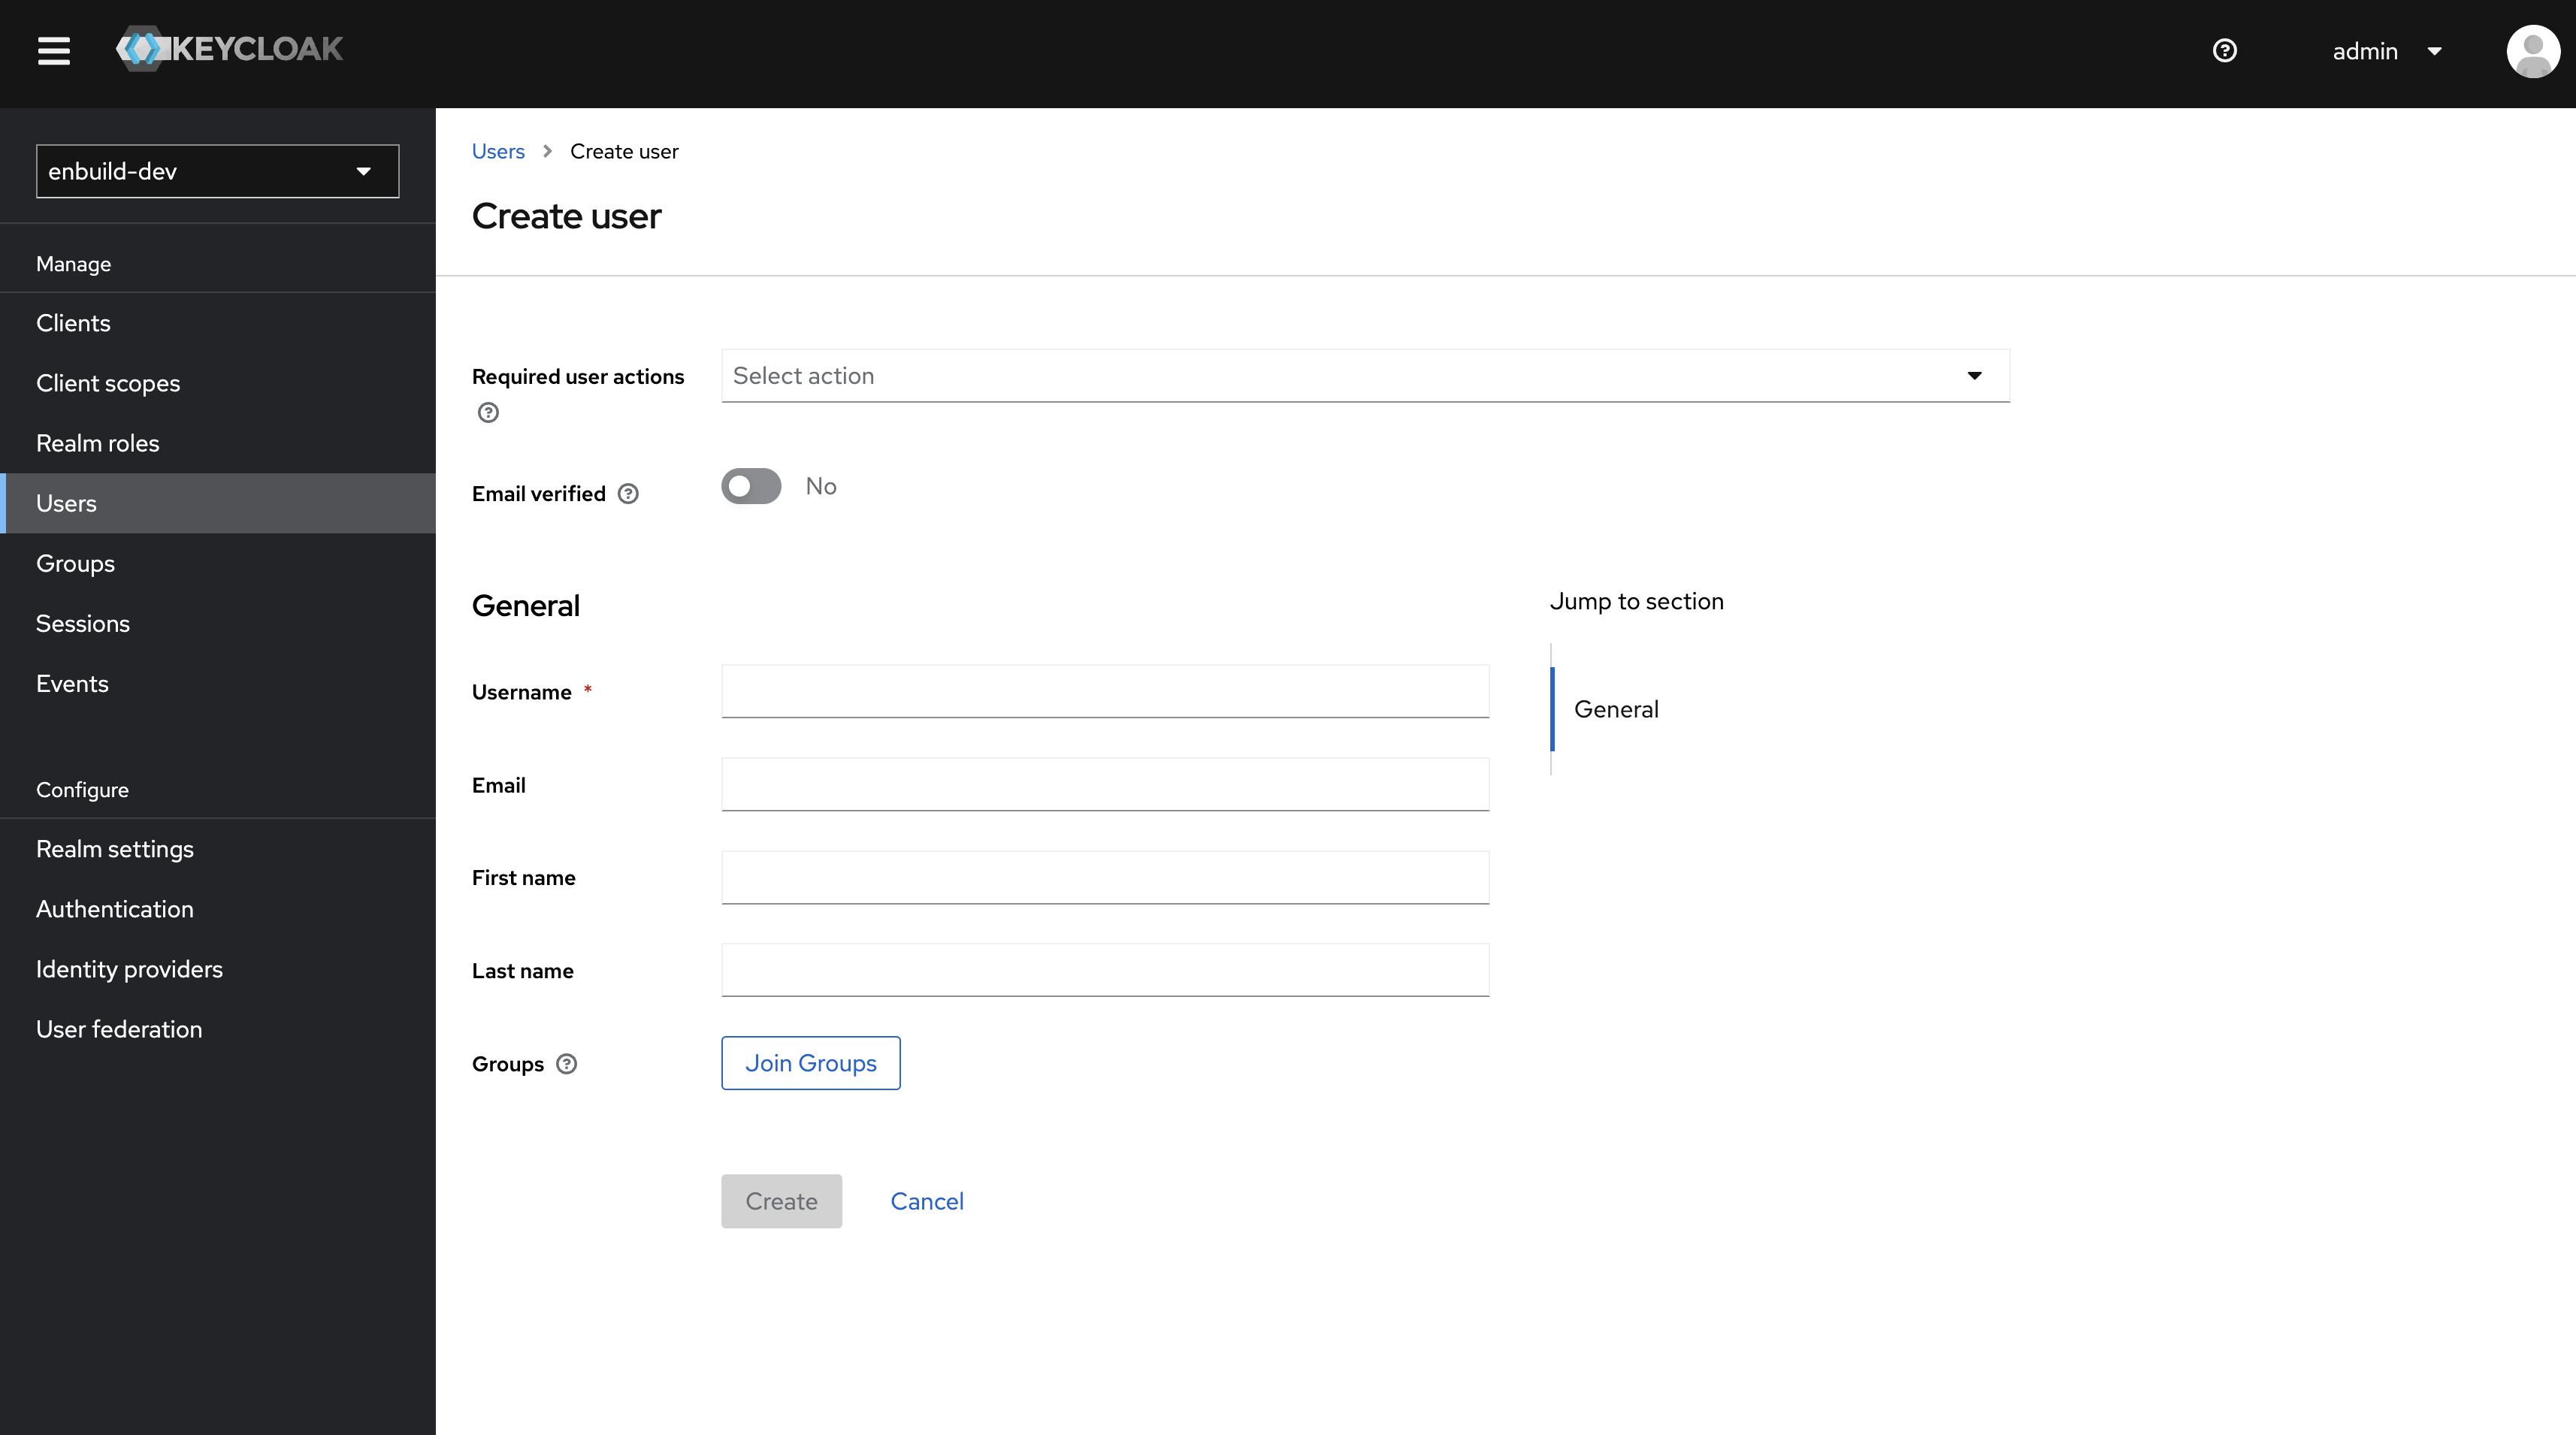
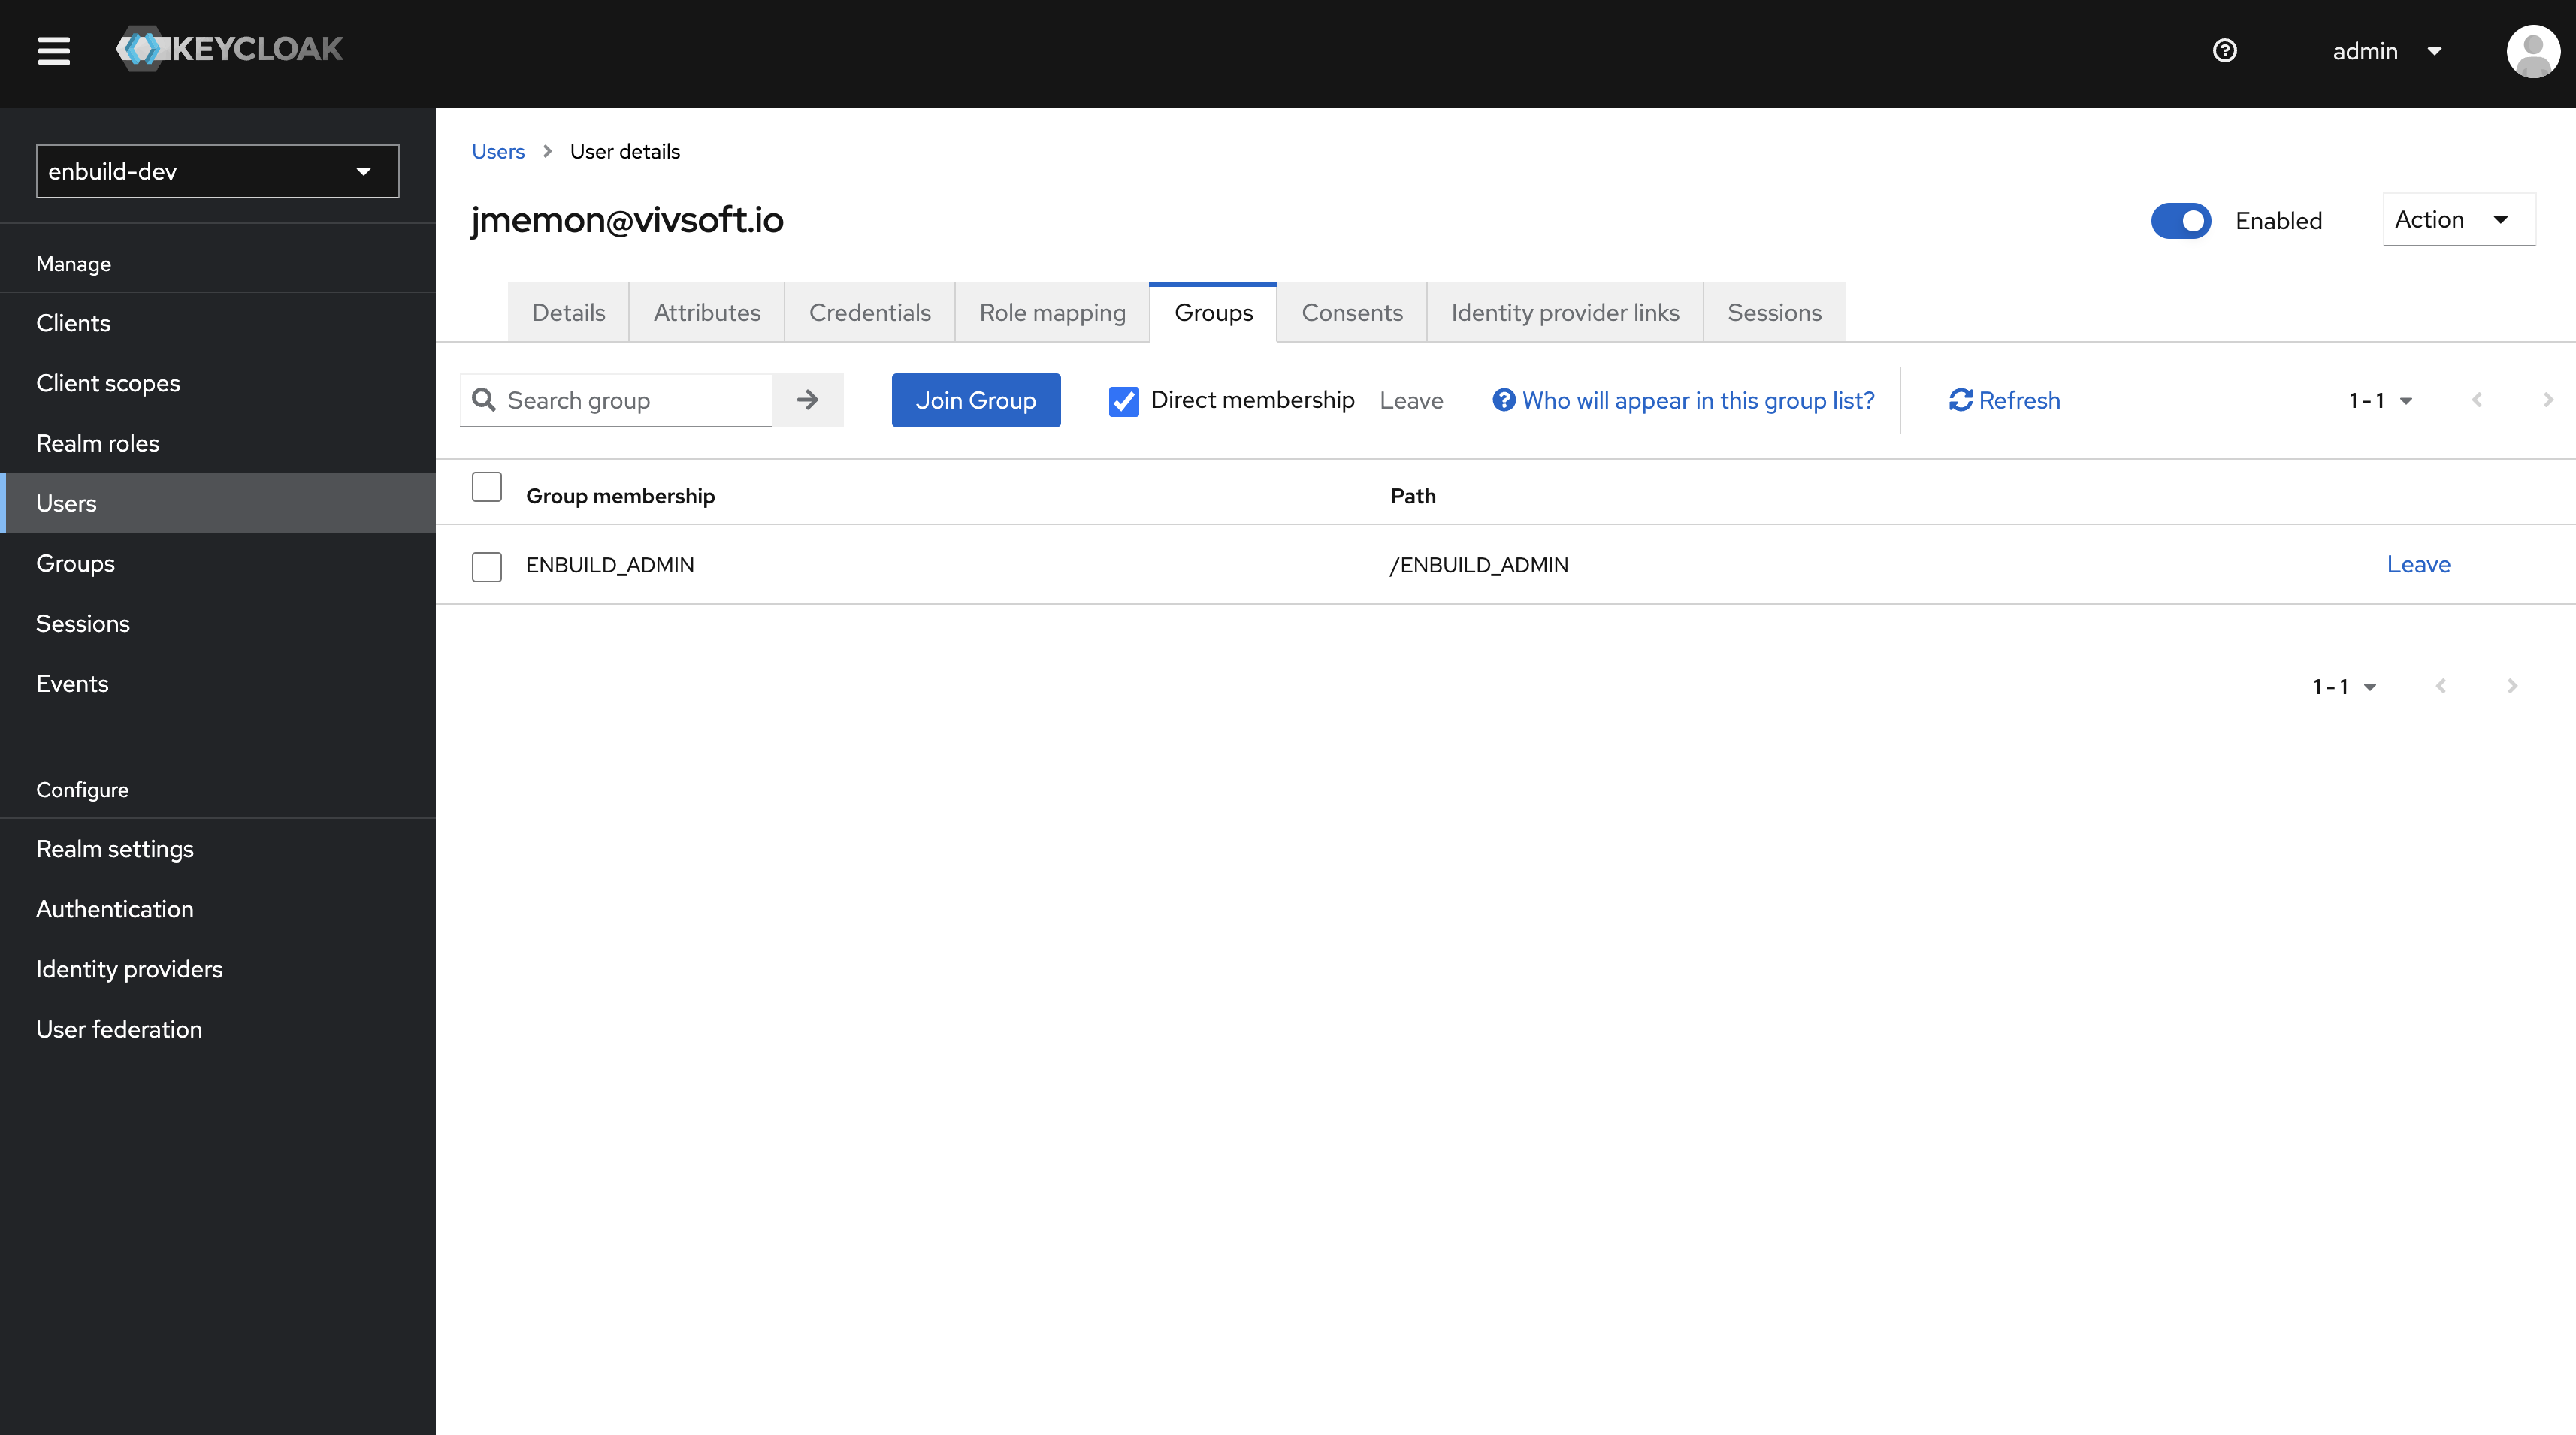
Join Groups button or Groups tab from the profile.
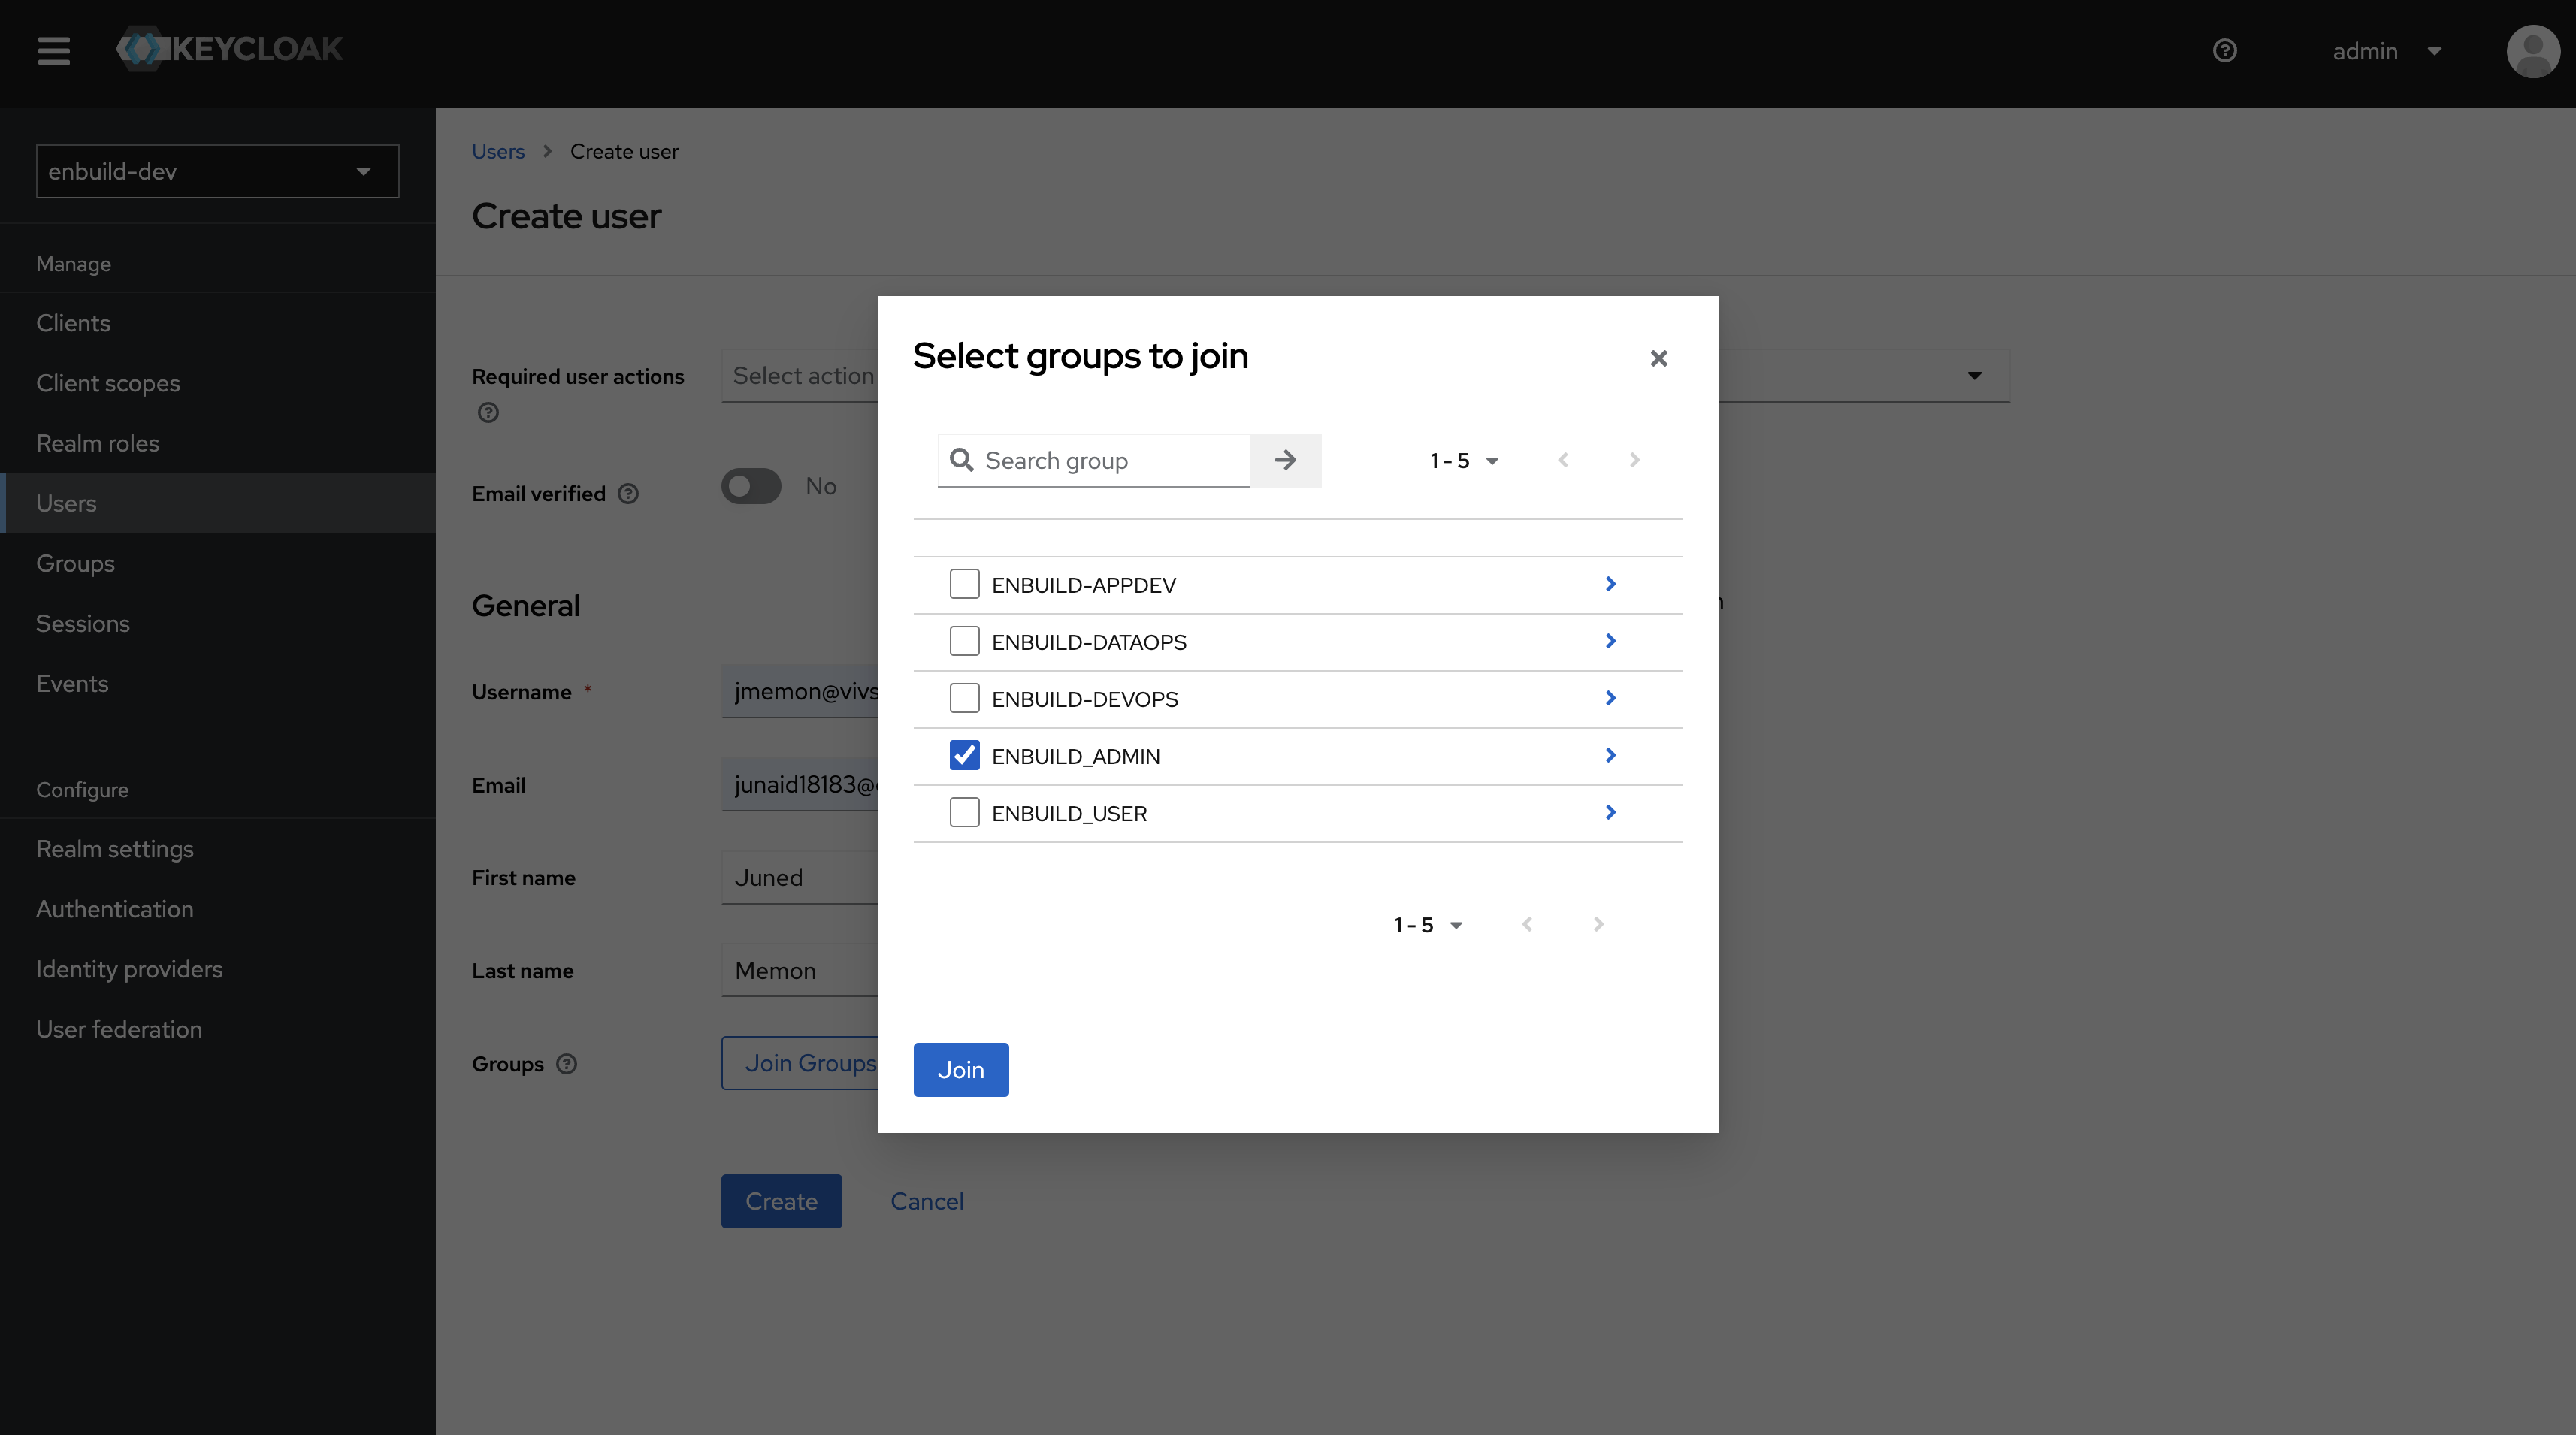
Click on the Add Member button and select the group you want to add the user to, then click on the Add button.
So far we have accessed the keycloak service from the browser by using the port-forwarding and then accessing it via local-port. But for production usage and to configure it as SSO inside ENBUILD we need to expose it on a public IP address.
There are multiple ways to achive that -
keycloak-http service as LoadBalancer - This way the kubernertes will create a external loadbalancer and expose the service on a public IP address.keycloak-http service - This way we can use a ingress controller to route traffic to the keycloak service based on the hostname.❗ Note: Make sure to adjust the hosts to the right value to which you want to expose the service.
after you have exposed the keycloak-http service using any of the above methods, you can create a DNS record pointing to the public IP address or FQDN of the loadbalncer.
e.g. if you have exposed the service using the istio virtual service you will need to create a DNS record for this service in your DNS provider.
The IP address of the DNS will be the EXTERNAL-IP of the istio-ingressgateway service, you can find that using the command below.
kubectl get svc -n istio-system istio-ingressgateway -o jsonpath='{.status.loadBalancer.ingress[*].ip}'
Create a DNS type A record using the IP address from the command above.
Once done you can proceed to configure keycloak as SSO for ENBUILD