Configuring ENBUILD

Follow these step-by-step instructions to configure ENBUILD.

After you have successfully deployed the ENBUILD Helm Chart, you will need to configure the ENBUILD to deploy the Catalogs.

Set the Admin Password

Screenshot of ENBUILD Login Screen

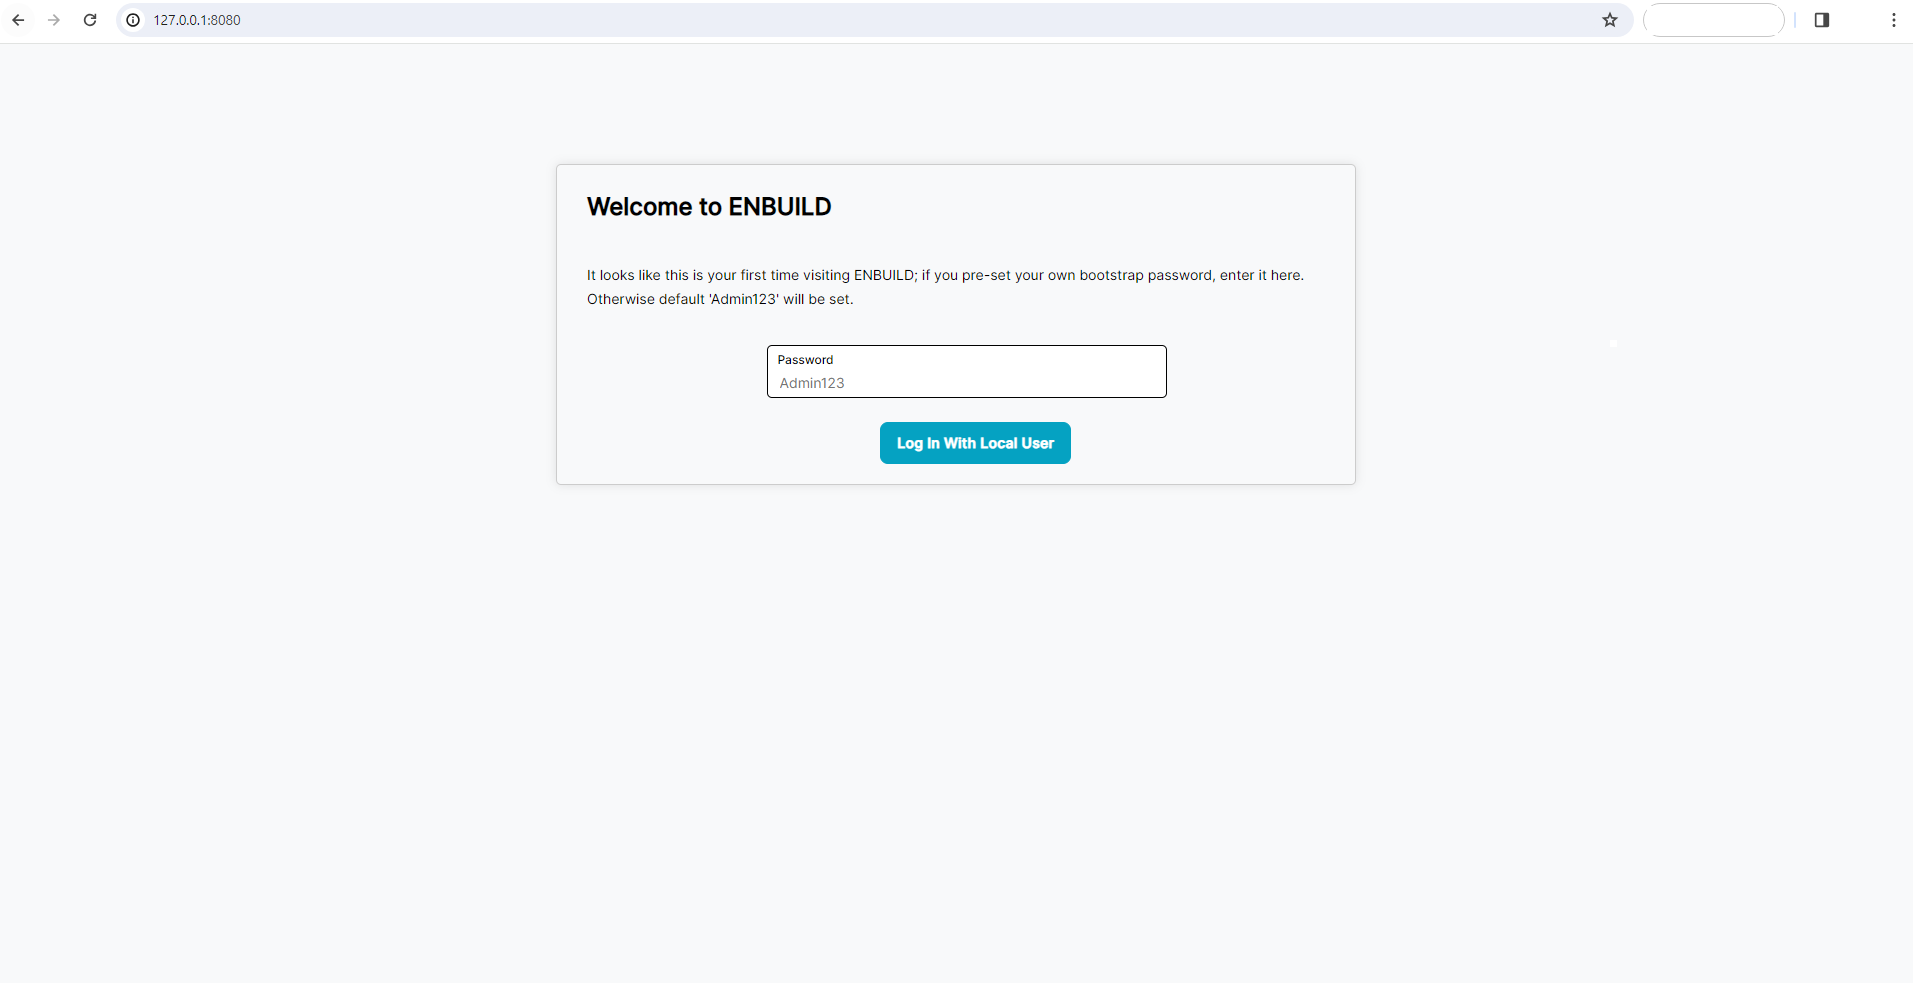
You need to set the Admin Password before accessing the ENBUILD.

Configure the VCS

Before deploying the catalog items, you need to configure the Version Control System (VCS). ENBUILD supports GitHub, GitLab VCS as of now.

These are the Version Control System where ENBUILD creates repositories when you deploy catalog item

GITHUB

By default , github is not enabled, so first you need to enable github, by clicking in it (only if you are planning to use Github as your VCS), and then set the following settings
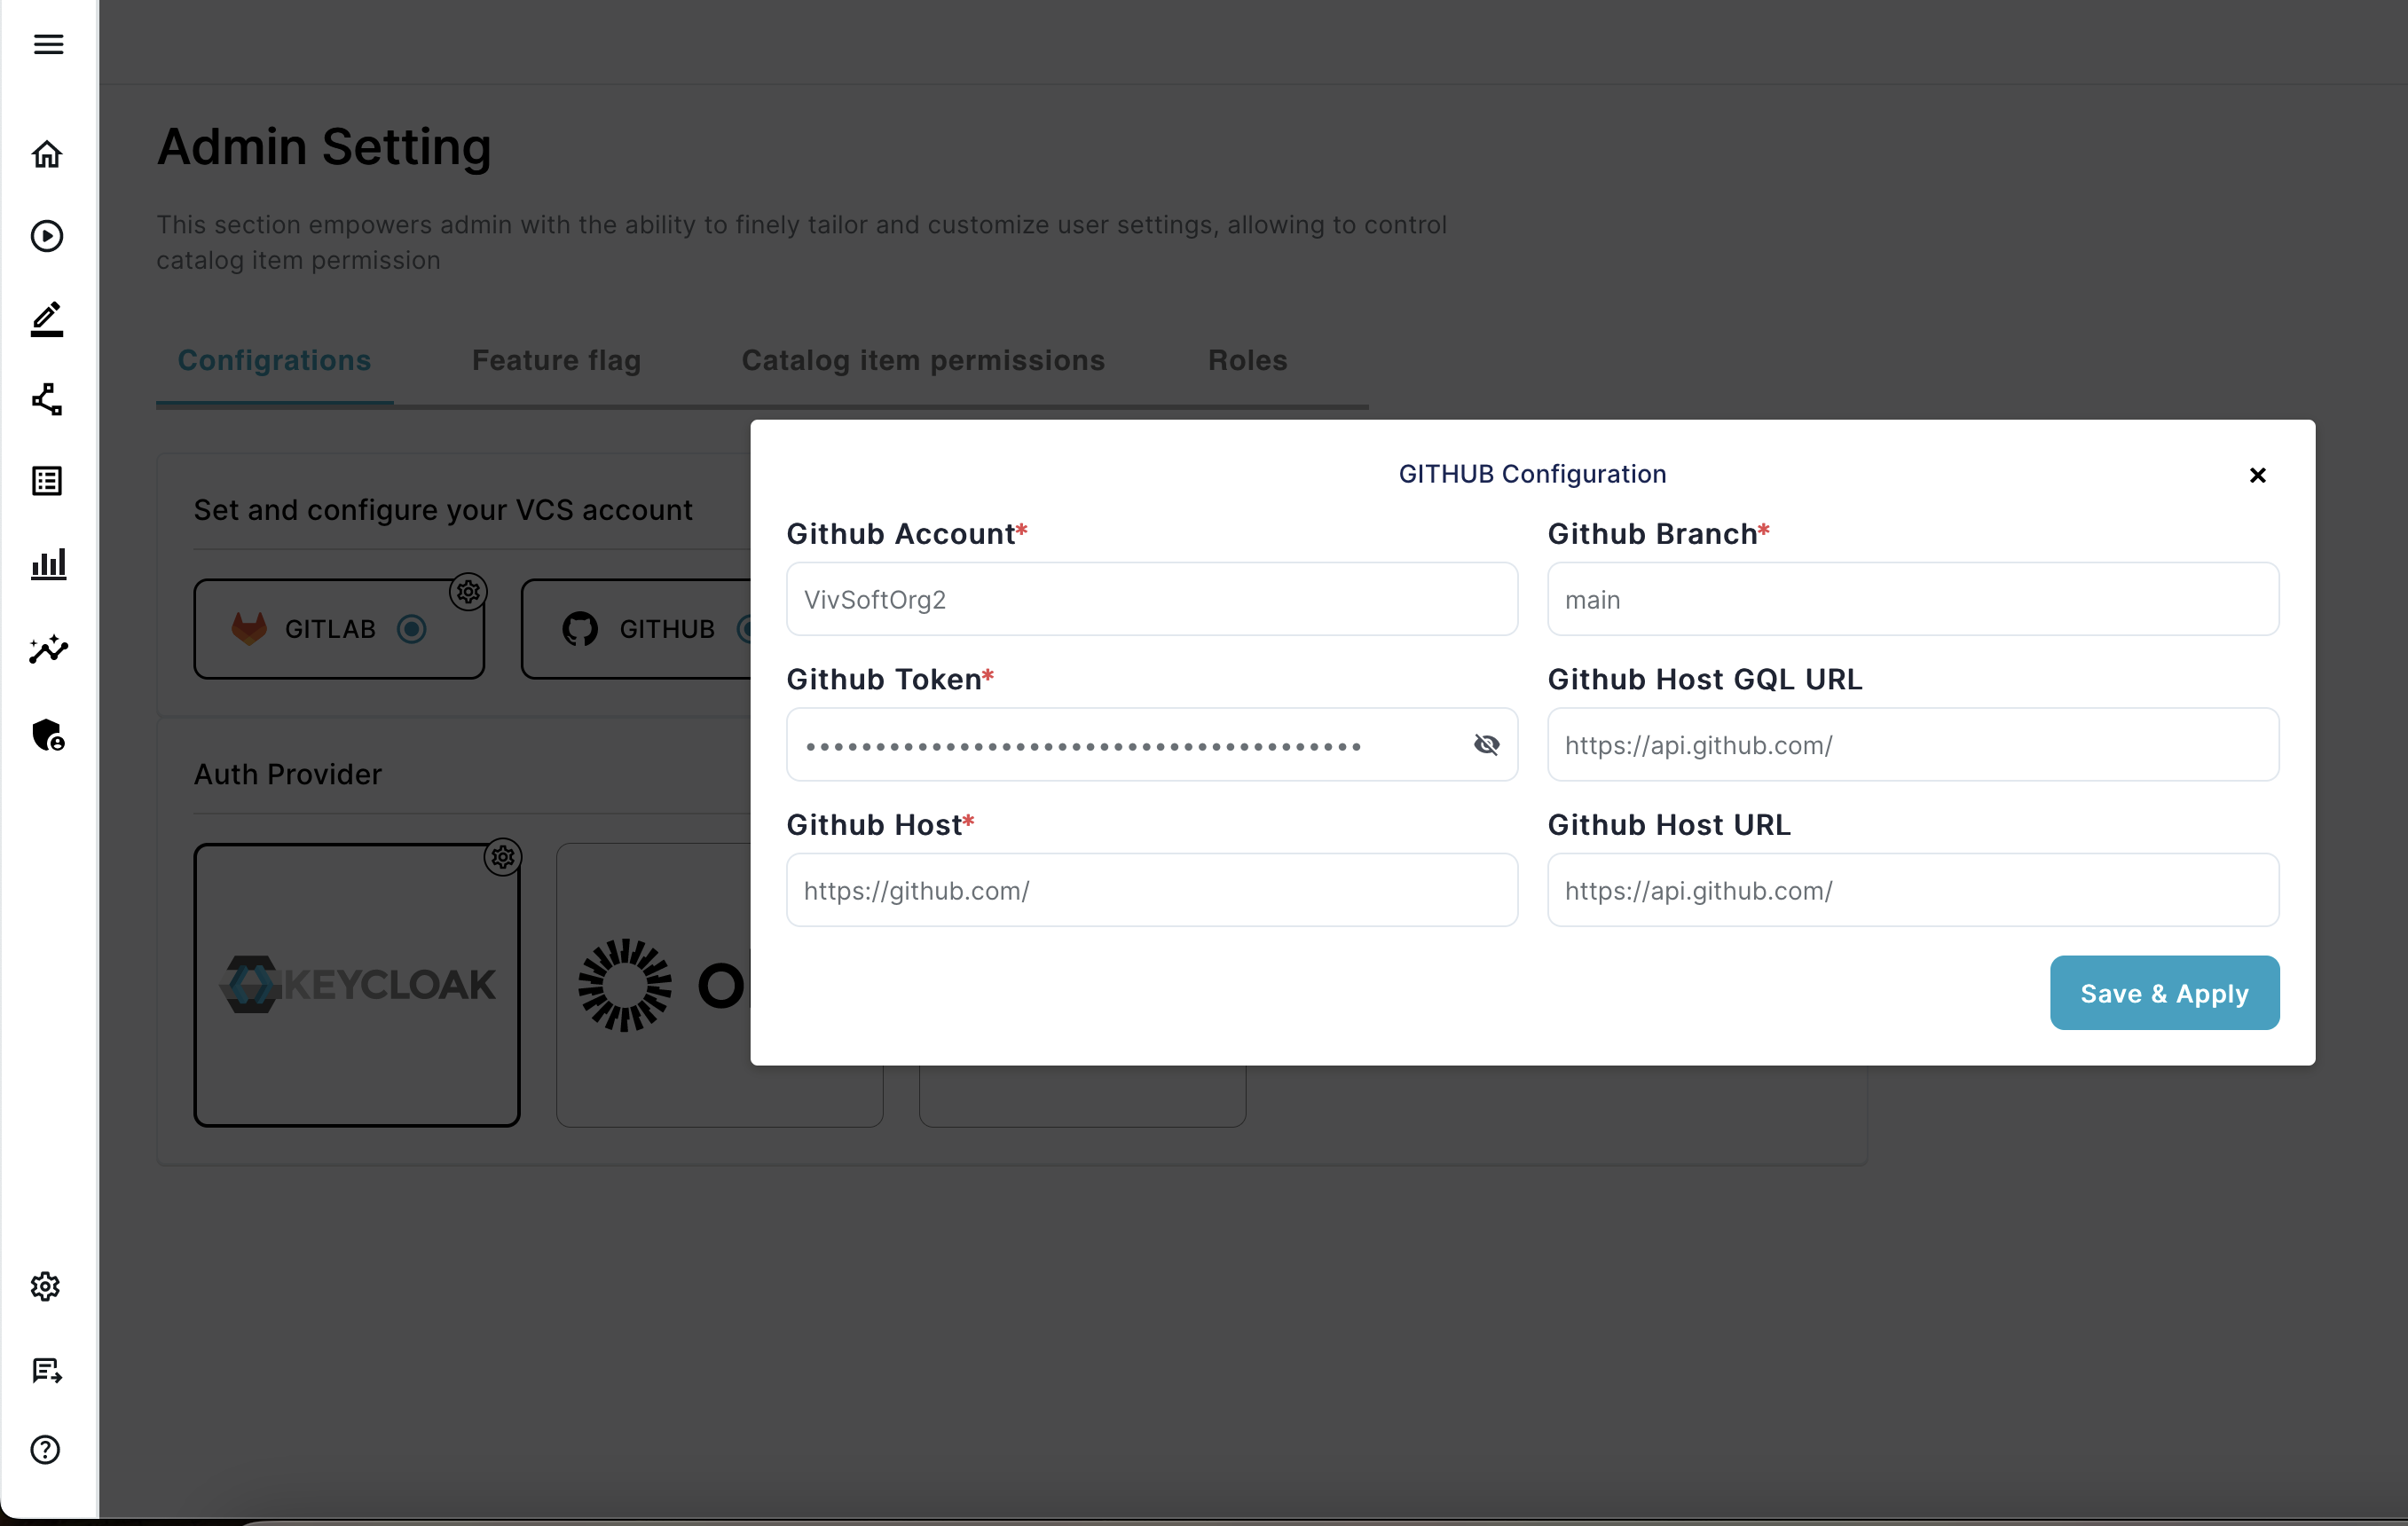
  • Github Account – The Github account where the deployment repositories will be created.
  • Github Token – The Token to be used to create deployment repositories
  • Github Host – The Github Host URL (e.g. https://github.com/)
  • Github Branch – The default branch for the deployment repositories (e.g. main)
  • Github Host GQL URL – The GraphQL API endpoint for the Github Host (e.g. https://api.github.com/graphql)
  • Github Host URL – The REST API endpoint for the Github Host (e.g. https://api.github.com)

Screenshot of ENBUILD Github VCS Configuration Screen

GITLAB

  • Gitlab Host - The Gitlab Host (e.g. https://gitlab.com/)
  • Gitlab Token - Gitlab Token to be used to create deployment repositories
  • Gitlab Group - The Gitlab Group where the deployment repositories will be created
  • Gitlab Namespace ID - The Gitlab Namespace ID of the group or user (e.g. 70306609)

Screenshot of ENBUILD Github VCS Configuration Screen

Note: You need to restart the enbuild-enbuild-mq-* pod after changing the VCS (GITHUB and GITLAB) setting.

Catalog level Permissions

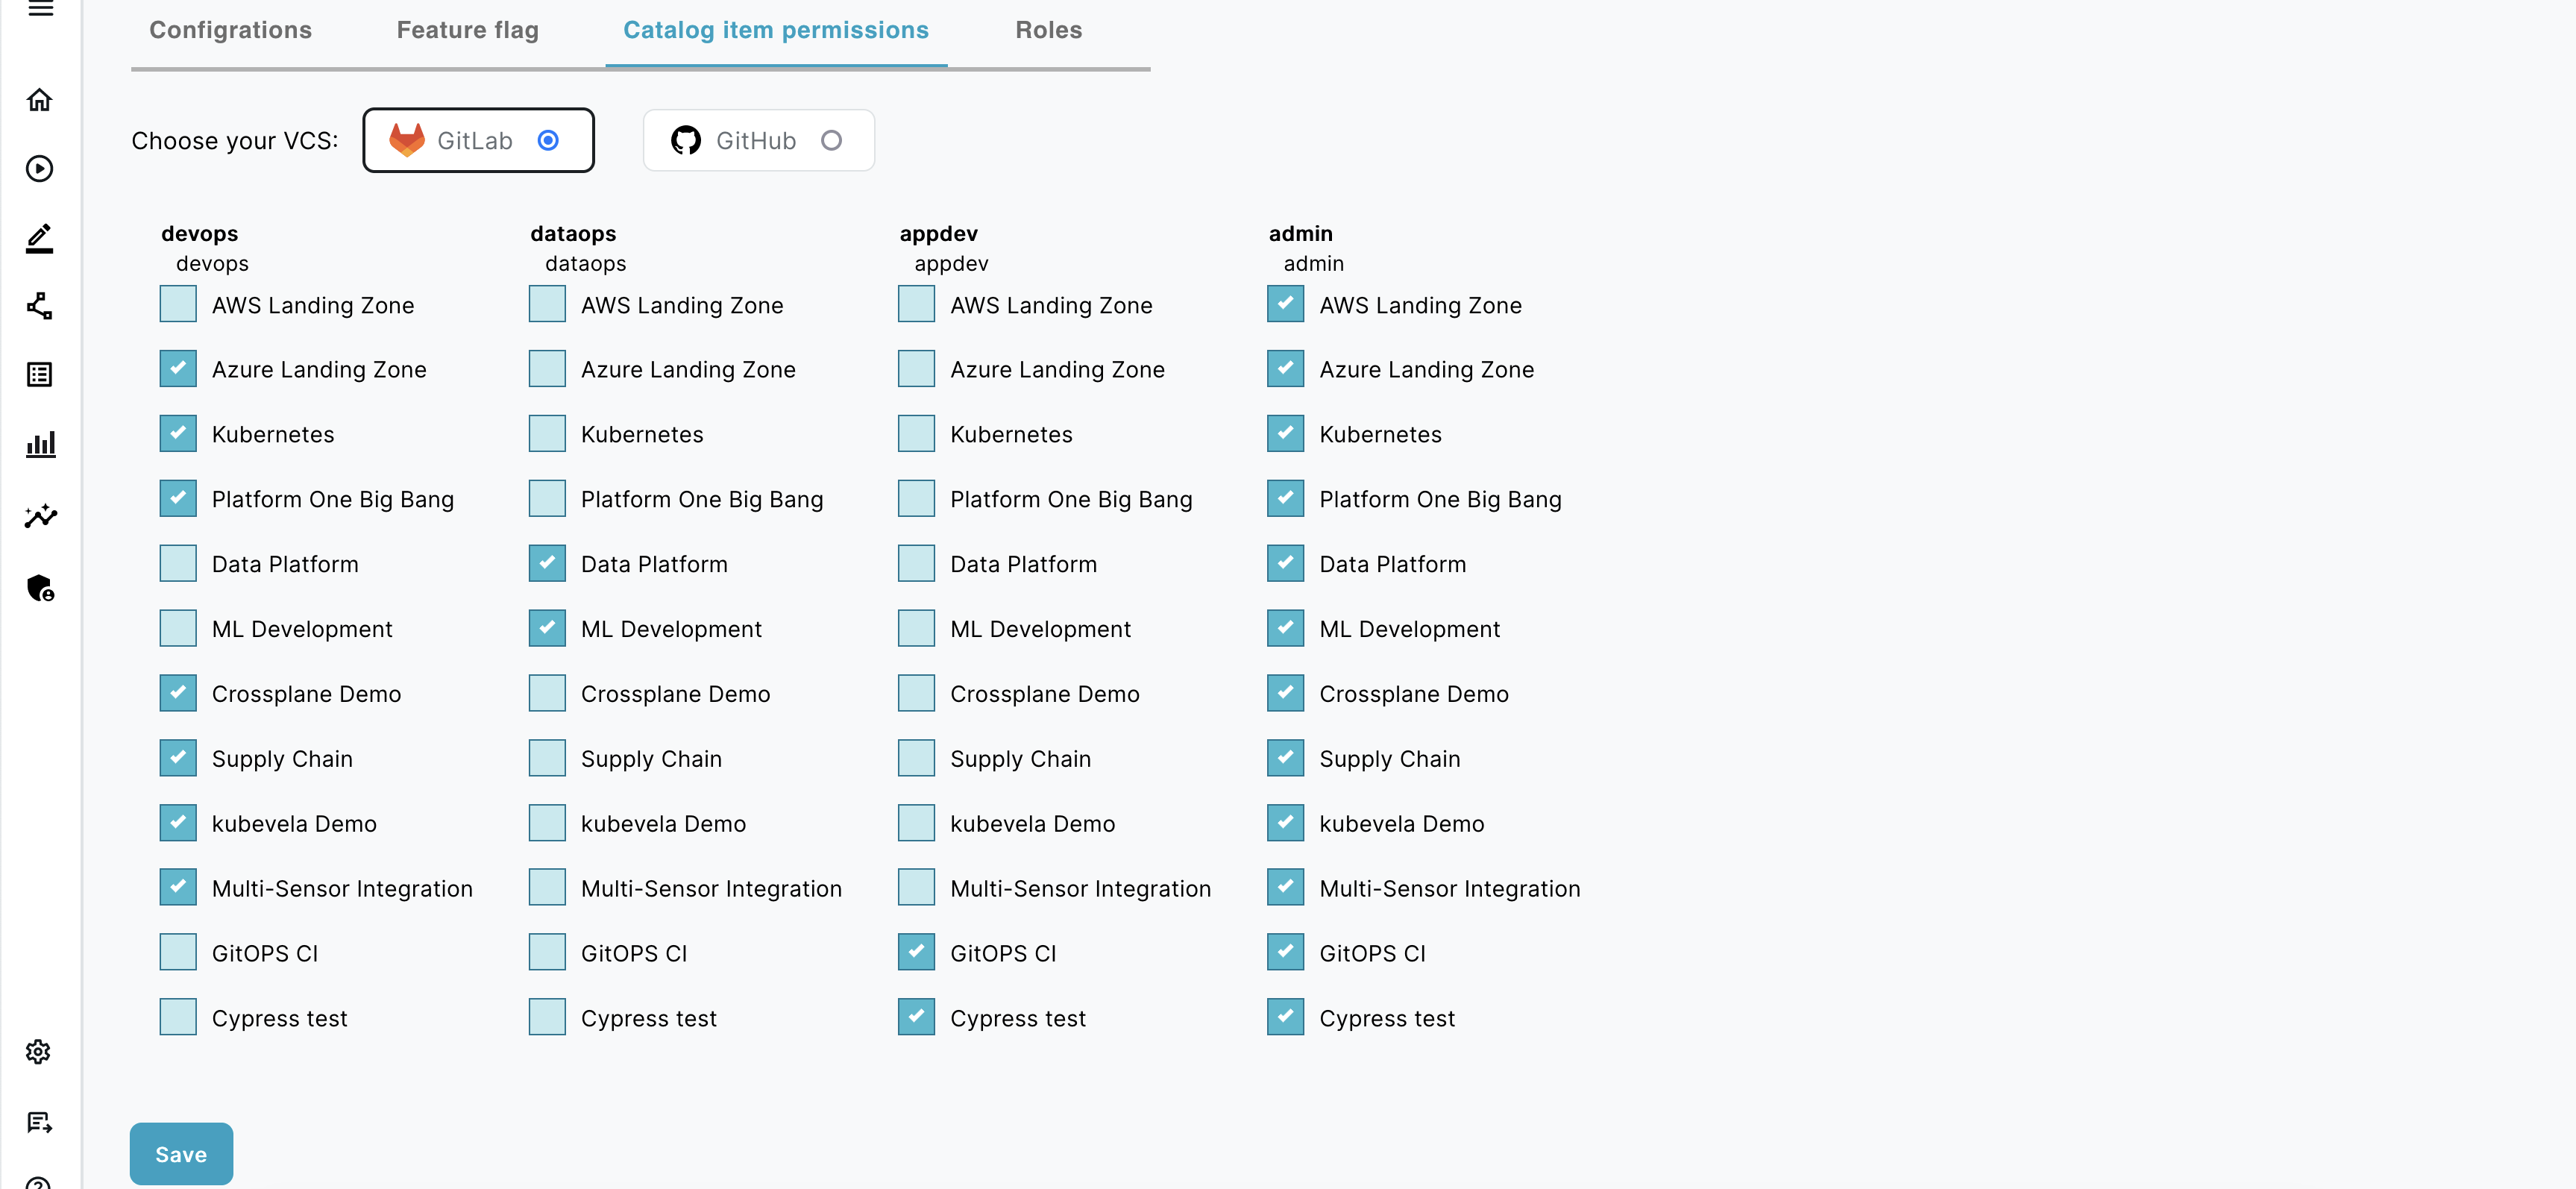
There are four built-in roles available in ENBUILD:

  1. admin
  2. appdev
  3. dataops
  4. devops

You can check the roles by going to Admin –> Roles

Screenshot of ENBUILD Roles

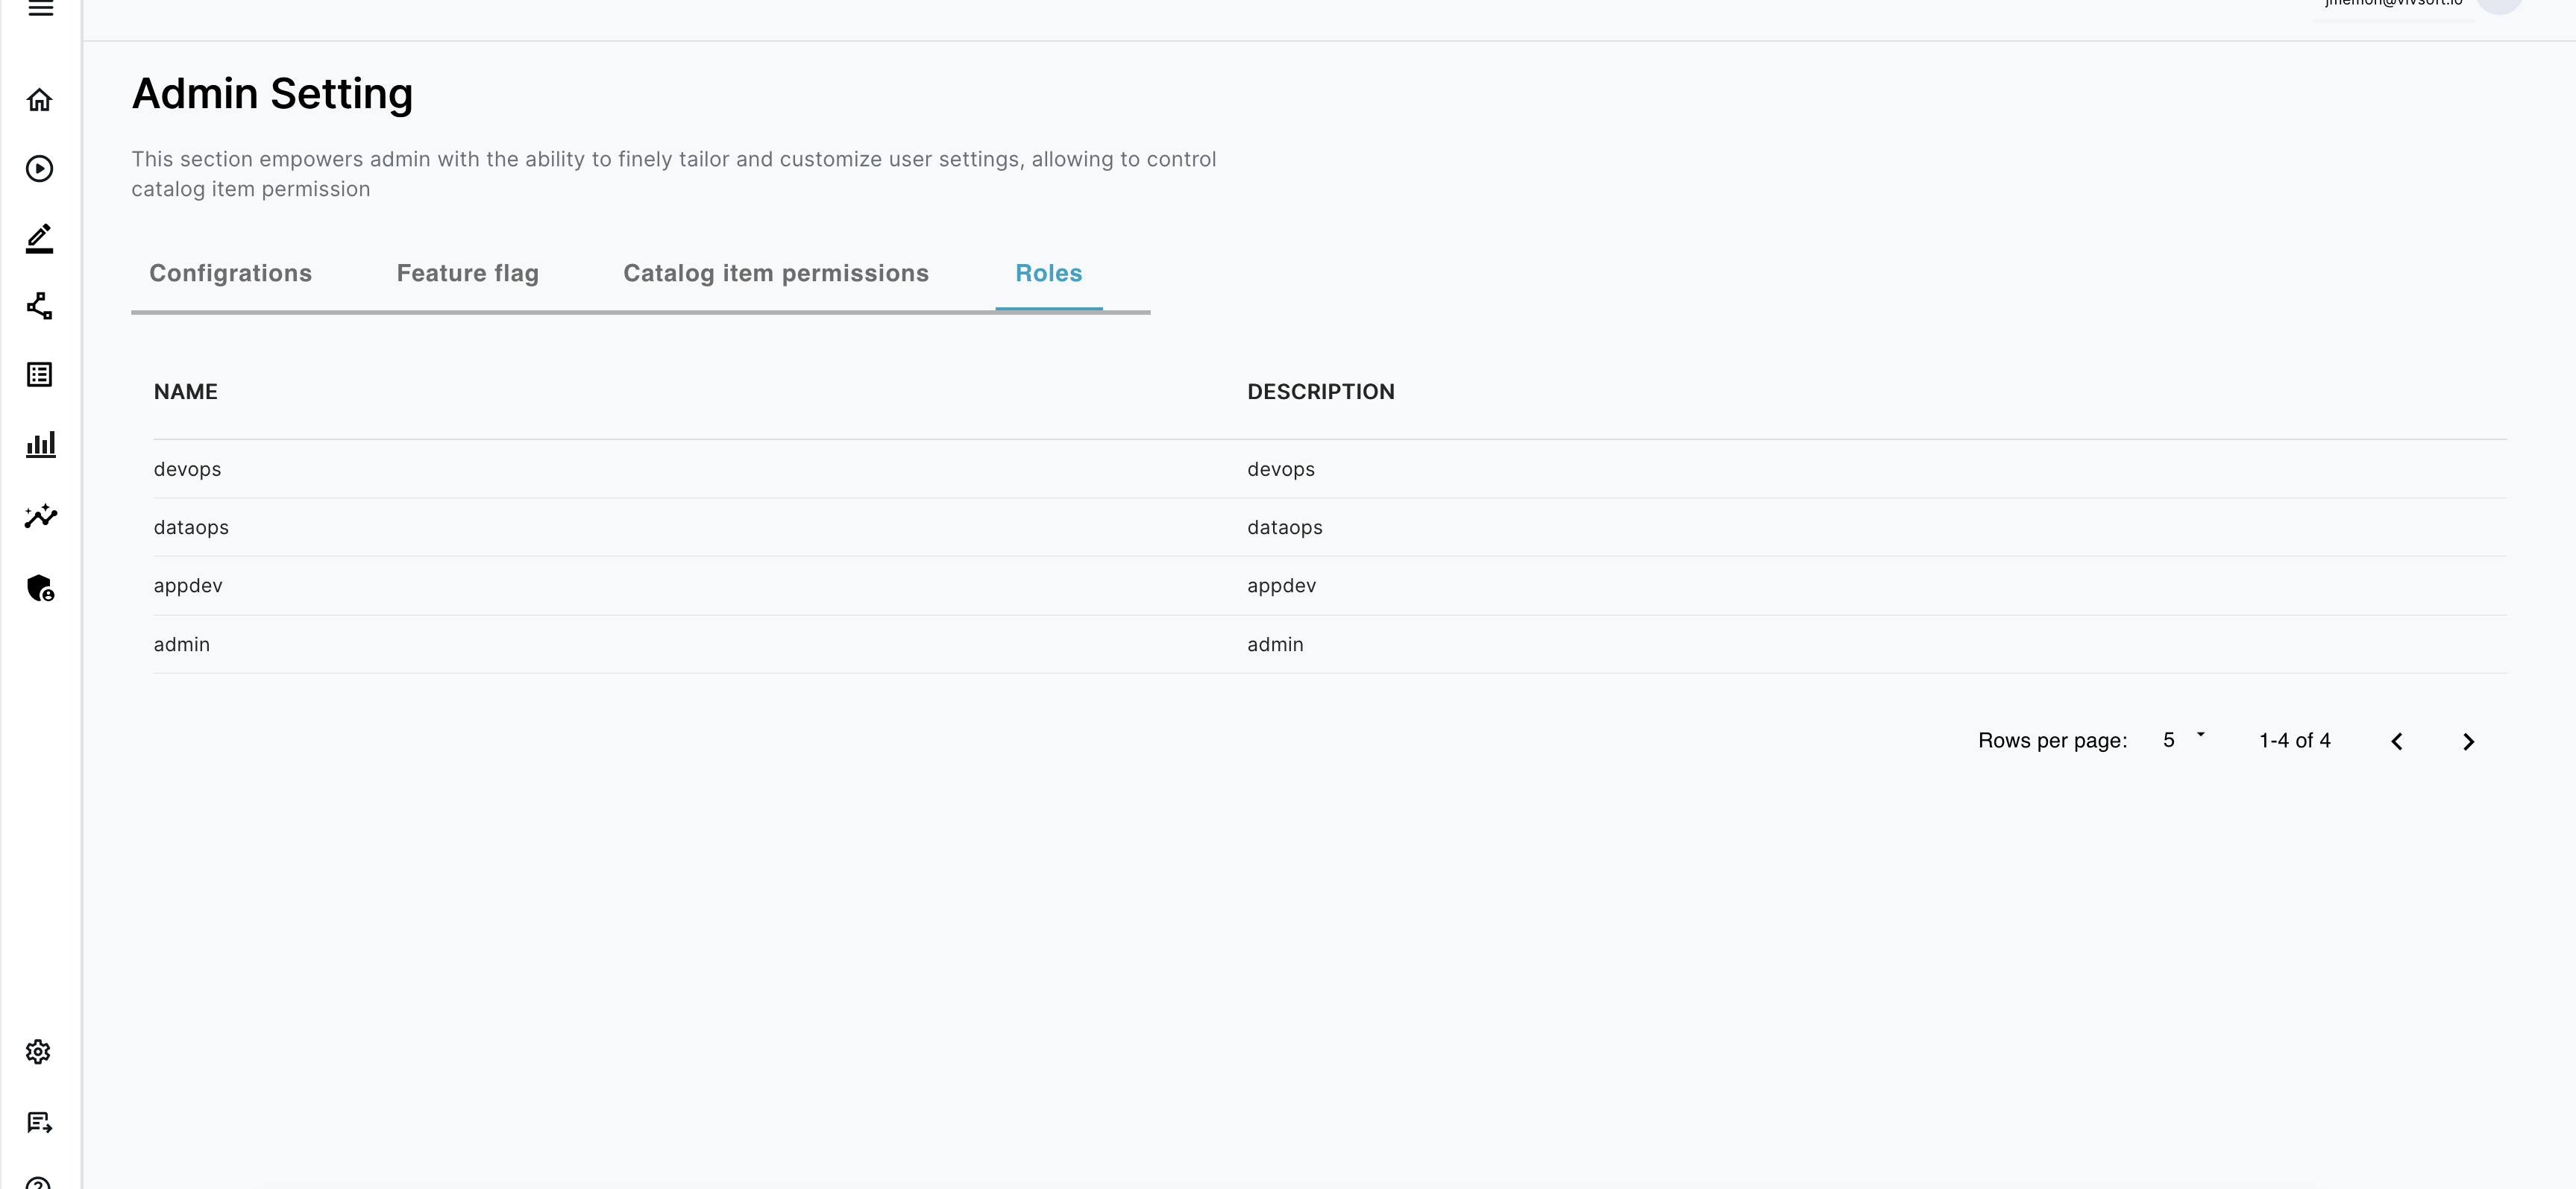
And you can provide the permissions to each catalog as per your requirement for each catalog and roles.

Catalog Permissions

Configure SSO

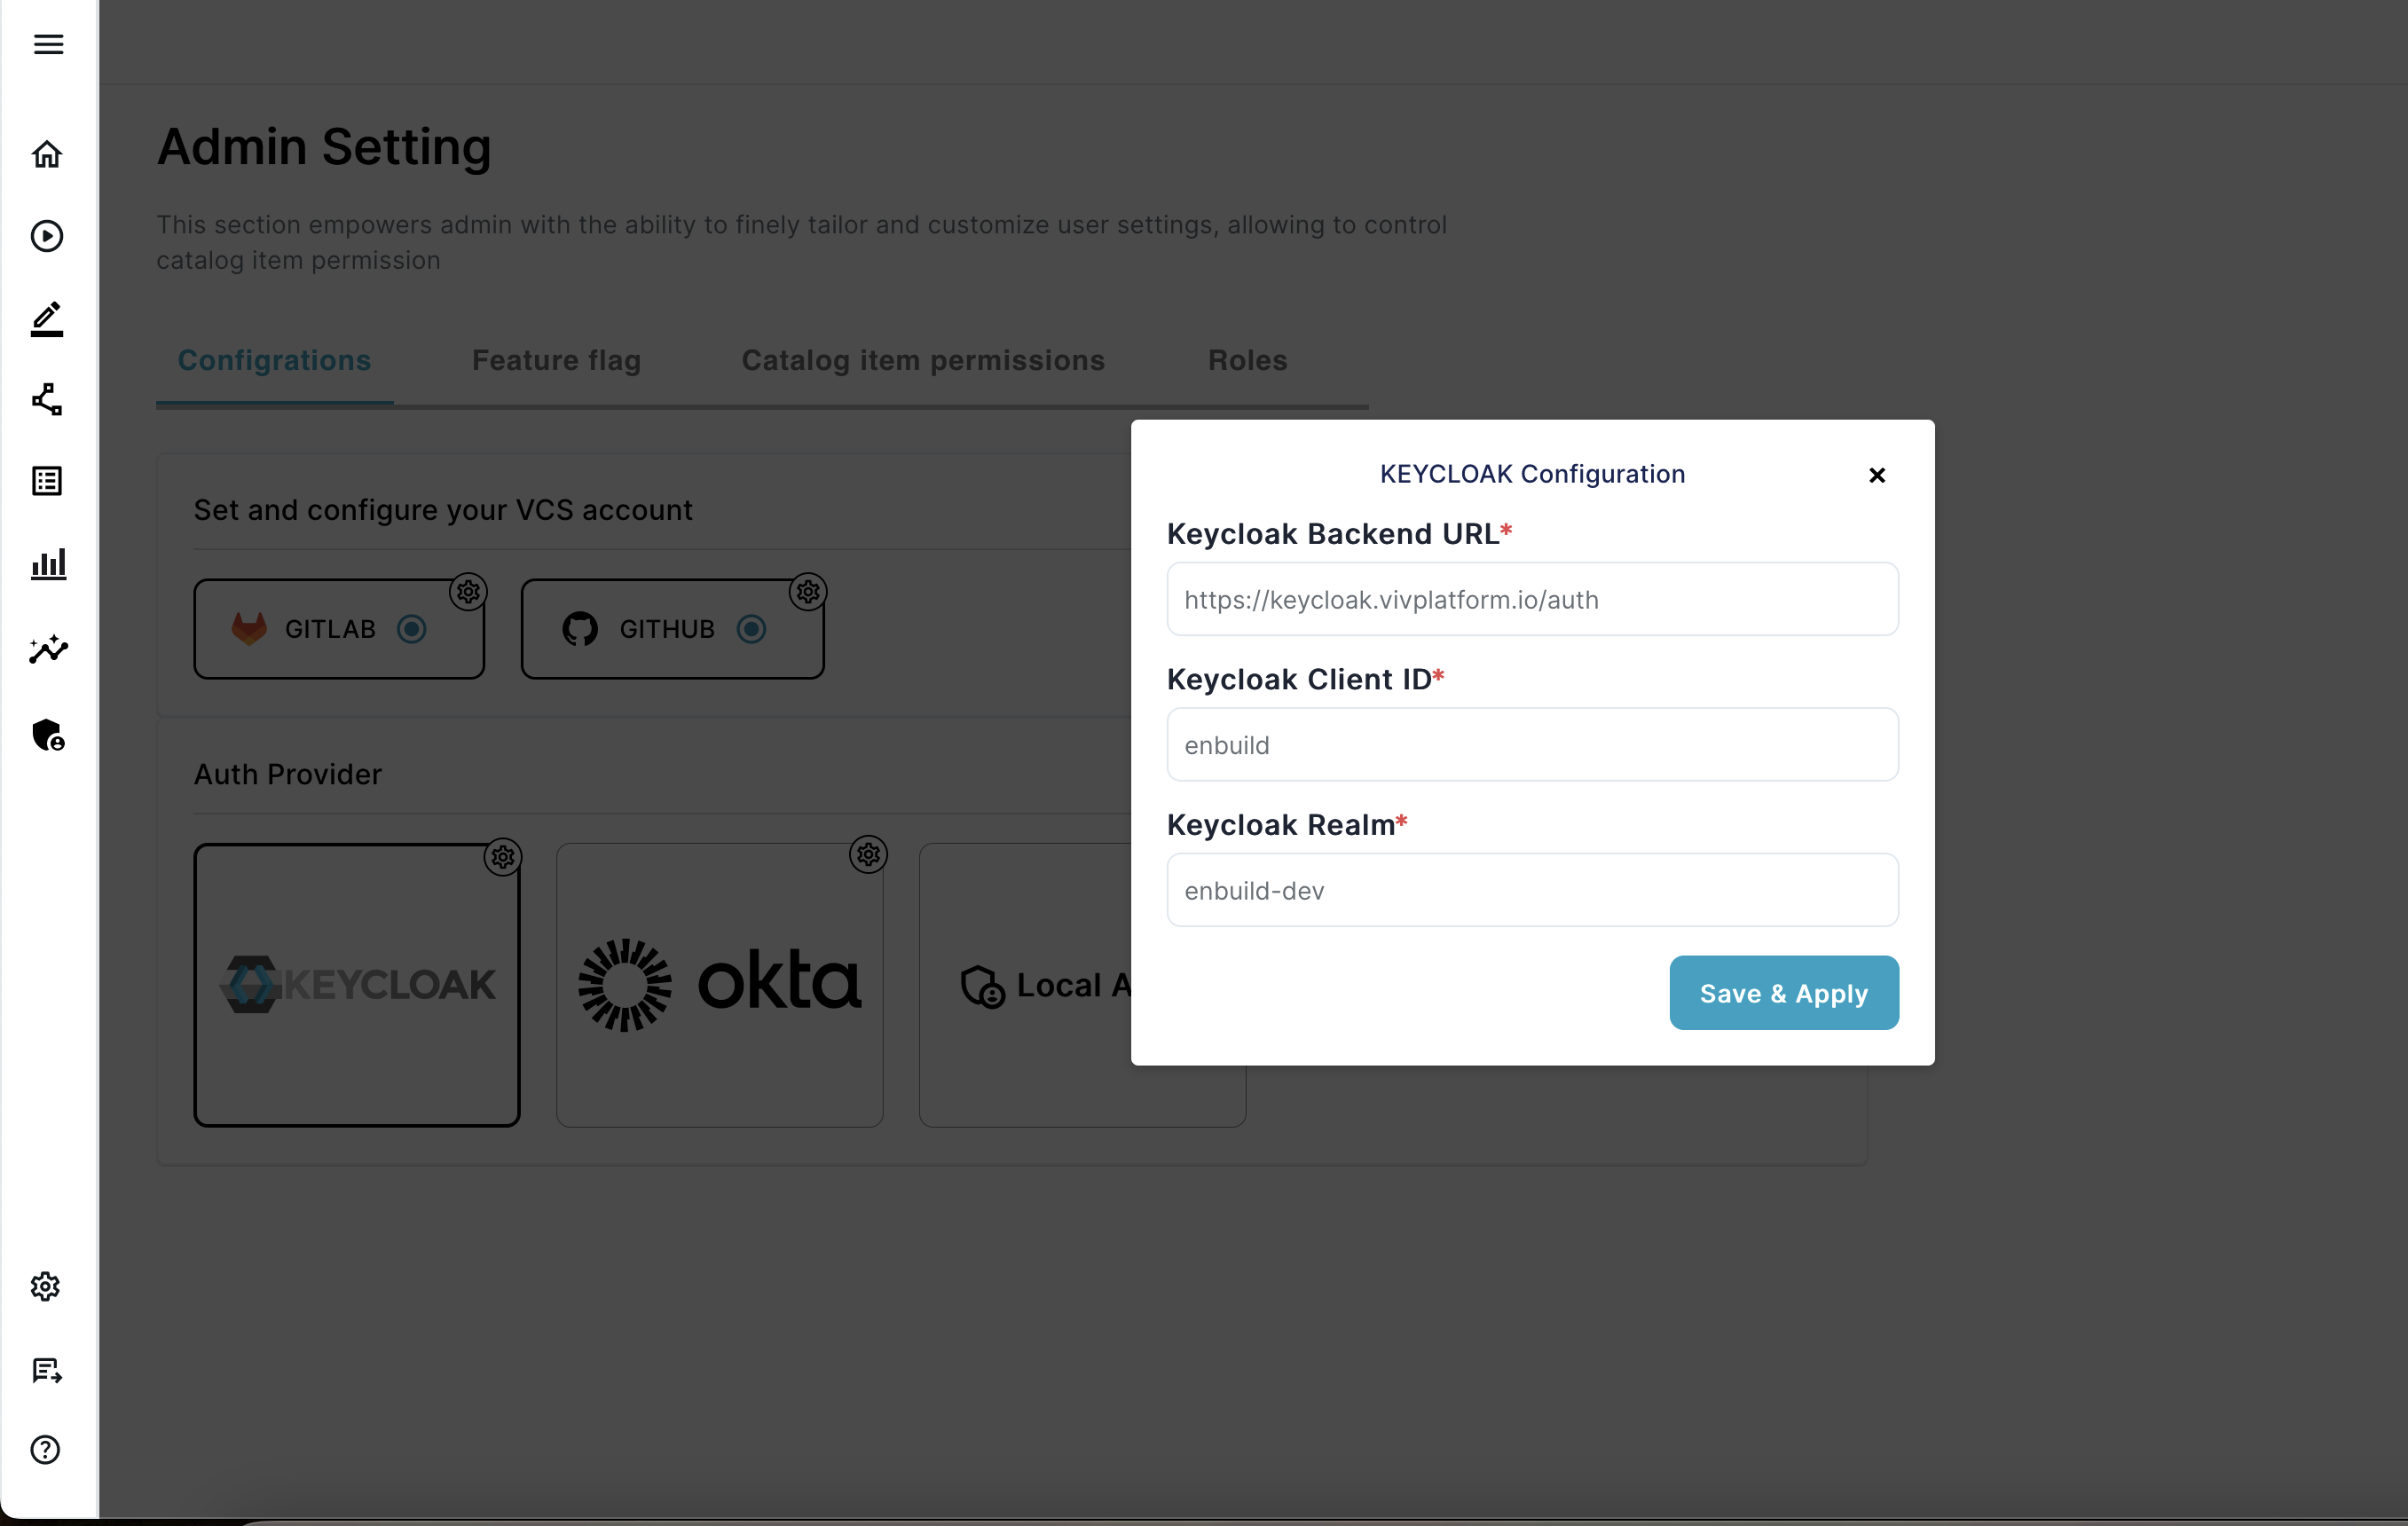
By default ENBUILD uses Local authentication, but you can choose to use either of

  • KEYCLOAK
  • OKTA

Configure KEYCLOAK

If you plan to use KEYCLOAK as SSO for authentication, you will need to configure the following:

  • Keycloak Backend URL – The Keycloak URL to authenticate users.
  • Keycloak Client ID – The Keycloak Client ID to authenticate users.
  • Keycloak Realm — The Keycloak REALM to authenticate users.

Note: To provide these details, you need to existing keyclaok or you need to install and configure keycloak.

Screenshot of ENBUILD KEYCLOAK Configuration Screen

Configure OKTA

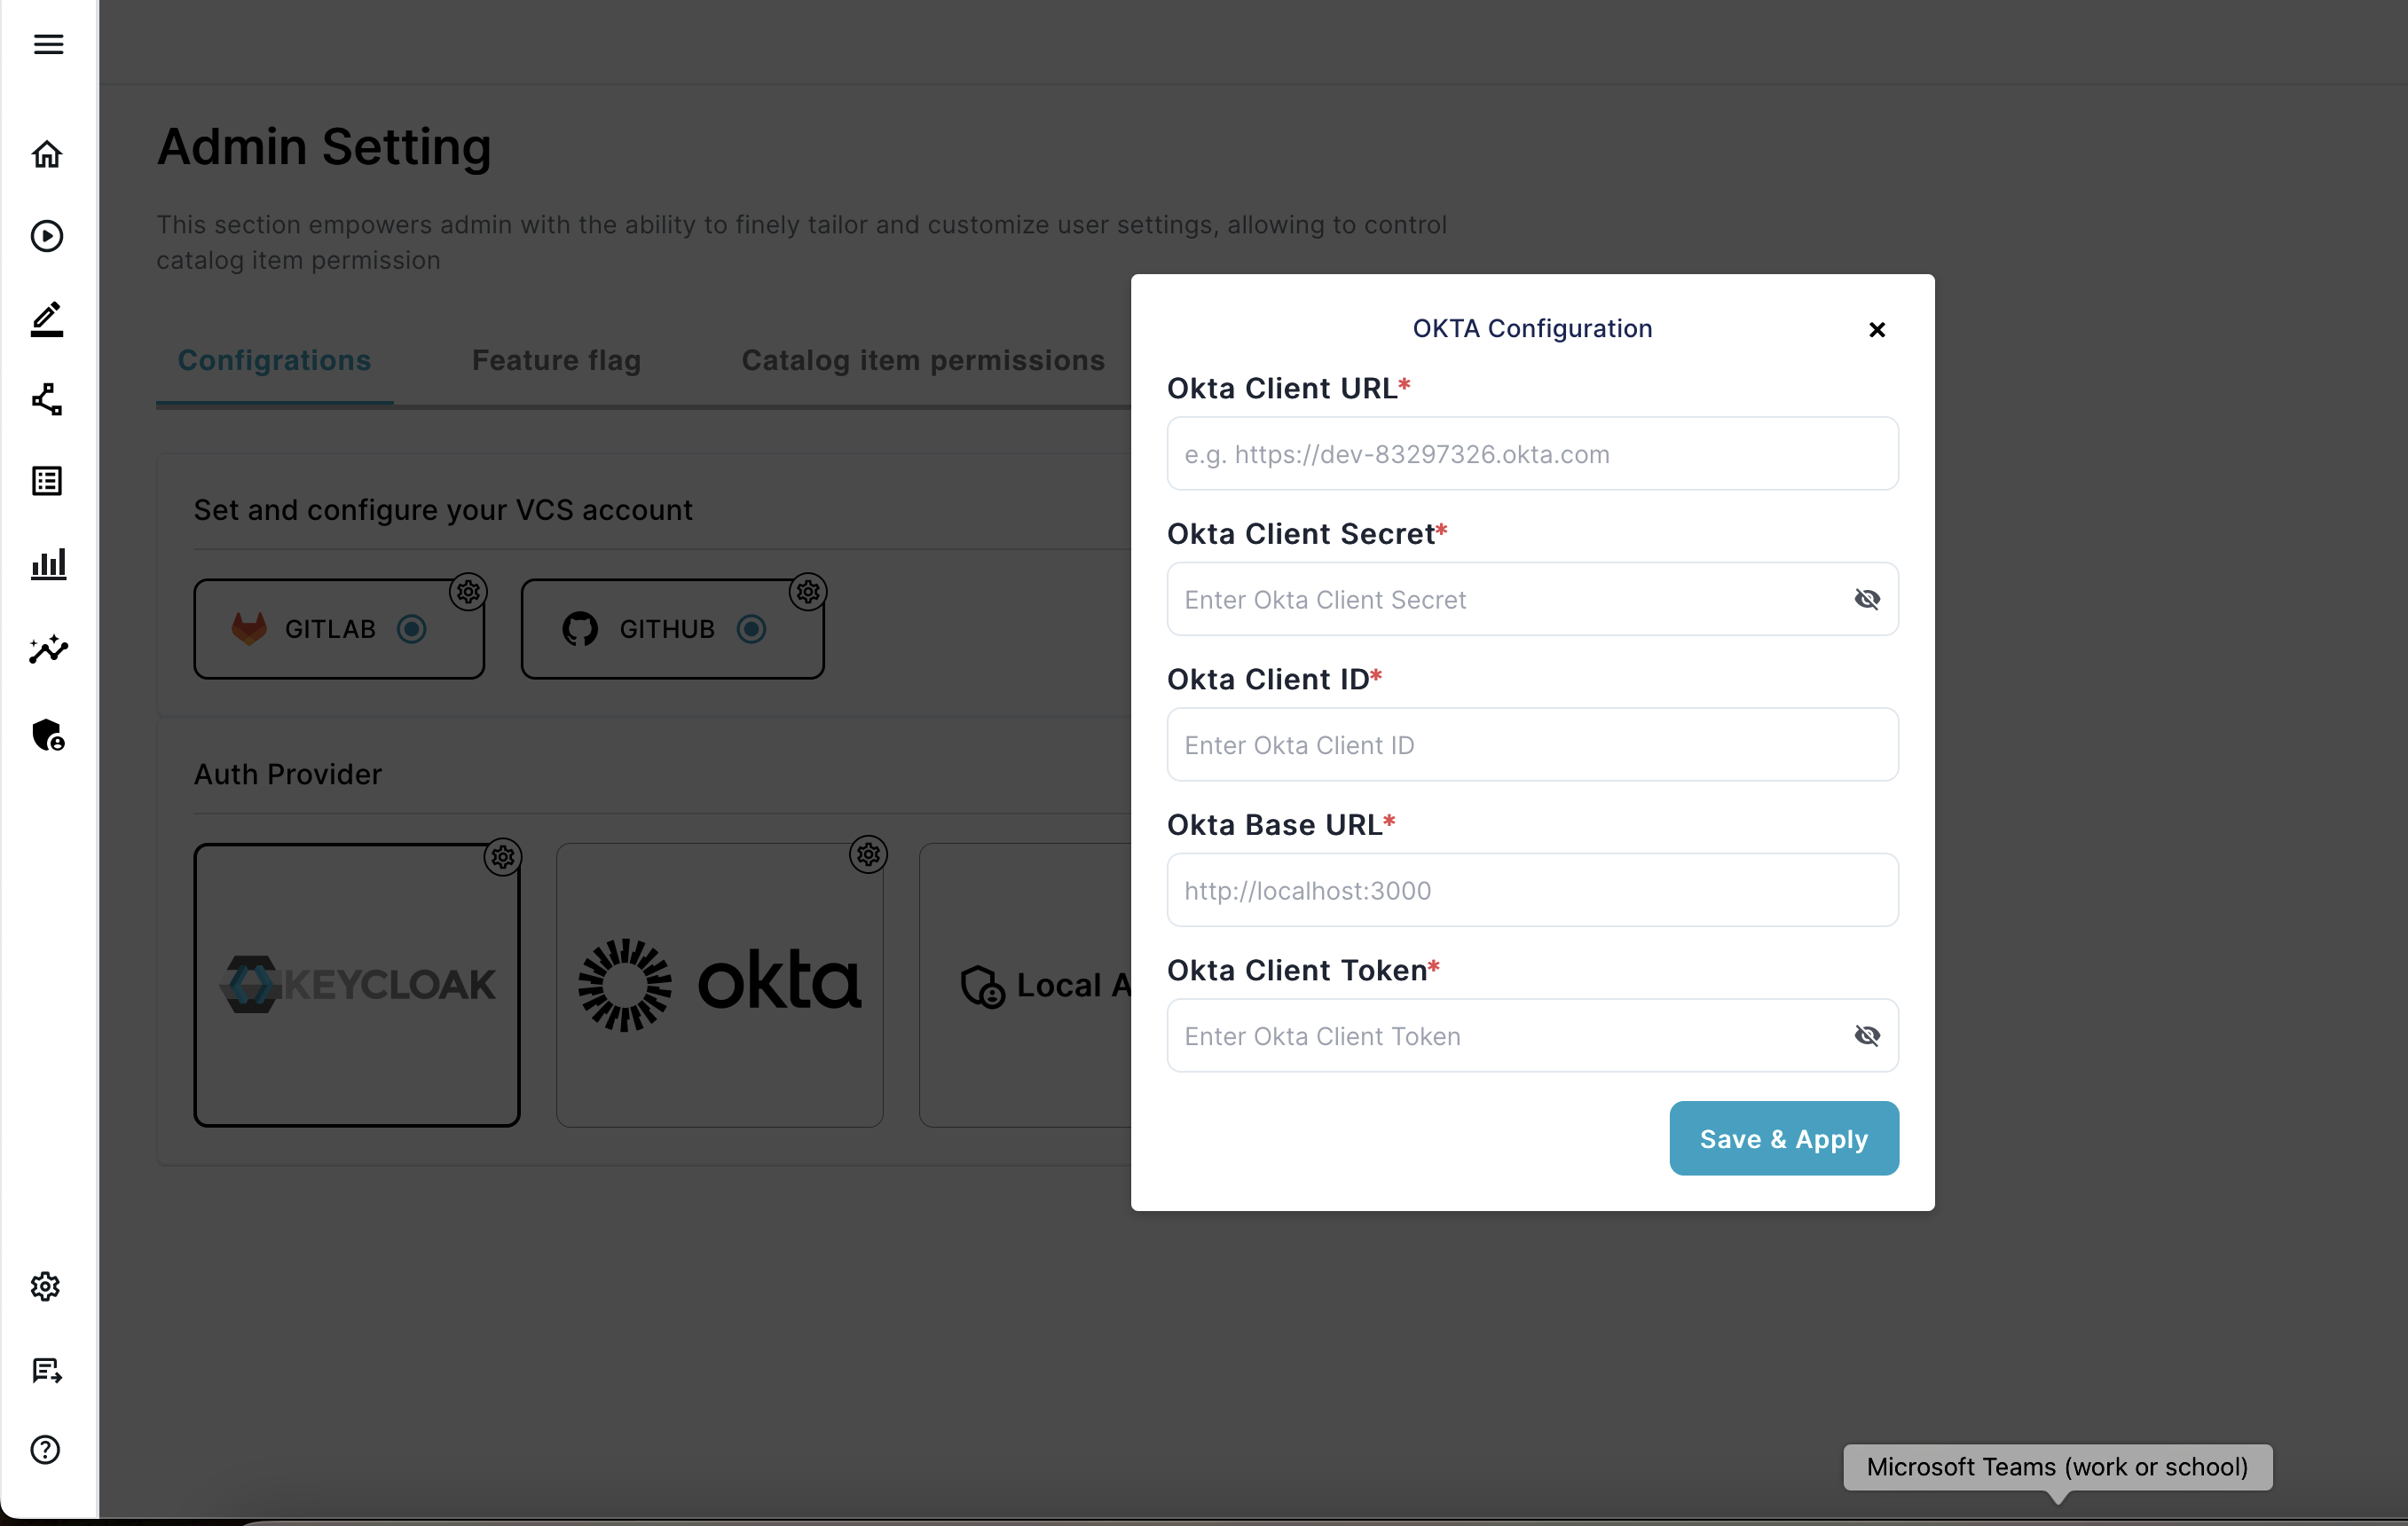
If you plan to use OKTA as SSO for authentication, you will need to configure the following:

  • Okta Client URL – The Okta URL to authenticate users.
  • Okta Client Secret – The Okta Client Secret to authenticate users.
  • Okta Client ID — The Okta Client ID to authenticate users.
  • Okta Base URL — The Okta Base URL to authenticate users.
  • Okta Client Token — The Okta Client Token to authenticate users.

Note: To provide these details, you need to configure okta and obtain the details.

Screenshot of ENBUILD OKTA Configuration Screen