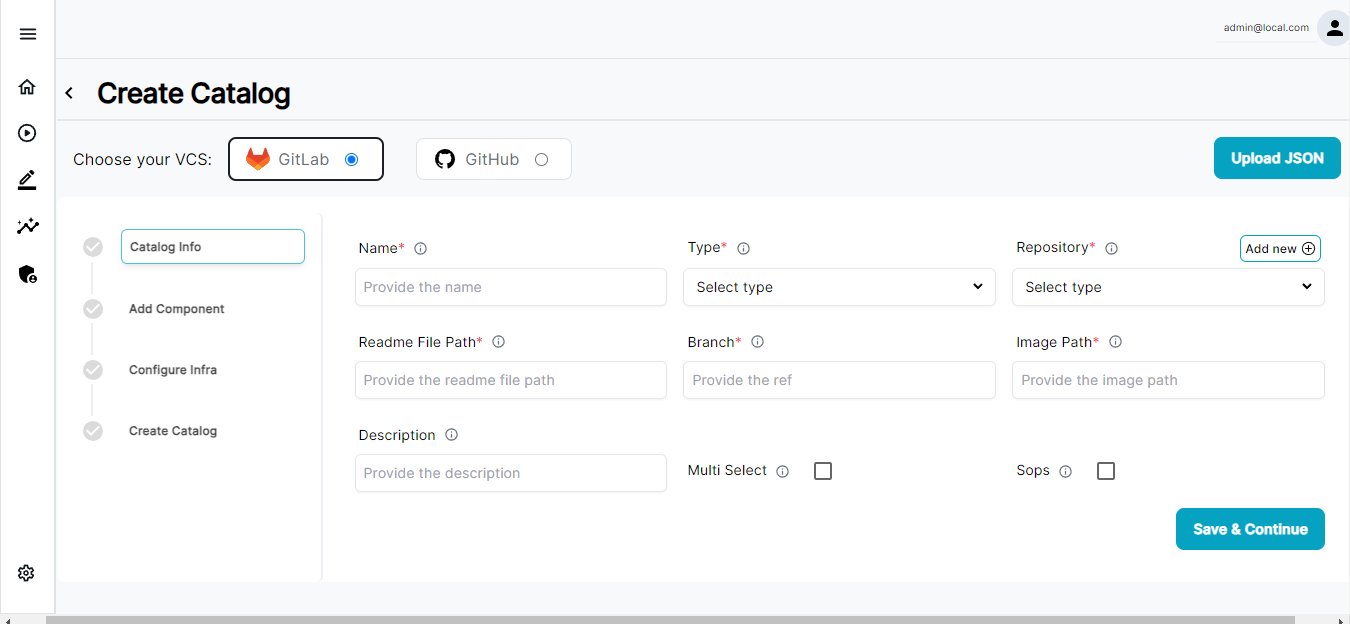
Enter a Name for your catalog. This name is displayed to the user while they are browsing the ENBUILD.
Choose a Type for your catalog items. The type defines the type of the catalog.
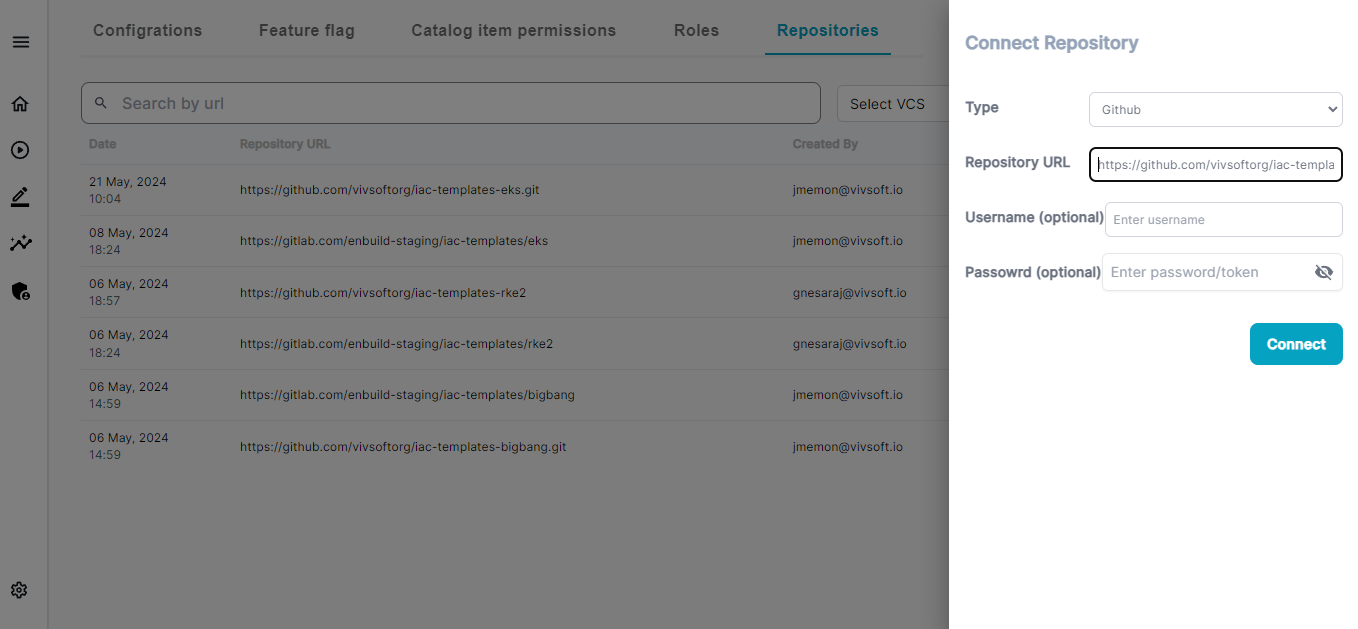
Choose the template Repository for your catalog items from the dropdown menu. This is the template repository that you have created in previous step (or) click on the Add new button to add a new repository.
If the template repository is private, Check the IsPrivate button and provide the Readonly Access Token in the Token field.
Provide the Project ID of the template repository.
Enter a Readme File Path this is the path of the README file that you want to disaply when user clicks on your catalog item.
Enter a Values Folder Path this is the directory of the Values files for the components.
Choose the Branch for your catalog template to be used. (only required in Gitlab)
Enter an Image Path of the image to be displayed for a catalog item in ENBUILD UI.
Select Multi Select. This feature allows users to select multiple components from same catagary in a catalog. If enabled the user can install/enable multiple components at once. Otherwise a single component is installed/enabled at a time for a component catagory.
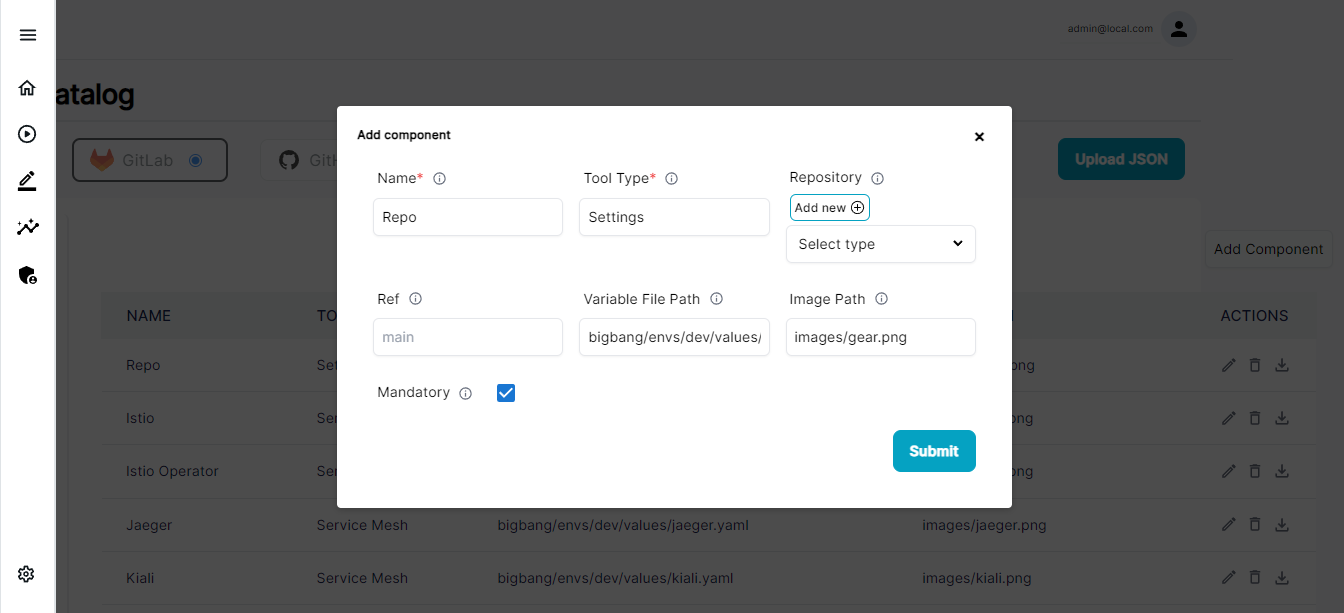
Select a Tool Type for your component item. This is used to group components in a single group.
Choose the component Repository for your component items from the repository dropdown (or) click on the Add new button to add a new repository. Ommit if the component and catalog are in same repository.
Provide the Project ID of the template repository. Ommit if the component and catalog are in same repository.
Choose the Branch as Ref for your component template to be used. (only required in Gitlab) Ommit if the component and catalog are in same repository.
Enter a Variable File Path this is the input variable file which ENBUILD will display for the components , and user will use to change the beheviour of the deployment.
Enter an Image Path of the image to be displayed for a component item in ENBUILD UI.
Select Mandatory. If the Catalog is created enabling the Multi Select . Enabling this Mandatory will set This component to be enabled by default in ENBUILD UI.
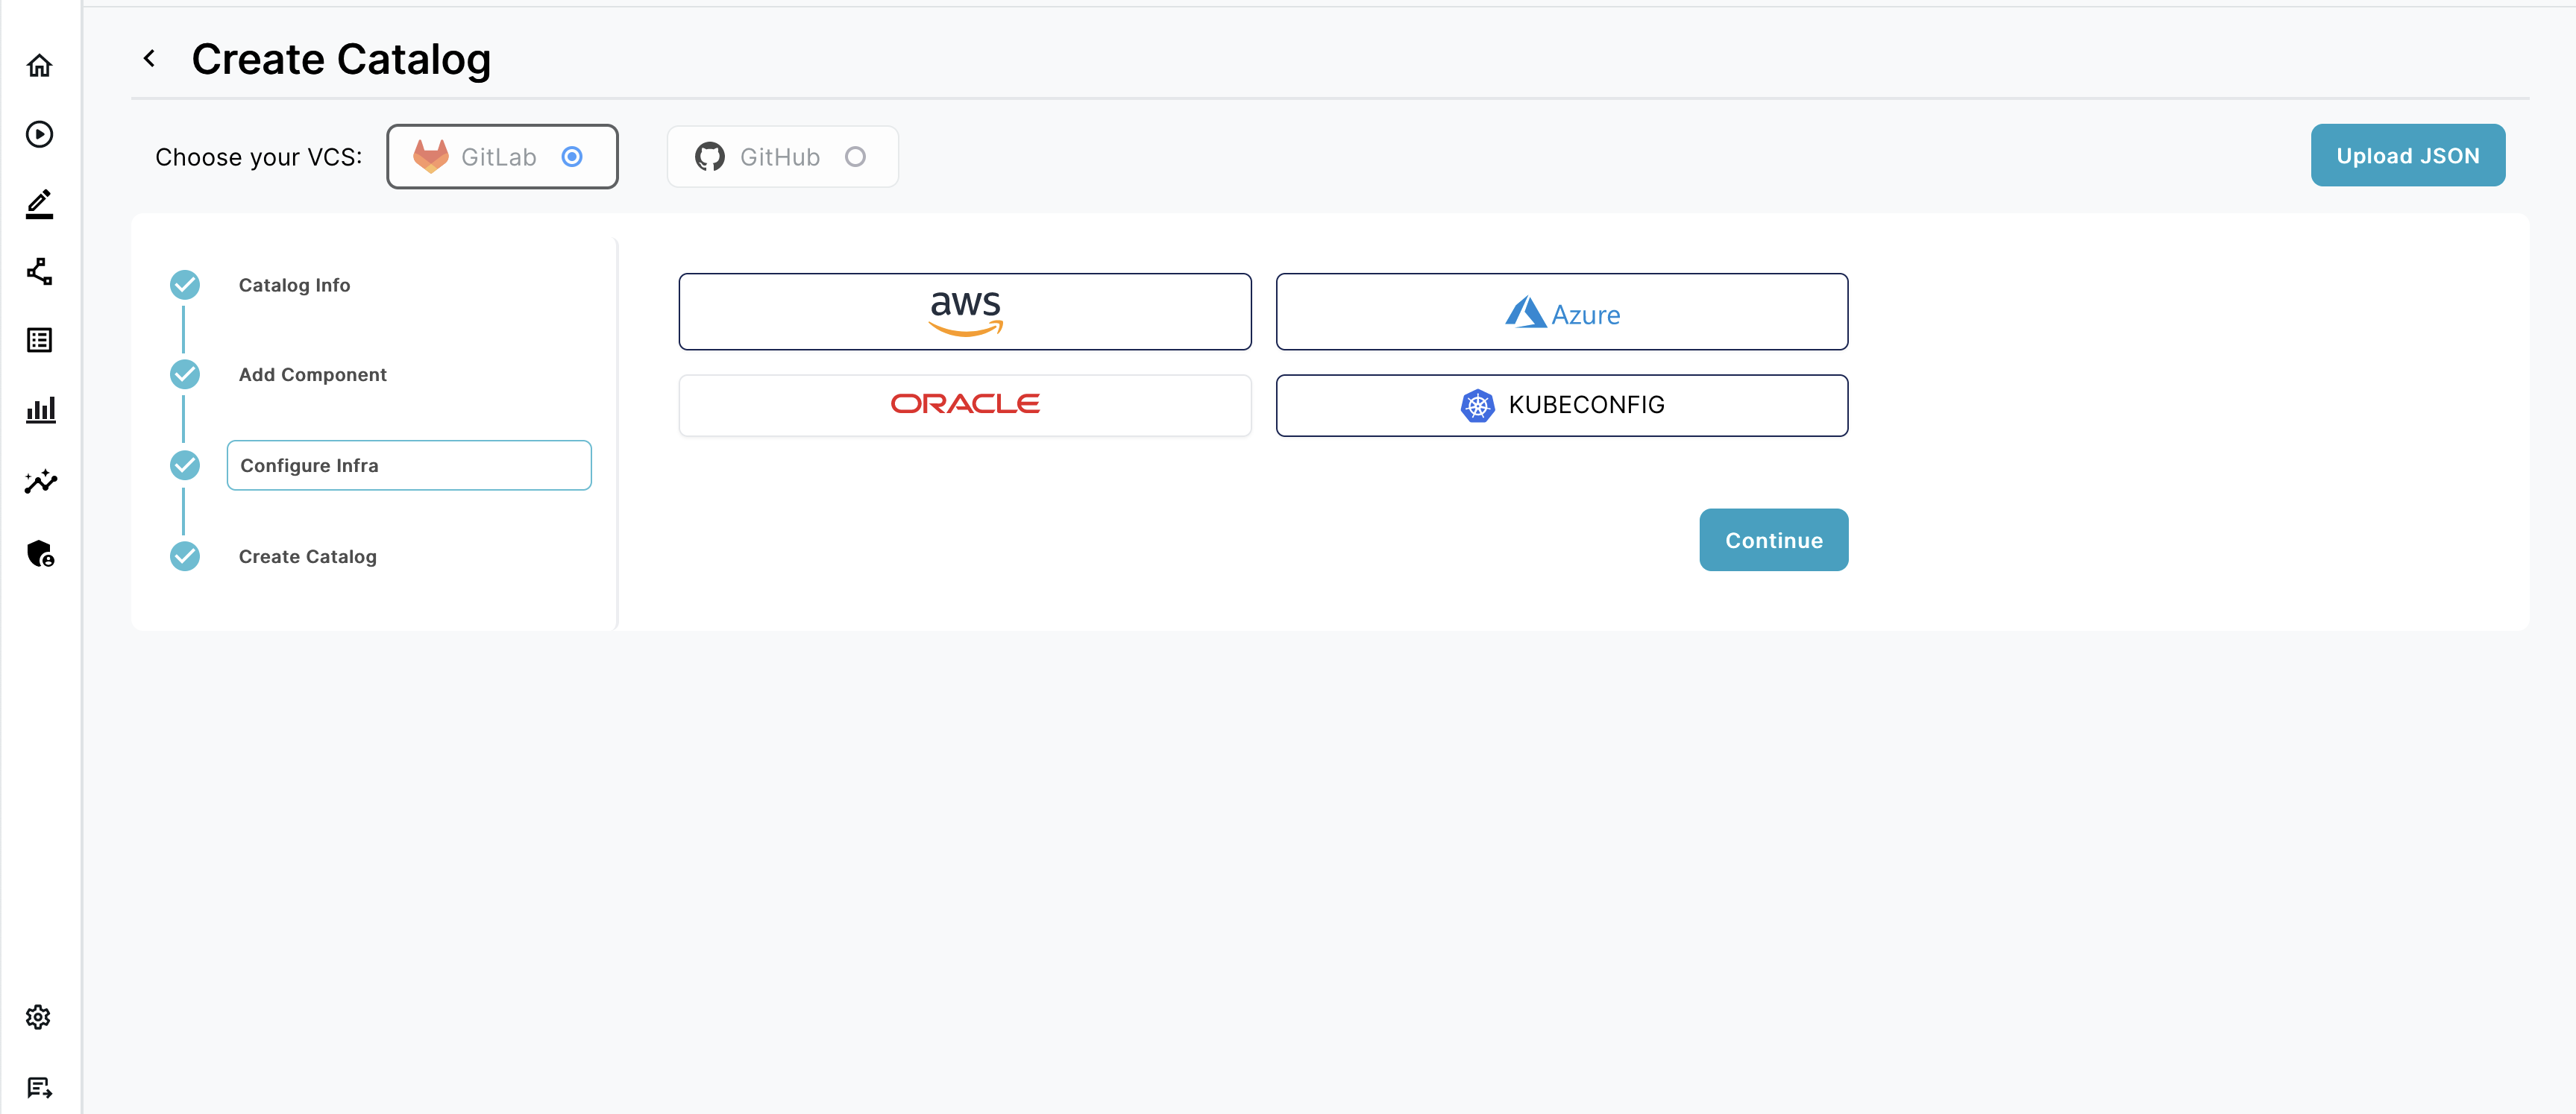
Here you can select all the infrastructure providers that the catalog needs to be installed.
For now we support AWS ,AzureOracle and KUBERNETES
You can select 1 or multiple providers for your catalog, but you must have at least one provider selected for the catalog to be valid.
And your catalog template should have provision to support all the selected providers.
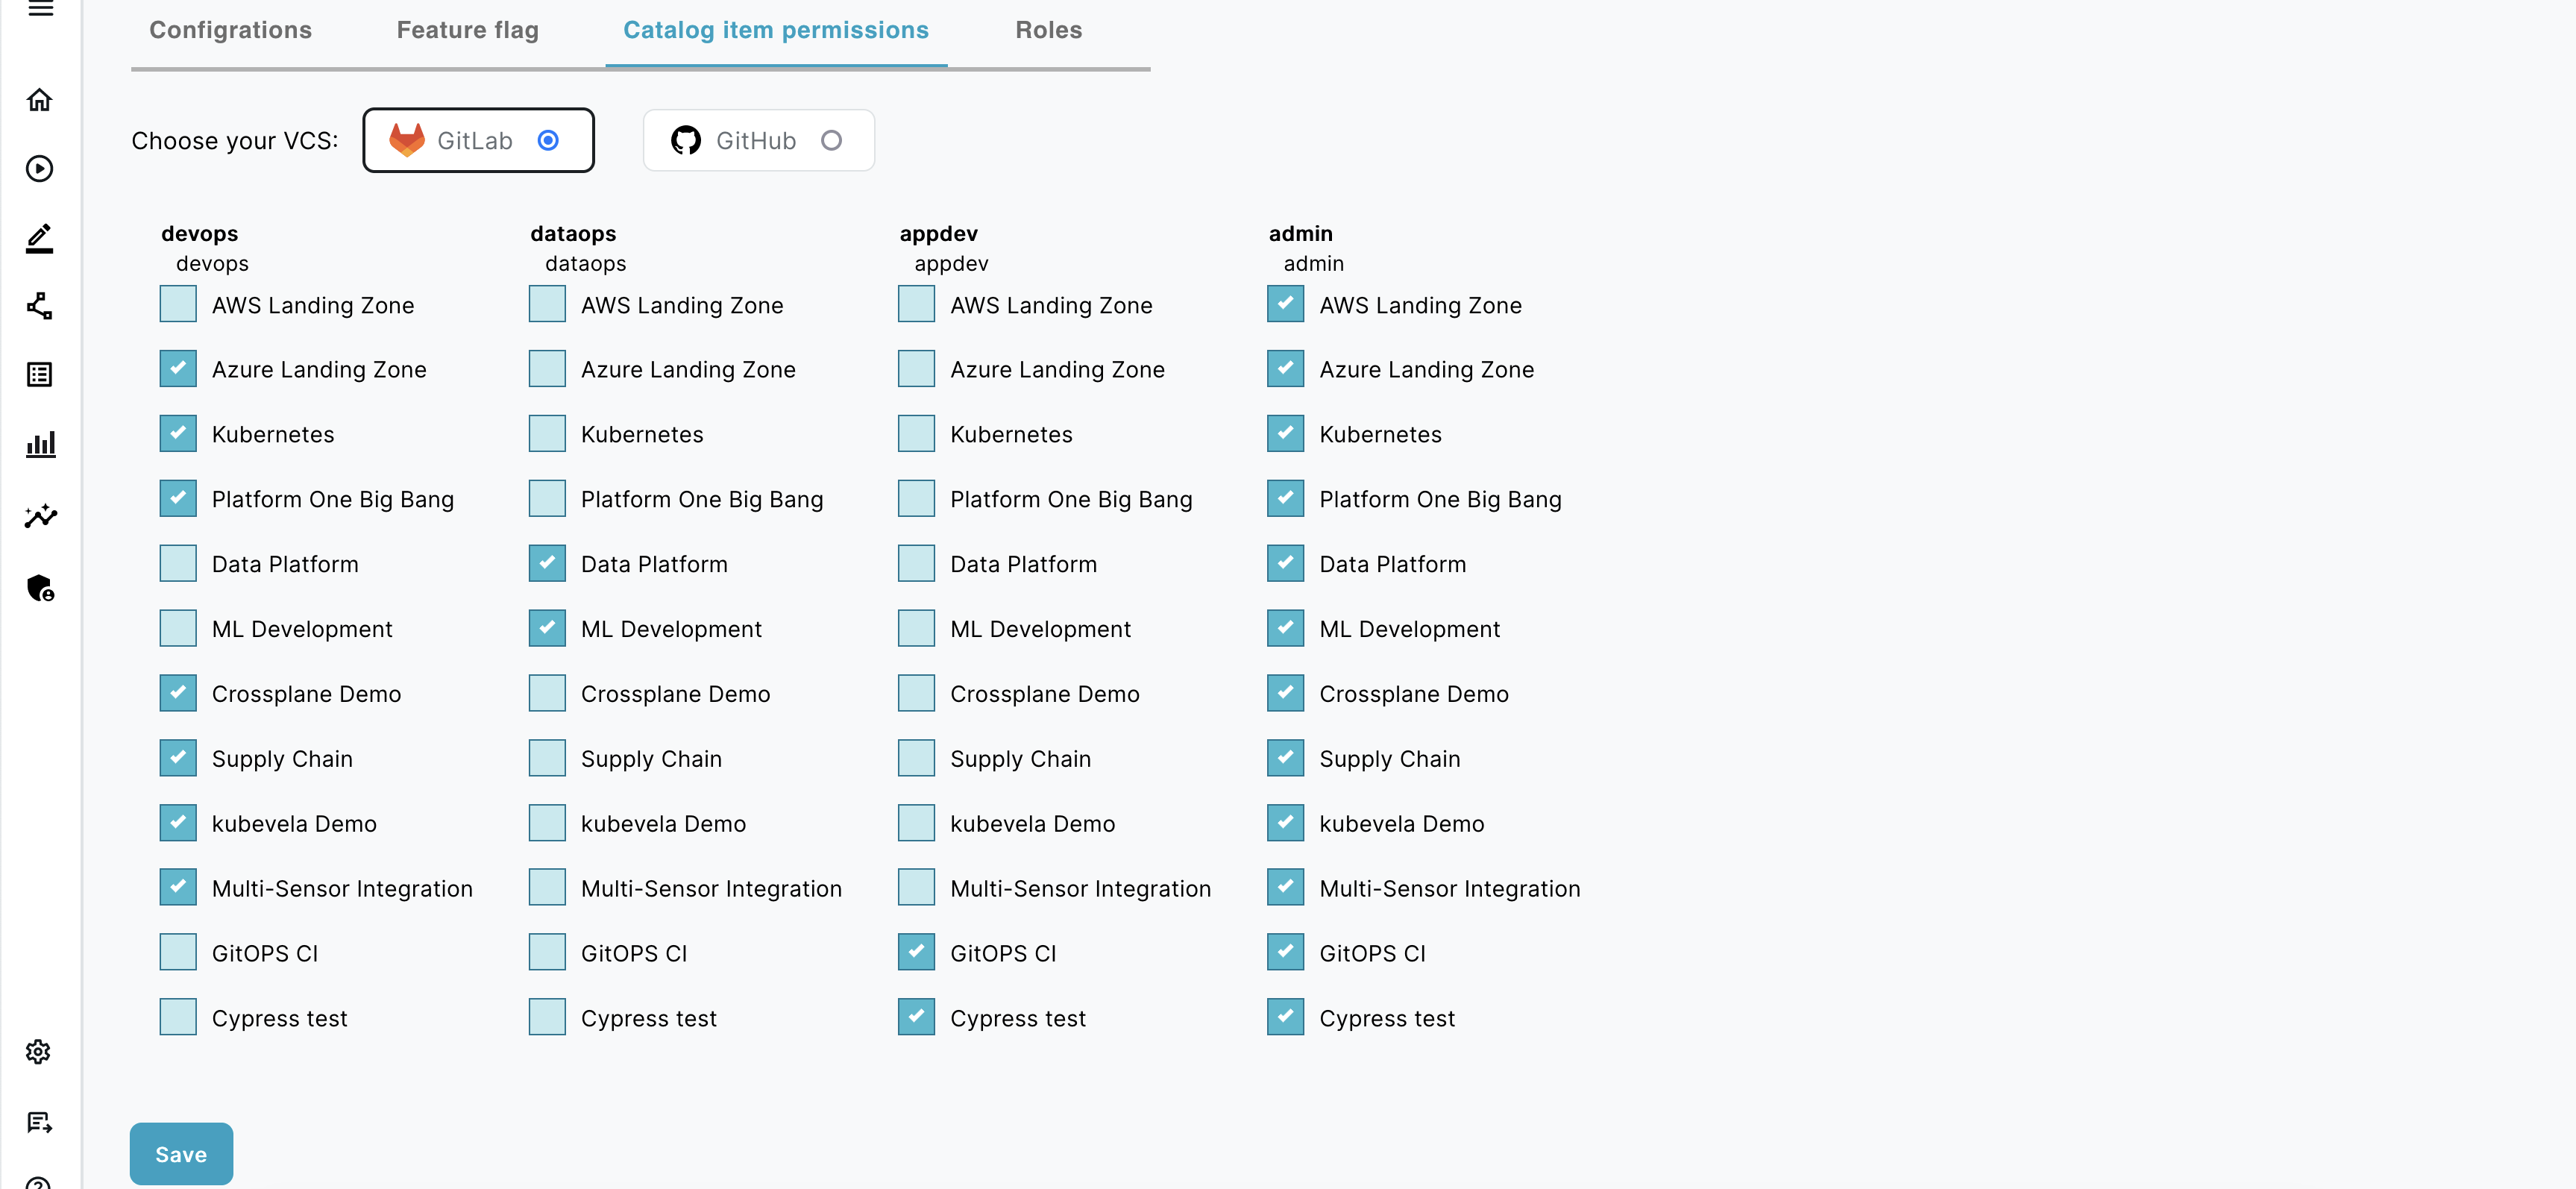
Adding the Permission for the catalogs to ENBUILD ROLES#
Once the Catalog is created , you need to add permissions to the catalog for a particuler role that can have access to this catalog.
And you can provide the permissions to each catalog as per your requirement for each catalog and roles.
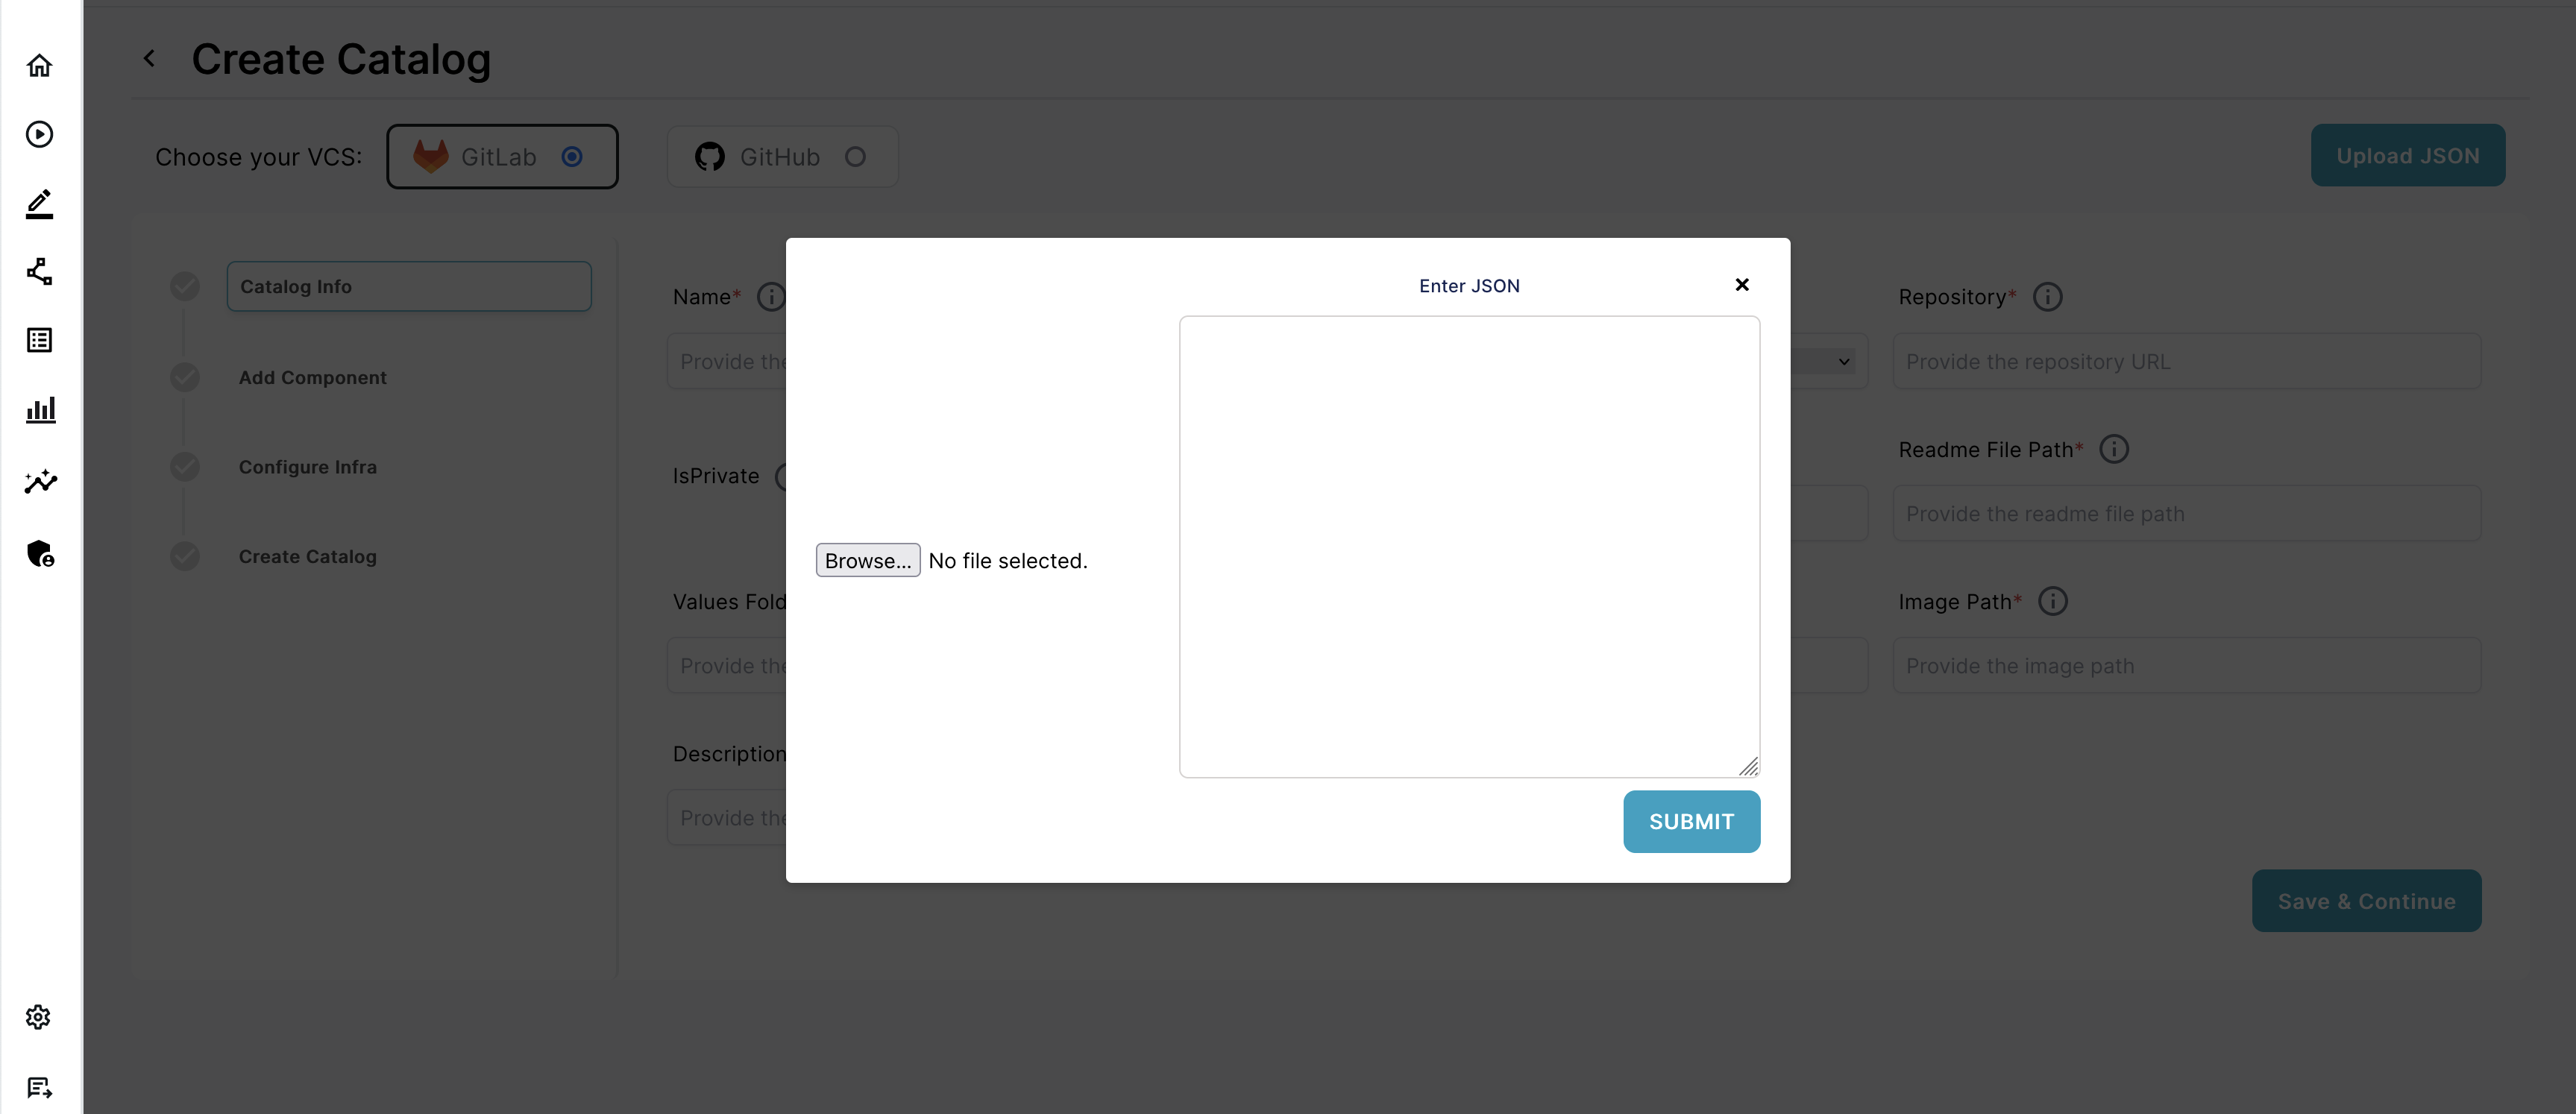
Adding a New Catalog Item using exported JSON
The other way of creating the Catalog Item is providing the raw catalog json file that you have exported from ENBUILD or uploading the json file containing the catalog information.
Login to ENBUILD as admin user.
Navigate to Manage Catalogs tab and click on Create Catalog. and then
Choose the VCS of your catalog, either Gitlab or Github. In this example, we will use Gitlab.
Click on Upload Json button to to proceed to import the catalog using JSON
Here you can provide the raw json of any catalog exported from ENBUILD UI. OR upload a file from your local machine having the catalog json.